# Welcome to Gallabox Docs

Gallabox is no-code conversational commerce platform for small and medium-sized companies to automate customer conversations on WhatsApp. Start your free trial now!

### What is Gallabox?

![](/files/egE2ljGp8Uhqy0ydJZy4)

Gallabox is a purpose-built, no-code conversational commerce platform that helps small and medium-sized companies modernize and automate their customer conversations on WhatsApp by deploying ready-to-use workflows, to turn leads to deals and conversations to commerce.

### Getting Started With Gallabox

<table data-view="cards"><thead><tr><th align="center"></th><th></th><th data-hidden data-card-cover data-type="files"></th><th data-hidden data-card-target data-type="content-ref"></th></tr></thead><tbody><tr><td align="center"><strong>Creating an Gallabox account</strong></td><td></td><td><a href="/files/s5FIbtx9SQxRUjtVKWE8">/files/s5FIbtx9SQxRUjtVKWE8</a></td><td><a href="/pages/SkAY5i4AEsFEDIneVfkf">/pages/SkAY5i4AEsFEDIneVfkf</a></td></tr><tr><td align="center"><strong>Pre-requisites for getting started with own number</strong></td><td></td><td><a href="/files/VxjDeLOAkY6hUc25zEZ0">/files/VxjDeLOAkY6hUc25zEZ0</a></td><td><a href="/pages/JVT9hxZhO1ZY6KJ8eZ6P">/pages/JVT9hxZhO1ZY6KJ8eZ6P</a></td></tr><tr><td align="center"><strong>Start free trial with your own WhatsApp number</strong></td><td></td><td><a href="/files/jTQArSQ7yrKaV5e6IJnc">/files/jTQArSQ7yrKaV5e6IJnc</a></td><td><a href="/pages/1ZiYTrn0B0JBWO3B6SpF#moving-out-of-sandbox-mode">/pages/1ZiYTrn0B0JBWO3B6SpF#moving-out-of-sandbox-mode</a></td></tr></tbody></table>

### Basic Modules

<table data-view="cards"><thead><tr><th align="center"></th><th></th><th data-hidden data-card-cover data-type="files"></th><th data-hidden data-card-target data-type="content-ref"></th></tr></thead><tbody><tr><td align="center"><strong>WhatsApp Channel</strong></td><td></td><td><a href="/files/wTGXljpCbcMJ1p9sX23B">/files/wTGXljpCbcMJ1p9sX23B</a></td><td><a href="/pages/byNWUuwpOHxQGd7f2gkG">/pages/byNWUuwpOHxQGd7f2gkG</a></td></tr><tr><td align="center"><strong>WhatsApp Templates</strong></td><td></td><td><a href="/files/EkSkNRXm2ByuqlX7WnBH">/files/EkSkNRXm2ByuqlX7WnBH</a></td><td><a href="/pages/sgUnNZea3DExc8B0TZIM">/pages/sgUnNZea3DExc8B0TZIM</a></td></tr><tr><td align="center"><strong>Canned Response</strong></td><td></td><td><a href="/files/nk04PTYDwF00GSzUOE58">/files/nk04PTYDwF00GSzUOE58</a></td><td><a href="/pages/nx3C0gkctJlzd0RDIZ18">/pages/nx3C0gkctJlzd0RDIZ18</a></td></tr><tr><td align="center"><strong>Field Collection</strong></td><td></td><td><a href="/files/Da2MeGcoFc1N8imXidqW">/files/Da2MeGcoFc1N8imXidqW</a></td><td><a href="/pages/qbg1L7idgQKzdlTQKyZW">/pages/qbg1L7idgQKzdlTQKyZW</a></td></tr><tr><td align="center"><strong>Tags</strong></td><td></td><td><a href="/files/VBBZSFHRJnru1S6yBGsc">/files/VBBZSFHRJnru1S6yBGsc</a></td><td><a href="/pages/mHZhgqnPr6InQONKIe19">/pages/mHZhgqnPr6InQONKIe19</a></td></tr><tr><td align="center"><strong>Message Tracker</strong></td><td></td><td><a href="/files/WeuCOlrB3AZJ6gzaD1bm">/files/WeuCOlrB3AZJ6gzaD1bm</a></td><td><a href="/pages/bcd2zsOP0kVbUDCzeUdE">/pages/bcd2zsOP0kVbUDCzeUdE</a></td></tr></tbody></table>

### Key Features

<table data-view="cards"><thead><tr><th align="center"></th><th></th><th data-hidden data-card-target data-type="content-ref"></th><th data-hidden data-card-cover data-type="files"></th></tr></thead><tbody><tr><td align="center"><strong>Conversations</strong></td><td></td><td><a href="/pages/54n5JUcjRv99P1DIyffE">/pages/54n5JUcjRv99P1DIyffE</a></td><td><a href="/files/WKj9UcD5c8foOLwmD35P">/files/WKj9UcD5c8foOLwmD35P</a></td></tr><tr><td align="center"><strong>Contacts</strong></td><td></td><td><a href="/pages/6tOZwK7wVC0LTkbLcbVx">/pages/6tOZwK7wVC0LTkbLcbVx</a></td><td><a href="/files/seO4FoWpuHnZHU7OefbL">/files/seO4FoWpuHnZHU7OefbL</a></td></tr><tr><td align="center"><strong>Chatbots</strong></td><td></td><td><a href="/pages/XD2rYgrihWyTtyM0z5n3">/pages/XD2rYgrihWyTtyM0z5n3</a></td><td><a href="/files/aQVNSfcViHYJOZHl2QMj">/files/aQVNSfcViHYJOZHl2QMj</a></td></tr><tr><td align="center"><strong>Broadcast</strong></td><td></td><td><a href="/pages/d93Vky02NBY3FFZWP9qo">/pages/d93Vky02NBY3FFZWP9qo</a></td><td><a href="/files/xPfG99gMyfAbIXd1xIOe">/files/xPfG99gMyfAbIXd1xIOe</a></td></tr><tr><td align="center"><strong>WhatsApp Drip Campaign (or) Sequence</strong></td><td></td><td><a href="/pages/4XtJNr50YUT8LSDbWYIB">/pages/4XtJNr50YUT8LSDbWYIB</a></td><td><a href="/files/0lLC41VqFxHcXETWkMZ7">/files/0lLC41VqFxHcXETWkMZ7</a></td></tr><tr><td align="center"><strong>Click-to-WhatsApp Ads</strong></td><td></td><td><a href="/pages/6ue5fld4bMAuSp2UpOOz">/pages/6ue5fld4bMAuSp2UpOOz</a></td><td><a href="/files/uKkm4eQPPEKmNeRLRAMB">/files/uKkm4eQPPEKmNeRLRAMB</a></td></tr><tr><td align="center"><strong>WhatsApp Shop</strong></td><td></td><td><a href="/pages/sqmbQikGTU2ztpNBIcah">/pages/sqmbQikGTU2ztpNBIcah</a></td><td><a href="/files/Fdyhu45WQQla79hEh0kT">/files/Fdyhu45WQQla79hEh0kT</a></td></tr><tr><td align="center"><strong>Payments</strong></td><td></td><td><a href="/pages/FwvQNvGLZfTHXvRjLnQx">/pages/FwvQNvGLZfTHXvRjLnQx</a></td><td></td></tr></tbody></table>

### Integrations

**E-commerce Platforms:**

<table data-view="cards"><thead><tr><th align="center"></th><th></th><th data-hidden data-card-cover data-type="files"></th><th data-hidden data-card-target data-type="content-ref"></th></tr></thead><tbody><tr><td align="center"><strong>Shopify</strong></td><td></td><td><a href="/files/Hlu1LID4PbsOyw5pWz7v">/files/Hlu1LID4PbsOyw5pWz7v</a></td><td><a href="/pages/NgZrSeHHjyp8AQ3j6Pby">/pages/NgZrSeHHjyp8AQ3j6Pby</a></td></tr><tr><td align="center"><strong>Woocommerce</strong></td><td></td><td><a href="/files/9ZUIoU2cfAHHQUZD3W4n">/files/9ZUIoU2cfAHHQUZD3W4n</a></td><td><a href="/pages/NFue6Es7cI9lAW4UybLJ">/pages/NFue6Es7cI9lAW4UybLJ</a></td></tr></tbody></table>

**Customer Relationship Management (CRM) Systems:**

<table data-view="cards"><thead><tr><th align="center"></th><th></th><th data-hidden data-card-cover data-type="files"></th><th data-hidden data-card-target data-type="content-ref"></th></tr></thead><tbody><tr><td align="center"><strong>HubSpot</strong></td><td></td><td><a href="/files/F86cIzaYHCQCxAdpH4au">/files/F86cIzaYHCQCxAdpH4au</a></td><td><a href="/pages/FTJkIiechNLuhfAMDc3H">/pages/FTJkIiechNLuhfAMDc3H</a></td></tr><tr><td align="center"><strong>Kylas CRM</strong></td><td></td><td><a href="/files/Fs9shyoB4q0sIrQajZVK">/files/Fs9shyoB4q0sIrQajZVK</a></td><td><a href="/pages/5RztdXk6utO2OPVmX9pZ">/pages/5RztdXk6utO2OPVmX9pZ</a></td></tr><tr><td align="center"><strong>Zoho CRM</strong></td><td></td><td><a href="/files/azoq4JoqmgDT8PMpuc7D">/files/azoq4JoqmgDT8PMpuc7D</a></td><td><a href="/pages/L8hXHLRdPJHRqcBFuFYE">/pages/L8hXHLRdPJHRqcBFuFYE</a></td></tr><tr><td align="center"><strong>LeadSquared</strong></td><td></td><td><a href="/files/HEFWyniX1XJVzOJ0y9AA">/files/HEFWyniX1XJVzOJ0y9AA</a></td><td><a href="/pages/qeRXRPmGFfBRICpW6lRn">/pages/qeRXRPmGFfBRICpW6lRn</a></td></tr><tr><td align="center"><strong>Zoho Signals</strong></td><td></td><td><a href="/files/tq53z5J6VW1aC4f57WH5">/files/tq53z5J6VW1aC4f57WH5</a></td><td><a href="/pages/OlNmNOpeZRLbAvHNtjqk">/pages/OlNmNOpeZRLbAvHNtjqk</a></td></tr></tbody></table>

**Shipping and Logistics:**

<table data-view="cards"><thead><tr><th align="center"></th><th></th><th data-hidden data-card-cover data-type="files"></th><th data-hidden data-card-target data-type="content-ref"></th></tr></thead><tbody><tr><td align="center"><strong>ShipRocket</strong></td><td></td><td><a href="/files/cUH6fvRTrrfCfSBfqtDV">/files/cUH6fvRTrrfCfSBfqtDV</a></td><td><a href="/pages/vjAslGw1r5e3Y0y9GePp">/pages/vjAslGw1r5e3Y0y9GePp</a></td></tr><tr><td align="center"><strong>Shipway</strong></td><td></td><td><a href="/files/lbp1jpDI2FgQHZSLf07Q">/files/lbp1jpDI2FgQHZSLf07Q</a></td><td><a href="/pages/FT9gqrsQu1lGzgPGBU4G">/pages/FT9gqrsQu1lGzgPGBU4G</a></td></tr></tbody></table>

**Payment Gateways:**

<table data-view="cards"><thead><tr><th align="center"></th><th></th><th data-hidden data-card-cover data-type="files"></th><th data-hidden data-card-target data-type="content-ref"></th></tr></thead><tbody><tr><td align="center"><strong>Cashfree</strong></td><td></td><td><a href="/files/SGrcAxPrqYFsETEBMojs">/files/SGrcAxPrqYFsETEBMojs</a></td><td><a href="/pages/azcY5Zrvjd0ITh62hX0d">/pages/azcY5Zrvjd0ITh62hX0d</a></td></tr><tr><td align="center"><strong>Razorpay</strong></td><td></td><td><a href="/files/R5naNV4GIz6geRQsLBTm">/files/R5naNV4GIz6geRQsLBTm</a></td><td><a href="/pages/3IjmzspceqdX8HwoDYjT">/pages/3IjmzspceqdX8HwoDYjT</a></td></tr></tbody></table>

**Marketing and Engagement Platforms:**

<table data-view="cards"><thead><tr><th align="center"></th><th></th><th data-hidden data-card-cover data-type="files"></th><th data-hidden data-card-target data-type="content-ref"></th></tr></thead><tbody><tr><td align="center"><strong>WebEngage</strong></td><td></td><td><a href="/files/pt8crm26PAFWyhpVLHD0">/files/pt8crm26PAFWyhpVLHD0</a></td><td><a href="/pages/VBPIMUoWYrfeYWeW1yBP">/pages/VBPIMUoWYrfeYWeW1yBP</a></td></tr><tr><td align="center"><strong>MoEngage</strong></td><td></td><td><a href="/files/3iUVwLmmbtkslL5x4zXK">/files/3iUVwLmmbtkslL5x4zXK</a></td><td><a href="/pages/vOaORJ2ICfjfOzFN1sa9">/pages/vOaORJ2ICfjfOzFN1sa9</a></td></tr><tr><td align="center"><strong>Facebook Leads</strong></td><td></td><td><a href="/files/BZ4t4qZaXq8s7WwfSwzb">/files/BZ4t4qZaXq8s7WwfSwzb</a></td><td><a href="/pages/moILAcoJlJwDBeZyyJS9">/pages/moILAcoJlJwDBeZyyJS9</a></td></tr></tbody></table>

**Other Integrations:**

<table data-view="cards"><thead><tr><th align="center"></th><th></th><th data-hidden data-card-cover data-type="files"></th><th data-hidden data-card-target data-type="content-ref"></th></tr></thead><tbody><tr><td align="center"><strong>Zoho Books</strong></td><td></td><td><a href="/files/55UQ2XJG1ZyXIadwwd72">/files/55UQ2XJG1ZyXIadwwd72</a></td><td><a href="/pages/P2NkaJ0tYqmdFXO4MPaM">/pages/P2NkaJ0tYqmdFXO4MPaM</a></td></tr><tr><td align="center"><strong>Google Sheets</strong></td><td></td><td><a href="/files/XJl5eMv4ka2zPkQvpLn3">/files/XJl5eMv4ka2zPkQvpLn3</a></td><td><a href="/pages/aeJ5ENUUKATbNpA0swVA">/pages/aeJ5ENUUKATbNpA0swVA</a></td></tr><tr><td align="center"><strong>Pabbly</strong></td><td></td><td><a href="/files/FBNF3hUcCFCAc2q4TbFC">/files/FBNF3hUcCFCAc2q4TbFC</a></td><td><a href="/pages/z6HxCcmv6DmfSzMuxqHw">/pages/z6HxCcmv6DmfSzMuxqHw</a></td></tr><tr><td align="center"><strong>Zapier</strong></td><td></td><td><a href="/files/8kC5WC66jJ57DJy8Q50U">/files/8kC5WC66jJ57DJy8Q50U</a></td><td><a href="/pages/MNynCyeln8jZaO5Jbg6k">/pages/MNynCyeln8jZaO5Jbg6k</a></td></tr></tbody></table>

### Account Management Modules

<table data-view="cards"><thead><tr><th align="center"></th><th></th><th data-hidden data-card-cover data-type="files"></th><th data-hidden data-card-target data-type="content-ref"></th></tr></thead><tbody><tr><td align="center"><strong>User and Roles</strong></td><td></td><td><a href="/files/FCCT9XV4wyYmmG72NN3c">/files/FCCT9XV4wyYmmG72NN3c</a></td><td><a href="/pages/5CRssFwPmp3eEII9cMNo">/pages/5CRssFwPmp3eEII9cMNo</a></td></tr><tr><td align="center"><strong>Account Details</strong></td><td></td><td><a href="/files/CddY0TTeo11arN4HeZBM">/files/CddY0TTeo11arN4HeZBM</a></td><td><a href="/pages/4su5qLKJzv91RZmRKhSB">/pages/4su5qLKJzv91RZmRKhSB</a></td></tr><tr><td align="center"><strong>Security Modules</strong></td><td></td><td><a href="/files/yHrargCUYt24Eo7rwue3">/files/yHrargCUYt24Eo7rwue3</a></td><td><a href="/pages/zIFKGslUbgP1u9qL0A3i">/pages/zIFKGslUbgP1u9qL0A3i</a></td></tr><tr><td align="center"><strong>Pricing &#x26; billing modules</strong></td><td></td><td><a href="/files/XL3oeFmE7zJNczUSMz9D">/files/XL3oeFmE7zJNczUSMz9D</a></td><td><a href="/pages/V9C6r4tjQBzsRw6XHCHc">/pages/V9C6r4tjQBzsRw6XHCHc</a></td></tr></tbody></table>


# Pre-requisites

Integrate WhatsApp Business with Gallabox! Learn how to authenticate & connect your number for seamless communication.

WhatsApp API allows businesses to use WhatsApp for things like customer support, sending messages, and connecting with customers. Before you dive into using the WhatsApp Business API, there are a few things you'll need to have in place. Let's explore these pre-requisites to get you started!

## **Pre-requisites:**

### **Facebook Business Manager Account**

This is a free tool from Facebook that helps you manage your business presence across Facebook, Instagram, and WhatsApp. If you don't already have one, you can create a Facebook Business Manager Account at <https://business.facebook.com/>.

{% hint style="info" %}
You need to either have a facebook page or an Instagram page for your Business to get a Business Manager account.
{% endhint %}

### **Business Website**

Website is often the first point of contact between your business and potential customers. For integrating WhatsApp Business API, your website serves as a verification tool to authenticate your business's legitimacy and to provide customers with a direct channel to connect with you via WhatsApp.

### **Phone Number**

The phone number you use for your WhatsApp Business Account needs to be a dedicated business line. You cannot use a personal phone number with the Business API. This number cannot be connected to WhatsApp at the same time. .

## Prep for WhatsApp API Connection

### **Authenticate Your Phone Number:**

Before proceeding with integration, it's crucial to authenticate your phone number. This involves verifying through either a call or SMS. It's important to note that your phone number must not be associated with any existing WhatsApp Business Mobile App or Account hosted by another service provider during integration.

{% hint style="info" %}
Learn more about the [migration ](/connect-whatsapp-channel/connect-your-whatsapp#migrating-from-whatsapp-business-api-to-whatsapp-business-personal)from another WhatsApp Business Service Provider.
{% endhint %}

> If your business currently utilizes a WhatsApp account on a mobile device and intends to use the same number for WhatsApp API integration, you'll need to delete the existing WhatsApp account associated with that number.

{% hint style="info" %}
Navigate to the WhatsApp app settings and select "**Delete my account**."
{% endhint %}

Alternatively, activate a new phone number for WhatsApp API if you wish to retain the Business WhatsApp Number.

### **Authenticate with Your Facebook Business Account:**

To streamline your business operations, it's recommended to [authenticate](/connect-whatsapp-channel/meta-business-verification) with your existing Facebook Business Account. This ensures seamless integration and accessibility across platforms. If you don't have a Facebook Business Account, you can sign up for one during the integration process.

**Please note that:**

{% hint style="warning" %}

* After integration, WhatsApp usage on your phone will be disabled, and previous conversation history/contacts will not be migrated to Gallabox.
* If you decide to revert to using WhatsApp Business or the individual WhatsApp Mobile App after integrating with Gallabox, reach out to Gallabox support for assistance.
  {% endhint %}

### Detailed Business Website

In obtaining a WhatsApp API from META, your business website should effectively showcase the following elements:

1. **Business Identity:** Clearly display your business name, logo, and contact information to establish credibility.
2. **About Us Page:** An informative section detailing your business activities, mission, and values, helping META understand your business model.
3. **Privacy Policy:** A comprehensive privacy policy page that outlines how customer data is collected, used, and protected.
4. **Terms of Service:** Updated terms of service that reflect the nature of integrating WhatsApp API for business communication.
5. **Customer Support:** Highlight your commitment to customer support, demonstrating the use of WhatsApp as a tool for enhancing customer service.

To successfully obtain a WhatsApp API, ensure your business website includes essential elements that reflect your brand and commitment to privacy and customer support. This helps in establishing a trustworthy foundation for using WhatsApp as a communication tool.


# Signup

To get started with Gallabox, creating an account is quick and straightforward. In this guide, we'll walk you through the different methods available for signing up and creating your Gallabox account.

### **Creating a Free Account**

Signing up for Gallabox is easy and can be done in three simple ways. You can either choose to sign up using your

1. **Google Workspace mail ID**
2. **Microsoft Outlook account**, or
3. **Manual Signup**.
4. **SSO Login with SAML**

{% hint style="info" %}
Make sure you are using your **work email** while creating an account on Gallabox.
{% endhint %}

### Google SSO Signup

If you prefer to use your Google Workspace mail ID for signing up:

Visit <https://app.gallabox.com/signup>. Click on "Sign up with Google." Choose your business account and click on continue. Once verified, your details will be submitted, and you'll be redirected to your Gallabox account.

<figure><img src="/files/XXwQ7IURsVXGZCnwmz1M" alt=""><figcaption></figcaption></figure>

### Microsoft Outlook SSO Signup

For those who prefer using their Microsoft Outlook account:

Go to <https://app.gallabox.com/signup>. Click on "Sign up with Microsoft." Upon successful verification, your details will be submitted, and you'll be directed to your Gallabox account.

<figure><img src="/files/kYSO9LrKMsJdrH0UJBCE" alt=""><figcaption></figcaption></figure>

### Manual Sign-up

If you opt to fill in the required details manually, ensure that you have access to your business mail inbox. Provide your name, work email, and phone number. Enter the OTP sent to your business email and set your password.

<figure><img src="/files/JMyI9DGDQAJ29w1nxUKv" alt=""><figcaption></figcaption></figure>

Submit the OTP and proceed with creating the password for your account.

### **SSO Login with SAML**

#### What is Enterprise SSO (Single Sign-On)?

Enterprise SSO allows your team to log in to Gallabox using your company’s identity provider — like Okta, Microsoft Entra (formerly Azure AD), or Google Workspace — instead of remembering a separate username and password.

This is done using a secure login protocol called **SAML**, which is widely used by larger organizations for centralized access control.

#### How SAML-Based SSO Works

SAML login follows a simple two-step process:

1. **User Login Request**\
   When someone from your team tries to log in, they’ll be redirected to your company’s login system (e.g., Okta or Microsoft Entra).
2. **Authentication and Access**\
   After they successfully log in there, they’re redirected back to Gallabox and automatically logged in — no password required.

#### What’s Needed to Set It Up

To enable Enterprise SSO, you need to connect with our support team (<support@gallabox.com>) and they will guide you how to set it up.

<figure><img src="/files/ZapTrp91w0rKGR9zfjTV" alt=""><figcaption></figcaption></figure>

### Setting up your Gallabox Account

1. After landing in Gallabox account, tell us about your business. Add your Business name, website, the country you do the business in, and more details. Click Next once you have added the details.

<figure><img src="/files/IHZImwN8hCJwhhp6eq5L" alt=""><figcaption></figcaption></figure>

2. To personalize your homepage, choose your role in the company and the industry you are working in.

<figure><img src="/files/22m6F98Pe1yJhfuvEAAW" alt=""><figcaption></figcaption></figure>


# Explore Demo Account

Discover the features and functionalities of Gallabox with a Demo Account. Test out and familiarize yourself with the environment.

Now that you have successfully created your Gallabox account, it's time to explore the features and functionalities.

Before you proceed with your number, we have designed a **demo environment**, providing you with the opportunity to experience the broadcast in real time.

### **Understanding Demo Account:**

When you sign up for Gallabox, a 3-day demo account is activated for you.

{% hint style="info" %}
It's important to note that all messages sent from the Demo Account will originate from a shared test number. To send messages from your actual number, you'll need to activate the free trial by connecting your number.
{% endhint %}

#### Prefer watching than reading? Watch the below YouTube Video:

{% embed url="<https://www.youtube.com/watch?list=PLqLBaOO-5zr3JhI6eRnp0EiNuzgPdLGE1&v=VtMXrmI33_E>" %}

Prefer reading? Read the steps below:

If you don't have a business number available at the moment, you can explore our demo account. To activate Demo account:

1. Click on "I don't have a business number. Explore demo account." option in the pop-up asking you to connect your number with WhatsApp. The number you provided during signup will be taken here to send the link for activation. Click on 'Send Activation Link'.

<figure><img src="/files/GjHYoxjyvV6DTcJzOHBt" alt=""><figcaption></figcaption></figure>

2. Open your WhatsApp and click on the button 'Activate' in the message. The account will be activated. If nothing happens, click on - 'Click here to refresh page.'

<figure><img src="/files/i3xJ6l8bEVnvH6hDXGWW" alt=""><figcaption></figcaption></figure>

3. You will be notified when your demo account will be created. Click on Get Started to use the account.

<figure><img src="/files/2qdsJb9yhZzTIwBIQv0X" alt=""><figcaption></figcaption></figure>

### What to do in demo account?

To get the understanding of Gallabox, procced with the following modules in demo account:

<table data-card-size="large" data-view="cards"><thead><tr><th></th><th></th><th data-hidden></th><th data-hidden></th></tr></thead><tbody><tr><td>Use three pre-created field collections to organize your contact details efficiently.</td><td><a data-mention href="/pages/fYxzpkrtjtUG0pZDD3Oy">/pages/fYxzpkrtjtUG0pZDD3Oy</a></td><td></td><td></td></tr><tr><td>Design a WhatsApp message for quick communication.</td><td><a data-mention href="/pages/qAltIqBKKHTlJmpVpAp4">/pages/qAltIqBKKHTlJmpVpAp4</a></td><td></td><td></td></tr><tr><td>Schedule a broadcast campaign to explore Gallabox's marketing capabilities.</td><td><a data-mention href="/pages/LnqMuRHUCA10SIhGudxX#create-your-first-broadcast">/pages/LnqMuRHUCA10SIhGudxX#create-your-first-broadcast</a></td><td></td><td></td></tr><tr><td>Save frequently used messages for instant replies.</td><td><a data-mention href="/pages/nx3C0gkctJlzd0RDIZ18">/pages/nx3C0gkctJlzd0RDIZ18</a></td><td></td><td></td></tr><tr><td>Collaborate with your team on Gallabox</td><td><a data-mention href="/pages/5CRssFwPmp3eEII9cMNo">/pages/5CRssFwPmp3eEII9cMNo</a></td><td></td><td></td></tr><tr><td>Easily deliver pre-approved messages to your contacts.</td><td><a data-mention href="/pages/ImpyfI72MS9WgoAuHkGl#whatsapp-templates">/pages/ImpyfI72MS9WgoAuHkGl#whatsapp-templates</a></td><td></td><td></td></tr><tr><td>Automate interactions and provide 24/7 customer support.</td><td><a data-mention href="/pages/jtzvjnBzL0BDcp2PuVe4">/pages/jtzvjnBzL0BDcp2PuVe4</a></td><td></td><td></td></tr><tr><td>Connect Gallabox with other tools to streamline your workflow.</td><td><a data-mention href="/pages/OUm3eOu0oFSECj7TRJ4B">/pages/OUm3eOu0oFSECj7TRJ4B</a></td><td></td><td></td></tr></tbody></table>

### **Messaging Restrictions in Demo Mode:**

While in Demo mode, please note the following messaging restrictions:

* You can chat with up to 2 unique contacts per day.
* You can send up to 10 Business-Initiated Messages per day.

### **Removing Demo Mode Restrictions**

To eliminate demo mode restrictions, simply [connect your own number](/get-started/activate-free-trial#activating-free-trial).


# Activate Free Trial

Get ready to connect your number with Gallabox by fulfilling the pre-requisites required for WhatsApp API.

If you have your WhatsApp Business Number ready, activate a 7-day free trial for you.

#### Do not prefer reading? watch the below YouTube Video:

{% embed url="<https://www.youtube.com/watch?feature=youtu.be&v=ZYYczbxuL0Q>" %}

#### Prefer reading? Follow the below steps:

1. After personalizing your homepage, click on Continue. The pop-up will show the pre-requisites required to connect your WhatsApp Business Number.

{% hint style="info" %}
If any one of the pre-requisites are not satisfied, you can [explore demo account](/get-started/explore-demo-account).
{% endhint %}

<figure><img src="/files/EikAmOtVN05oMMo0MIwX" alt=""><figcaption></figcaption></figure>

2. If you have all the pre-requisites ready, check the box and click on Continue.

<figure><img src="/files/2XCzGloq1jkKHF2xrlOw" alt=""><figcaption></figcaption></figure>

3. Enter the number you would like to connect with WhatsApp API using Gallabox. Click on Next.

{% hint style="info" %}
Check the box if you are assisted by an Product Expert. If you are doing it on your own, you can click on the video resource to get the step-by-step guidance.
{% endhint %}

<figure><img src="/files/6inUUDEtHhQH5t69FhmB" alt=""><figcaption></figcaption></figure>

3. In the next step, enter your WhatsApp Display Name. Make sure your display name should adhere to the [guidelines ](https://www.facebook.com/business/help/757569725593362)set by META. Click on 'Connect Number' button.

<figure><img src="/files/wR2LPtb0D4p86UxTBkTY" alt=""><figcaption></figcaption></figure>

4. When you click on Connect Number button, META window will open for you to login. Make sure you have the admin access.

<figure><img src="/files/kbaASHNmogYJT4Y5KCX6" alt=""><figcaption></figcaption></figure>

5. If you already have a WhatsApp Business Account, select it. If not, create your WhatsApp Business Account (WABA).

<figure><img src="/files/XzxaEOagSHJ4LB1B7hIK" alt=""><figcaption></figcaption></figure>

6. Check for the WhatsApp Business display name, time zone, website, and add business description. Information provided here will be visible to WhatsApp users under your business profile, it is recommended to double check the information.

<figure><img src="/files/Zf4z3SrG8nWKVLHaS159" alt=""><figcaption></figcaption></figure>

7. Enter your WhatsApp Business Number and verify your mobile number using either SMS or phone.

<figure><img src="/files/kQ4dd0niBXI5fT18ejGa" alt=""><figcaption></figcaption></figure>

Please wait 3-5 minutes for your account to be created.


# Connect your WhatsApp

Learn about Business Service Providers (BSPs) facilitating communication between WhatsApp Business Accounts and customer management platforms. Migrate or Connect your WhatsApp Number with Gallabox.

#### Prefer watching than reading? Watch the video below:

{% embed url="<https://www.youtube.com/watch?index=2&list=PLqLBaOO-5zr3JhI6eRnp0EiNuzgPdLGE1&v=8hrrkuGl5cY>" %}

#### Prefer reading? Read the step below:

To initiate the process, click on the "**Connect by Yourself**" button, which will set the stage for linking your WhatsApp Channel with Gallabox.

Make sure the pre-requisite are ready before connecting your number.

1. Fill in your business information.

<figure><img src="/files/evFMCzKavPOLlNbkfvPU" alt=""><figcaption></figcaption></figure>

2. Choose or create your WhatsApp Business Account (WABA).

<figure><img src="/files/BP54KzexsJSxqzF9LVoV" alt=""><figcaption></figcaption></figure>

3. Create your WhatsApp Business (WABA) profile. Information provided here will be visible to WhatsApp users under your business profile.

<figure><img src="/files/L2QUBMcmrSTLKN0qO8XR" alt=""><figcaption></figcaption></figure>

4. Add and verify your mobile number.

<figure><img src="/files/T2PrOsS5c2TUhAjmEBJp" alt=""><figcaption></figcaption></figure>

5. Wait for 3-5 mins, for your account to get created.

### Sign up to 360 Dialog

1. Before proceeding further, you'll need to sign up for a 360 Dialog account. This can be done using either your Facebook account or your business email ID.

<figure><img src="/files/THG8uwQcPIfsTXGmM3a8" alt=""><figcaption></figcaption></figure>

2. If you choose to sign up using your business's Facebook account, follow the prompts provided by 360 Dialog to complete the registration process seamlessly.

<figure><img src="/files/m39UAb1V3jJESiu1bfGj" alt=""><figcaption><p>Login to Facebook and share access with 360 Dialog</p></figcaption></figure>

Next, you'll need to create or select a WhatsApp Business Account (WABA) for your business.

3. Provide accurate business information, ensuring visibility to WhatsApp users.

<figure><img src="/files/CGQVuQ3VvbealfM7G2kx" alt=""><figcaption></figcaption></figure>

4. If you already have a WhatsApp Business account, select it; otherwise, proceed to create a new one.

<figure><img src="/files/puu1UEFd97oOiM654X7k" alt=""><figcaption></figcaption></figure>

5. Create a Whatsapp Business profile, ensuring the information provided is visible to WhatsApp users.

<figure><img src="/files/wc1LKbZoru9RxGDnxd2o" alt=""><figcaption></figcaption></figure>

6. Enter the mobile number you wish to connect with and verify it using the one-time password (OTP) sent to that number.

<figure><img src="/files/lzkIlohIUtZGDD8zQ9hi" alt=""><figcaption></figcaption></figure>

7. Allow some time for the instance to be prepared for use.

<figure><img src="/files/uYJLLuiXKlg46ngKEllA" alt=""><figcaption></figcaption></figure>

8. Once your WhatsApp Business instance is ready, proceed to authorize Gallabox for integration. This step enables seamless communication between your WhatsApp Channel and Gallabox.

<figure><img src="/files/4anBrUXm6YnjnZ9J5SII" alt=""><figcaption></figcaption></figure>

Congratulations! Your WhatsApp Number is now successfully connected with Gallabox, enhancing your communication capabilities within the platform.

<figure><img src="/files/maLuNVzsPvxBxIbytX5B" alt=""><figcaption></figcaption></figure>

Make the most of this by exploring the various resources available, including **training sessions**, **product documentation**, and **FAQs**, to optimize your experience.

<figure><img src="/files/vRFjgDg30gkqVHbUlDbJ" alt=""><figcaption></figcaption></figure>

> Connecting your Number allows unverified businesses to respond to unlimited **service** (*user-initiated conversations*) and send **business-initiated** conversations to 50 unique customers in a 24-hour rolling period.
>
> Upon completing your Facebook business verification after connecting your own number, you gain access to sending unlimited business-initiated conversations as per your messaging tier.


# WhatsApp Co-existence

Use your WhatsApp Business App and Gallabox on the same number — simultaneously.

Already using the **WhatsApp Business App** on your phone? With co-existence, you can connect that same number to Gallabox without giving up the app.

* **WhatsApp Business App** — continue personal, 1:1 conversations from your phone
* **Gallabox** — run shared inbox, automation, campaigns, and chatbots for your team

Both work on the **same phone number**. Messages stay in sync.

{% hint style="warning" %}
WhatsApp Co-existence is **not enabled by default**. It must be activated for your Gallabox workspace by our support team before you can set it up. [Contact support](mailto:support@gallabox.com) to get started.
{% endhint %}

***

## Why use Co-existence with Gallabox?

Before co-existence, businesses had to pick one:

* **WhatsApp Business App** — simple and free, but limited for teams and automation
* **WhatsApp Cloud API** — powerful, but required disconnecting the app entirely

Co-existence removes this trade-off.

With Gallabox Co-existence, you can:

* Keep the same number your customers already know
* Retain recent chat history and context
* Give your team a shared inbox with assignments and collaboration
* Run campaigns, journeys, and automations at scale
* Let founders or managers still reply directly from their phone

***

## Who is this best suited for?

Co-existence works best if:

* You actively use the WhatsApp Business App today but need team access
* You want automation and campaigns without disrupting live conversations
* You are an SMB or growing brand moving gradually toward Cloud API

**Common scenarios:**

* **Founder-led sales** — founder handles high-touch deals from the app; team manages follow-ups and bulk campaigns in Gallabox
* **Support teams scaling up** — support moves into Gallabox with assignments, SLAs, and automation, while agents can still respond from their phone when needed
* **Gradual migration** — test Cloud API features first, then decide later if you want to go fully API-first

***

## How to enable

Co-existence is set up in four stages. Reach out to Gallabox support to begin.

{% stepper %}
{% step %}
**Contact Gallabox support**

Email <support@gallabox.com> with:

* Your WhatsApp Business App phone number
* A brief note on how you plan to use co-existence
  {% endstep %}

{% step %}
**Eligibility check**

The Gallabox team will verify:

* Your number is registered on the WhatsApp Business App (not already on Cloud API)
* Your country is supported
* There are no existing partner or credit-line conflicts on your number
  {% endstep %}

{% step %}
**Embedded Signup**

Once eligible, you will complete onboarding through Gallabox:

1. Start the signup flow in Gallabox and choose to connect your existing WhatsApp Business App number
2. A verification code will appear on screen — copy it
3. On your phone, open the WhatsApp Business App. You'll receive a message from the official **Facebook Business Account** — tap **Connect**. If you don't see the message, go to **Menu (or Settings) > Account > Connect to Business Platform**
4. Choose whether to share up to **6 months of chat history** with Gallabox — this decision cannot be changed later
5. Enter the verification code and tap **Connect to the Business Platform**

{% hint style="warning" %}
The chat history sharing decision **cannot be changed later**. If you want to change it, you must disconnect and reconnect — and history sharing will not be available again on reconnect.
{% endhint %}

{% hint style="info" %}
Sync can take a few minutes depending on your message history size and internet speed. Keep the WhatsApp Business App open during this time.
{% endhint %}
{% endstep %}

{% step %}
**Start using Co-existence**

Once connected:

* Chats and contacts begin syncing into Gallabox
* Your team can work from the Gallabox shared inbox
* You can continue replying directly from the WhatsApp Business App
  {% endstep %}
  {% endstepper %}

***

## What you can do after enabling

**From Gallabox (Cloud API):**

* Send campaigns and broadcast messages (standard WhatsApp Cloud API pricing applies)
* Use the shared inbox with assignments, tags, and team collaboration
* Build automation flows triggered by events — new leads, form fills, conversation status changes, and more

**From the WhatsApp Business App:**

* Continue 1:1 conversations directly from your phone
* Use app-only features like catalog, status, labels, and quick replies (these stay in the app and are not mirrored to Gallabox)

**Message and contact sync:**

* Up to 6 months of recent 1:1 chat history can be synced into Gallabox (with your consent during onboarding)
* New eligible 1:1 messages are mirrored between the app and Gallabox so your team stays in sync
* Contacts with WhatsApp numbers can be synced into Gallabox, reflecting your existing customer base

***

## Features and limitations

Co-existence comes with platform-level rules from Meta. Here is what changes and what stays the same once enabled.

| Feature                                                          | On WhatsApp Business App                                             | On Gallabox (Cloud API)                                                                  |
| ---------------------------------------------------------------- | -------------------------------------------------------------------- | ---------------------------------------------------------------------------------------- |
| 1:1 chats                                                        | Continues as usual — but **edit and revoke are no longer supported** | Supported. Up to 6 months of history synced; future messages mirrored in both directions |
| Chat history                                                     | No change in the app                                                 | Last 6 months synced (if you approved sharing during setup)                              |
| Contacts                                                         | No visible change                                                    | WhatsApp contacts can be synced into Gallabox                                            |
| Disappearing messages                                            | **Turned off** for all 1:1 chats                                     | Not supported                                                                            |
| View once messages                                               | **Disabled** for all 1:1 chats                                       | Not supported                                                                            |
| Live location                                                    | **Disabled** for all 1:1 chats                                       | Not supported                                                                            |
| Broadcast lists                                                  | Cannot create new lists — existing lists become **read-only**        | Not synced; use Gallabox campaigns instead                                               |
| Messaging tools (greeting, away messages, quick replies, labels) | Remain available in the app                                          | Not synced; Gallabox has its own routing, tags, and automation                           |
| Group chats                                                      | No change                                                            | Not synced — group conversations stay on the phone only                                  |
| Voice & video calls                                              | No change                                                            | Not available via Cloud API                                                              |
| Catalog, orders, status                                          | No change                                                            | Not synced                                                                               |
| Business profile & WhatsApp Channels                             | No change                                                            | Channels not supported via Cloud API                                                     |

***

## Technical requirements, limits & pricing

**Requirements:**

* WhatsApp Business App version **2.24.17 or higher**
* Phone number from a supported country (see below)
* Embedded Signup with session logging enabled
* Gallabox webhooks enabled

**Throughput:**

* Co-existence numbers are limited to approximately **20 messages per second**

**Customer service window:**

* A 24-hour messaging window opens only when a user messages you after Cloud API onboarding
* Messages received before onboarding can be replied to only using templates

**Unsupported countries:**

Co-existence is not available for phone numbers from:

* Nigeria
* South Africa

**Pricing:**

* Messages sent from the **WhatsApp Business App** remain **free**
* Messages sent via **Gallabox** follow standard [WhatsApp Cloud API pricing](https://github.com/gallabox/docs.gallabox.com/blob/main/pricing-and-billing-modules/README.md)

***

## Linked devices

After connecting, all linked companion devices (WhatsApp Web, tablets, etc.) will be **unlinked automatically**. You can re-link them after setup is complete.

***

## How to disconnect

To stop using co-existence, open the WhatsApp Business App and go to:

**Settings > Account > Business Platform > Disconnect Account**

This disconnects your number from Gallabox. Your WhatsApp Business App will not be affected.

If you need help disconnecting or want to understand the impact on your account, [contact Gallabox support](mailto:support@gallabox.com).

***

## Keeping your co-existence connection active

Once co-existence is set up, the connection between your WhatsApp Business App and Gallabox needs to stay active. If it breaks, Gallabox will be automatically removed from your WhatsApp Business Account and you will need to re-onboard.

### Why is Gallabox automatically removed?

Meta can remove a connected partner like Gallabox without warning in the following situations:

* **Number offline for more than 14 days** — if your WhatsApp Business App is inactive or unreachable for over 14 days, the co-existence link is severed automatically. This is expected Meta platform behaviour.
* **Device changes or app reinstalls** — switching phones, resetting your device, or uninstalling and reinstalling the WhatsApp Business App can break the connection.
* **Compliance or integrity issues** — if Meta flags your WhatsApp Business Account for policy violations, low trust score, or integrity concerns, the partner connection may be removed.
* **Backend offboarding events** — unresolved financial associations or system-level offboarding processes on Meta's side can also trigger removal, even if you did not take any action.

{% hint style="warning" %}
If Gallabox stops receiving messages or your shared inbox goes silent unexpectedly, your co-existence connection may have been broken. [Contact Gallabox support](mailto:support@gallabox.com) to confirm and re-onboard.
{% endhint %}

### Best practices to avoid unexpected disconnections

1. **Keep the WhatsApp Business App active** — open and use the app regularly. Avoid leaving the number dormant for more than a few days at a time.
2. **Avoid frequent device changes or app reinstalls** — if you do need to change devices, contact Gallabox support first so they can guide you through safely.
3. **Stay compliant with Meta's business policies** — ensure your messaging practices, business profile, and account remain in good standing.

### What to do if you are automatically disconnected

If Gallabox is removed from your account unexpectedly, the fix is to re-onboard:

1. Make sure the WhatsApp Business App is active and registered on your phone.
2. Check your WhatsApp Business Account for any compliance or integrity flags that may need to be resolved first.
3. Contact [Gallabox support](mailto:support@gallabox.com) — they will walk you through the Embedded Signup process again to restore the connection.

Note that re-onboarding follows the same steps as the initial setup. The option to share chat history will not be available again on reconnect.

***

## Frequently asked questions

**Will I lose my existing WhatsApp chats?**\
No. Up to 6 months of recent 1:1 chats can be synced into Gallabox if you approve history sharing during onboarding.

**Can I still reply from my phone?**\
Yes. The WhatsApp Business App continues to work normally for 1:1 conversations.

**Are group chats available in Gallabox?**\
No. Group chats remain only in the WhatsApp Business App and are not synced.

**Is the WhatsApp Business App removed?**\
No. It continues to work alongside Gallabox.

**Are messages free?**\
Messages sent from the app are free. Messages sent through Gallabox follow WhatsApp Cloud API pricing.

**Can I disable Co-existence later?**\
You can disconnect via the WhatsApp Business App settings. Contact Gallabox support for guidance on your specific setup.

**Why are my linked devices disconnected after setup?**\
Meta automatically unlinks companion devices during Cloud API onboarding for security and compatibility reasons. You can re-link them after setup.

**What if my number was previously connected to another API provider?**\
Existing credit-line or partner connections can block onboarding. Gallabox support will help resolve this during the eligibility check.


# Meta Business Verification

Prepare and get your Facebook Business Manager verified to send unlimited messages everyday on WhatsApp

Ensuring a smooth Meta Business Verification process is crucial, and following the outlined preparations and guidelines will increase your company's chances of successful verification. If you face challenges, Gallabox support team is here to assist you.

### **Preparation for Meta Business Verification**

To enhance the chances of your company's verification by Meta, ensure the following:

* The company's website is active, has SSL, and is complete with the company's name, address, and phone number matching Business Manager information.
* The account email aligns with the company's website domain (if going for Domain Verification).
* For phone number verification, ensure you can receive calls. If your number has IVR applied, temporarily disable.
* The company's trade name in documentation matches that on the website and Facebook page, or they are related.

### **Documents Required for Business Verification**

Because of the differences between legal documents between countries, Facebook has provided a list of the specific documents that need to be sent according to each country. Please see for India and other countries below.

To apply for Facebook Business Verification, you need to submit documents that support the registered business’ legal name, address and phone number.

Facebook cross checks with the **MCA** (Ministry of Corporate Affairs) records to validate any information you submit to them. Hence, it is absolutely essential to submit the most up-to-date and correct documents because any discrepancy can lead to rejection or further questions.

{% tabs %}
{% tab title="India" %}
\
Here’s a list of the documents that are mandatory for Facebook Business Verification for Indian Business (in order of recommendation).

<figure><img src="/files/CWPpvyVpDIlKkk5Asc4R" alt=""><figcaption></figcaption></figure>
{% endtab %}

{% tab title="Other Countries" %}
Here’s a list of the documents that are mandatory for Facebook Business Verification for Other countries Business.

<figure><img src="/files/Sjw9SkmCvRlIYP5ScM6y" alt=""><figcaption></figcaption></figure>
{% endtab %}
{% endtabs %}

### **Documents not accepted for Business Verification**

<figure><img src="/files/xzWeWQNBhyhmxifLtwpU" alt=""><figcaption></figcaption></figure>

### **Application Process for Business Verification**

1. Access your Facebook business manager account, go to your Facebook account and click on Business Settings.

<figure><img src="/files/mVTohJQYCxq7DaiHVLiq" alt=""><figcaption></figcaption></figure>

2. On the left hand-side panel, scroll down and find Security Center, and click on Start Verification.

<figure><img src="/files/A19TRIsnjFVY2m7widSc" alt=""><figcaption></figcaption></figure>

3. You will need to fill out all your Business Details – Name, Address, Phone Number and Website. Make sure this information is consistent with MCA records and with the Business Details in your supporting documents. Once you are done, click Next.

<figure><img src="/files/vytzcvTIQvAx6SS1s3jx" alt=""><figcaption></figcaption></figure>

4. Next, Facebook will generate a list of businesses that match the information you just entered. You need to select your business category from this list and continue.

<figure><img src="/files/O2gjEeZf70xlDKLKYCW8" alt=""><figcaption></figcaption></figure>

5. You will need to simply confirm the business details that you wish to submit to Facebook. These details need to match the business details in your supporting documents that you will submit next. This information will also be present on your Facebook Business Profile once your verification is complete.

<figure><img src="/files/sxS8QLdExgGr1BGpb8EM" alt=""><figcaption></figcaption></figure>

6. Submit a supporting document to verify your Legal Business Name. You can upload any of the acceptable documents like the Certificate of Incorporation, Business License, Business Bank Account Statement etc. Once you have uploaded the document on Facebook for verification, click next.

{% hint style="info" %}
Ensure that you choose the correct language of the document – you need to specify the language of the documents you are submitting correctly so that the reviewer is easily able to verify it.
{% endhint %}

<figure><img src="/files/uctE5JGpM0nnMPxj9Zys" alt=""><figcaption></figcaption></figure>

7. You need to repeat the same process for verifying your Legal Business Address or Phone Number on Facebook. Once you have uploaded an acceptable document, click next.

<figure><img src="/files/VBD9g4lhXwTXs8fFEdrI" alt=""><figcaption></figcaption></figure>

8. You will need to choose a Facebook verification method. You can choose to receive a code via call or email or you can choose to verify using your business’ website domain.

{% hint style="info" %}
If you are choosing to verify via email or call, make sure that you are entering an email address or phone number that you have access to. It is recommended that your verification may get completed faster if you use an email address that contains your website domain.
{% endhint %}

<figure><img src="/files/HHnOmUNq6N2SHwyFq4hm" alt=""><figcaption></figcaption></figure>

9. If you picked email verification, enter the code that you must have received and click submit.

<figure><img src="/files/fQ66itP3NUfuMxnPETpU" alt=""><figcaption></figcaption></figure>

You have now completed the application for the verification of your business on Facebook!

### **Application Review Process on Facebook Business Manager**

A review of your application by Facebook can take anywhere between 3 business days to 4 weeks. If your application has been approved, you will receive a confirmation email. You can also check the status of your application in the Security Center.

<figure><img src="/files/P978FvSskPpL9Z0tw3I1" alt=""><figcaption></figcaption></figure>

You may not receive a confirmation immediately. In case Facebook requires additional documentation, you will receive a notification about it. You will then need to respond to the same support ticket from Facebook and submit necessary documentation.

<figure><img src="/files/EljycIMVrw3SQ2rezYh7" alt=""><figcaption></figcaption></figure>

Once your verification comes through, you are eligible for unlimited messaging on Gallabox.

{% hint style="warning" %}
Business verification is different from the verified badge (green tick or Official Business Account), offering different benefits.
{% endhint %}

### **Verification Button Is Unavailable:**

Ineligible Business Managers can enable verification by completing Business Info on Facebook and creating a WhatsApp Business API account with Gallabox.

<figure><img src="/files/UuwOnOcYjVTaA3WQtBkA" alt=""><figcaption></figcaption></figure>

### Display Name

Earlier, only verified badge holders could have their approved display name appear for their business. From 2024, the business Display Name will be visible for **all accounts that have passed business verification**, regardless of the badge (Green Tick).

<figure><img src="/files/PKuYRSKLMe4nZ4mfrhyx" alt=""><figcaption></figcaption></figure>


# Apply for WhatsApp Blue Tick

WhatsApp's Official Business Account (OBA) signifies authenticity and credibility for brands. Find out how to get verified and the advantages it brings to your business.

### **Official Business Account on WhatsApp** <a href="#official-business-account-on-whatsapp" id="official-business-account-on-whatsapp"></a>

**WhatsApp's Official Business Account (OBA)** is a prestigious recognition for brands and entities, indicating their authenticity and well-known presence. Here's what you need to know about **OBAs**, how to attain one, and what it means for your business.

### **Recognizing an Official Business Account** <a href="#recognizing-an-official-business-account" id="recognizing-an-official-business-account"></a>

* The Official Business Account receives a Blue checkmark badge on its profile.
* In the chat list, chat screens, and contacts view, **the business name is displayed** instead of the phone number, even if the user hasn't added the business to their address book.
* This checkmark signifies WhatsApp's verification that an authentic, reputable brand owns the account.

<figure><img src="/files/X8O6Ft2uxAgk4uyrNi0Z" alt=""><figcaption></figcaption></figure>

### **Obtaining Official Business Account Status** <a href="#obtaining-official-business-account-status" id="obtaining-official-business-account-status"></a>

* **OBA status** is not purchasable. It is conferred to selected businesses by WhatsApp based on specific criteria.
* The decision to grant **OBA status** hinges on factors like **notability**. WhatsApp seeks well-known and frequently searched brands or entities.
* **Notability**, in this context, doesn't reflect the business's authenticity but its *significant online presence*, particularly in news articles from publications with substantial audiences. Paid or promotional content is not considered for review.
* Official business accounts are associated with specific phone numbers and display names.

{% hint style="info" %}
If the display name is changed after obtaining OBA status, the account must go through the approval process once more.
{% endhint %}

{% hint style="danger" %}
OBA approval for a WhatsApp Business Account does not extend to more than 1 numbers associated with that account, particularly if those numbers have different display names. In such cases, it's advisable to update display names for the child brands as follows: '{{sub-brand name}} by {{notable name}}'. For example - ***Gallabox by MangoLeap***.
{% endhint %}

### **Requirements for OBA Application** <a href="#requirements-for-oba-application" id="requirements-for-oba-application"></a>

To apply for an Official Business Account, you must meet the following criteria:

* 2-factor verification enabled for your WhatsApp API Number.
* A valid Meta Business ID with a [Verified Business Manager](https://docs.gallabox.com/set-up-gallabox-account/meta-business-verification).
* Adherence to WhatsApp's policies, especially its [Commerce Policy](https://gallabox.com/blog/how-to-comply-with-whatsapp-commerce-policy).
* Reach **Quality Tier 2** (The [quality rating](https://docs.gallabox.com/whatsapp-channel/messaging-limits-and-quality-ratings#quality-ratings) must be ‘**high**’ at the time the application is made and the minimum [Messaging Limit](https://docs.gallabox.com/whatsapp-channel/messaging-limits-and-quality-ratings#what-are-messaging-limits) is **1k**), denoting a high-quality business account.
* Has a substantial presence in online news articles (at least 5 external media coverage links from newspapers, magazines, etc.).

If your company fulfills these requirements, you can submit your application for an Official Business Account.

{% hint style="warning" %}
Please note your **Business Verification** needs to be completed before applying for OBA Status .
{% endhint %}

### Apply for a Blue Tick <a href="#apply-for-a-green-tick" id="apply-for-a-green-tick"></a>

1. Go to WhatsApp Channel on your Gallabox Account. Navigate to Apply Blue Tick section. Click on **Apply for Blue tick button**.

<figure><img src="/files/TJACnzNvMhcc1DoqILJW" alt=""><figcaption></figcaption></figure>

2. You will be redirected to your Business Manager. Navigate to Account tools > Phone numbers > Settings of Phone Number (the number for which you want the OBA Status ).

<figure><img src="/files/qNLiZOk7YPi0A0rUiCKd" alt=""><figcaption></figcaption></figure>

3. Fill out the required information like your Business Website, Reason for requesting, up to 5 supporting links to show that the business is notable, Business Name in it's original language, and Facebook Page.

<figure><img src="https://docs.gallabox.com/~gitbook/image?url=https:%2F%2F3137140735-files.gitbook.io%2F%7E%2Ffiles%2Fv0%2Fb%2Fgitbook-x-prod.appspot.com%2Fo%2Fspaces%252FZcl3T6ePz95GpzjAeOLW%252Fuploads%252FYcENDkYaKayiWnGWMqG0%252Fimage.png%3Falt=media%26token=dd806674-bd89-4154-8afa-1321474e2e09&#x26;width=768&#x26;dpr=4&#x26;quality=100&#x26;sign=856d98eb7490b3f348430e55bc1596beb58431c497d4f5dab6e0893a32069963" alt=""><figcaption></figcaption></figure>

Once Facebook reviewed your request, you will receive a notification if your account has been granted OBA or not. If your request is rejected, **you can submit a new request after 30 days.**

{% hint style="info" %}
Successful applications result in an **automatic upgrade to OBA status**, requiring no further action. However, WhatsApp does not guarantee OBA status for all applicants.
{% endhint %}

### **Denied Requests and Ongoing Growth** <a href="#denied-requests-and-ongoing-growth" id="denied-requests-and-ongoing-growth"></a>

* If your OBA request is denied, it indicates that WhatsApp's Meta team has reviewed your account and determined it's not eligible for OBA status at that time.
* While awaiting OBA status, businesses can enhance their online presence and reapply after a 30-day waiting period.
* Despite OBA status, businesses have access to a business profile associated with each phone number. This profile includes details like a profile picture, email, website, and business description, all of which are editable.

{% hint style="warning" %}
Facebook do not grant Official Business Accounts to business employees, test accounts, and Business App. Official Business Accounts are only available to UPI Platform users since accounts on the Business App do not go through Business Verification.
{% endhint %}


# Migrate to Gallabox

### Migration from Other BSPs

If you're already using a different BSP for your WhatsApp Business Account, migrating to Gallabox might involve some additional steps. These steps will vary depending on the specific BSP you're currently using.

The migration process involves 3 main assets:

| The account the phone number is currently registered to. | The number that will be migrated. | Your Gallabox Account |
| -------------------------------------------------------- | --------------------------------- | --------------------- |

{% stepper %}
{% step %}
**Step 1: Disable Two-Step Authentication**

Before you can initiate the migration process, it is essential to disable two-step verification for the associated phone number.

Disable 2FA directly from WhatsApp Business Manager > Phone Numbers > Configurations > Two-step confirmation: There will be an option to disable. If you see the option to Enable, it means you haven't enabled the Two-Step Authentication for your WhatsApp Number.
{% endstep %}

{% step %}
Step 2: Inform your Product Specialist

Inform the Product Specialist connected with you and fill the[ migration form](https://hub.360dialog.com/lp/migrate/iDtgTpPA) and follow the process. If you have any doubt within the form, feel free to reach out to your Product Specialist.
{% endstep %}

{% step %}
**Step 3: Re-Enable Two-Step Authentication**

After migrating to Gallabox, enable two-step authentication again in order to keep your account secure and retain OBA status.

{% hint style="info" %}
Enable 2FA from WhatsApp Business Manager > Phone Numbers > Configurations > Two-step confirmation: There will be an option to enable.
{% endhint %}
{% endstep %}
{% endstepper %}

### Migrating from WhatsApp Business API to WhatsApp Business/ Personal

Before proceeding with the deletion of a phone number from WhatsApp Business API, please ensure the following criteria are met:

1. All outstanding dues are settled.
2. A phone number cannot be removed from WhatsApp Business API if the associated business has sent more than 1000 messages using that number within the last 30 days.

{% hint style="info" %}
To request the deletion of a phone number, kindly raise a ticket by sending an email to <support@gallabox.com> with the subject line "Request for Deletion of Phone Number \<phone>.

Please use your registered email address with Gallabox for this communication.
{% endhint %}

#### Here's what you can expect during the phone number deletion process:

1. Our dedicated team will review your request and check for any pending dues. They will provide you with clear instructions on how to settle any outstanding payments.
2. To prevent any new messages from going through, our team will temporarily pause all incoming and outgoing messages associated with the phone number.
3. You will be informed of a specific date when the deletion process is scheduled to take place.
4. On the designated date, our team will initiate a deletion request with Meta (the parent company of WhatsApp) and keep you updated on the progress.
5. Once a phone number has been successfully deleted from the WhatsApp Business platform, you have the option to reuse it in the WhatsApp Consumer app or re-register it on the WhatsApp Business platform.<br>

Different rules apply to deleted numbers that were previously banned by the WhatsApp Business Platform.

Please feel free to reach out to us if you have any further questions or require assistance with the deletion process. Your satisfaction is our top priority.


# Messaging Limits & Quality Ratings

Maintain a good quality rating and take your messaging to the next level on WhatsApp

{% hint style="info" %}
Starting October 7 , 2025 Meta has updated rate limits which are reflected in this page
{% endhint %}

It is essential to make sure your messages are top-notch and not overwhelming. This means being mindful of the number of messages you send and maintaining a good quality rating. Let's break down what this all means for your business.

## **What Are Messaging Limits?**

Messaging limits are like rules that say how many people you can send messages to each day. The idea is not to flood everyone with messages. These limits do not apply to service conversations, and there are five in total.

* **Limited Access (New Whatsapp Business Account)**: You can chat with up to **250** people every day.
* **Tier 1 (After Facebook Verification)**: You get to talk to **2,000** people each day.
* **Tier 2**: Now you can chat with **10,000** people each day.
* **Tier 3**: This level lets you connect with **100,000** people every day.
* **Tier 4**: No limits here – chat with as many people as you need.

{% hint style="info" %}
This limit is now shared across WABA - all of your phone numbers now share a common message limit\
\
For example: A portfolio with two business phone numbers could have a limit of 100K, and both phone numbers share the 100K limit
{% endhint %}

{% hint style="info" %}
If you are in the Limited Access and would like to increase the messaging limit to Tier 1 i.e. 2000, then get your **Facebook Business** verified.
{% endhint %}

To check your Account's **Messaging Limit**, go to WhatsApp Channel and you will see the Messaging Limit of Gallabox on the left, along with Meta's limit on the right. Refer the GIF below.\
\
The Gallabox Messaging Limit is set based on your price plan, and Meta's limit is based on the WABA criteria.

<figure><img src="/files/YtBskG84Vg7oYHMi6jir" alt=""><figcaption></figcaption></figure>

## **Moving Up the Tiers**

Each time you initiate a new conversation with a unique customer WhatsApp will determine if your limit should be increased. This determination is based on the following criteria:

* Your phone number status is **Connected**
* Your phone number quality rating is **Medium** or **High**
* Display name is **Approved**
* Keep the current messaging limit for at least **48 hours**

If you meet all conditions, WhatsApp will increase your messaging limit by one level in 6 hours

### Increasing Messaging Limit from 2k upwards <a href="#increasing-your-limit" id="increasing-your-limit"></a>

As your business grows and send more messages, you can move up to higher tiers. If your current Limit is **2K** (**Tier 1**), you must send messages to at least 1500 unique users per day within the next 7 days to upgrade your Broadcast Limit & move to the next tier **10K** (**Tier 2**).\
\
This upgrade will happen automatically once all the criteria is met.

{% hint style="info" %}
Messaging limits are **increased** automatically based on your phone number status, phone number quality rating, and how often you initiate conversations with unique customers. Decrease is currently deprecated
{% endhint %}

### Increasing Messaging Limit to unlimited <a href="#increasing-your-limit" id="increasing-your-limit"></a>

If you reach your messaging limit (**2K**), you can commence additional conversations as soon as one or more ongoing conversations conclude. For instance:

Examples:

1. Messaging limit increased from **2,000 to 10,000 in the same day**:

If the 2000th conversation is initiated at 3 pm, the messaging limit is increased at 9 PM the same day (i.e., 6 hours later) when the other criteria is met.\
\
Every time a conversation window closes, a new one can be opened to replace for the time interval.

### **Flagged Status**

Flagged Status of a channel is now deprecated. If your business quality rating drops, it only affects the message delivery rates - and not the rate limit. There will be no drop in rate limits.

## **Quality Ratings**

Your quality rating is like a report card for your messages. It's based on how your messages are received by the people you're chatting with. So, if you're sending messages that people don't like and they block you or report you, your rating goes down. To keep it high, make sure your messages are helpful, and may start conversations.

To check your Account's **Quality Rating**, go to WhatsApp Channel and you will see. Refer the GIF below.

<figure><img src="/files/etMSlRhi1NYgvAheFFP9" alt=""><figcaption></figcaption></figure>

### **Maintain High Quality Rating**

To keep your messaging in good health:

1. Meta mandates businesses to obtain customer opt-in before initiating a conversation, feasible both on and off WhatsApp.
2. Ensure that messages comply with the WhatsApp Business Policy and Commerce Policy. Limit messages to users who have expressly opted to receive communications from your business.
3. Craft highly personalized and beneficial messages to users, avoiding generic and open-ended introductions. This increases the chances of starting a conversation with new users.
4. Exercise caution with message frequency, smartly limited daily communication, and optimize content for length, media etc for engaging informational messages.
5. Clearly convey the value of receiving important updates on WhatsApp and maintain personalization in messages.
6. Explicitly specify the types of messages customers are opting into and honor their choices accordingly.
7. Provide instructions for opting out of specific messages, incorporating features like a '**STOP**' or '**UNSUBSCRIBE**' button to facilitate user control over communications.
8. Honor customer requests by preventing opted-out users from receiving messages, reducing the risk of customers blocking or reporting your business.

Meta actively monitors user sentiment and feedback, flagging phone numbers with low quality ratings over an extended period. Message templates resulting in a high rate of blocking or reporting may be paused until updated.

### Changes effective from October 7, 2025

|                                                          | Before Oct 7, 2025                                                                                                                                      | After Oct 7,2025                                                                                                                                                                  |
| -------------------------------------------------------- | ------------------------------------------------------------------------------------------------------------------------------------------------------- | --------------------------------------------------------------------------------------------------------------------------------------------------------------------------------- |
| **Where are the limits set?**                            | <p>On individual business phone numbers.</p><p>For example, phone number A could have a limit of 10K but phone number B could have a limit of 100K.</p> | <p>On individual business portfolios.</p><p>For example, a portfolio with two business phone numbers could have a limit of 100K, and both phone numbers share the 100K limit.</p> |
| **Starting limit for newly created business portfolios** | NA                                                                                                                                                      | 250                                                                                                                                                                               |
| **Starting limit for a newly registered number**         | 250                                                                                                                                                     | Shares the messaging limit set on the business portfolio.                                                                                                                         |
| **Time to increase limit via automatic scaling**         | Limit increased 24 hours after meeting criteria.                                                                                                        | Limit increased 6 hours after meeting criteria.                                                                                                                                   |
| **Phone number quality states**                          | If your business phone number quality rating has been set to **Flagged** for the last 7 days, we will decrease its limit by one level, immediately.     | If your business phone number quality rating drops, its messaging limit will not be downgraded.                                                                                   |

### Marketing Message Limitations in India

WhatsApp has introduced measures in India to enhance user engagement with marketing template messages. These measures involve limiting the number of marketing template messages a user can receive from any business within a specific timeframe. This limit will affect a small number of marketing conversations that are less likely to engage users.

> ***Importantly, this restriction only applies to marketing template messages that initiate a new conversation. Ongoing marketing conversations won't be impacted.***

Should a marketing template message exceed this limit, resulting in non-delivery, the Cloud API will issue error code **`131026`**, and the On-Premises API will return error code **`1026`**. These error codes indicate possible non-delivery reasons, but for privacy purposes, specific details about the limit causing non-delivery won't be disclosed by META Team.

A strategy of delaying re-sending attempts in longer time intervals is recommended until successful delivery is achieved. This initiative reflects WhatsApp's commitment to improving both the business and customer experience on the platform, with ongoing refinements to these measures expected.


# Gallabox Account Setup FAQs

Welcome to Gallabox Account Setup FAQ! Find answers to your questions and scroll through the list for specific answers and helpful links.

This FAQ article is organized by topic. To find a specific answer, simply scroll through the list. Each FAQ entry includes a question and a comprehensive answer.

### **General FAQs**

<details>

<summary><strong>What is Gallabox?</strong></summary>

Gallabox is a platform that helps businesses automate their WhatsApp conversations. This means that businesses can use Gallabox to create chatbots that can answer customer questions and provide support 24/7. Gallabox also offers other features, such as Click-to-WhatsApp ads and a shared team inbox, to help businesses communicate with their customers more effectively.

</details>

<details>

<summary><strong>What are the key features of Gallabox?</strong></summary>

1. **WhatsApp Chatbots**: Create chatbots that can answer customer questions and provide support 24/7.
2. **Click-to-WhatsApp Ads**: Create ads that allow customers to start a WhatsApp chat with your business with a single click.
3. **Shared Team Inbox**: Manage all of your WhatsApp conversations from a single inbox.
4. **WhatsApp Broadcast**: Send bulk messages to your WhatsApp subscribers.

Apart from these key features, there are many more to use for effective communication.

</details>

<details>

<summary><strong>Which industries use Gallabox?</strong></summary>

Gallabox is currently used by businesses of all sizes in a variety of industries, including:

* Education
* Travel
* Real estate
* E-commerce
* BFSI (Banking, Financial Services, and Insurance)
* Healthcare

</details>

<details>

<summary><strong>How much does a Gallabox WhatsApp API account cost?</strong></summary>

The cost of a Gallabox WhatsApp API account will vary depending on the type of account and the number of features you need. Gallabox offers a variety of [pricing ](https://gallabox.com/pricing)plans to meet the needs of businesses of all sizes.

</details>

<details>

<summary>How to find the Facebook Business Manager ID</summary>

The Facebook Business Manager ID (also called Facebook ID, FB ID, Business Manager ID or Business ID) identifies a specific Facebook Business Manager Account.

To discover what is your Business Manager's ID, please go to your Business Manager's settings, and then to the Business Info page:

<img src="/files/23KOzboG60CqFKdCxWAk" alt="Facebook Business Manager ID" data-size="original">

</details>

<details>

<summary>What is the cost of a demo from Gallabox?</summary>

Gallabox provides our prospective customers with a free demo at your convenience. If you would like to book a [<mark style="color:blue;">demo</mark>](https://api.whatsapp.com/send/?phone=917825877730\&text=I+am+interested+to+book+a+demo+to+understand+how+Gallabox+works.\&app_absent=0) with us today.

</details>

<details>

<summary>Does Gallabox provide a free trial?</summary>

Yes, Gallabox does provide a 7 days free trial. You can experience all the Gallabox features in this free trial.

</details>

<details>

<summary>How do I get my WhatsApp Business number verified/ green ticked?</summary>

Facebook has very stringent rules for verifying a WhatsApp business number/ awarding the green tick. Factors such as brand awareness & recall, number of followers (10,000+) on Facebook/ Instagram, your digital ad spend, messaging limit of Tier 2 (10,000+ messages), how strong your website domain is with respect to linking with external domains like Wikipedia - all these and more are taken into consideration by Facebook. Gallabox can help your account in the process of appealing to Facebook for the verification/green tick, but cannot promise the successful verification/green tick as the final decision is made by Facebook.

For further assistance with regard to any onboarding pricing queries contact: <mark style="color:blue;"><support@gallabox.com></mark>

</details>

### **Creating a WhatsApp API Account with Gallabox**

<details>

<summary><strong>What is a WhatsApp Business Account (WABA)?</strong></summary>

A WhatsApp Business Account is a dedicated account that is used for business communication via WhatsApp. You can use an existing WhatsApp Business Account or create a new one.

</details>

### **WhatsApp Magic Link**

Watch the video below to understand Magic Link and how you can create them.

{% embed url="<https://youtu.be/kjIm-P16fHc>" %}

<details>

<summary><strong>What is a WhatsApp Magic Link, and how does it work?</strong></summary>

A WhatsApp Magic Link is a feature that allows customers to start a chat with your business without saving your phone number in their contacts. When a customer clicks on a WhatsApp Magic Link, they will be redirected to a WhatsApp chat with your business.

</details>

### **Migration and Deletion**

<details>

<summary><strong>How can I migrate from another API provider to Gallabox?</strong></summary>

To migrate from another API provider to Gallabox, you will need to:

* Contact Gallabox's support team. Provide them with the information required for the migration, such as your source and destination WhatsApp Business Accounts (WABA), phone numbers, and your Gallabox account.

</details>

<details>

<summary><strong>Can I reuse a deleted phone number in WhatsApp Business or WhatsApp Personal after migrating from WhatsApp Business API?</strong></summary>

Yes, you can reuse a deleted phone number in WhatsApp Business or WhatsApp Personal after migrating from WhatsApp Business API. However, there are different rules that apply to previously banned numbers.

</details>

### MM Lite

<figure><img src="/files/SS1XP7hSftLsteXBcEjM" alt=""><figcaption></figcaption></figure>

MM Lite is an optimized method introduced by Meta that increases the delivery rate of your marketing messages.\
\
**This is now mandatory from January 13, 2026 to send any marketing template. Ensure this is enabled before then to continue uninterrupted services.**

<details>

<summary><strong>How to enable MM Lite?</strong></summary>

If you have Facebook Business Manager access, directly skip to step 7.\
\
\
If you need assistance, do the following:

1. Go to "Settings" on the left pane of your Gallabox dashboard.
2. Click on "WhatsApp Channel" on the section that appears next to the left pane.
3. Select the first channel and click on "Configure".
4. Check if there's a toggle next to "MM Lite Delivery". If yes, skip the rest of the steps and go through steps 1-4 for the rest of your WhatsApp channels.
5. If not, click on "Enable" next to "MM Lite Delivery".
6. Click on "Go to My Meta Business Manager" on the pop-up that appears.
7. Login to Meta and follow this path: WhatsApp Manager --> Manage Template --> Accept terms & conditions

</details>

<details>

<summary><strong>How to route my templates via MM Lite?</strong></summary>

Once MM Lite is successfully enabled, a toggle will appear. Switching on the toggle makes all messages go via MM Lite.\
If the toggle is greyed out, please contact support who will continue with further assistance

</details>

<details>

<summary>I do not see the enable TOS as shown in the pop up. What do I do ?</summary>

Please reach out to Meta support, and reach out to Gallabox support so we can help you check the flow before going.

</details>


# WhatsApp Business Username

Claim your channel's Whatsapp Business User name now

<figure><img src="/files/7JoRFdAH3PPN3jmSEMqu" alt=""><figcaption></figcaption></figure>

> **Who can use this?**
>
> * Gallabox users with the **Update Channel** permission.
> * Roles: Admin and Owner only. Other roles see the **Claim** button disabled with a tooltip asking them to contact an admin or owner.

{% hint style="warning" %}
Activity Log is also available to see which user has claimed the user name.
{% endhint %}

### What is a WhatsApp Business Username?

A WhatsApp Business username is a unique handle (like **@mayacakes**) mapped to your WhatsApp business phone number. Once approved by Meta, customers can find and message your business on WhatsApp by searching for your username — they no longer need to know or save your phone number. Your username appears on your business profile across WhatsApp.

Claiming a username does **not** hide your phone number. Customers who have your number can still see and use it.

{% hint style="info" %}
Usernames are available only for WhatsApp channels connected through the **Cloud API** (Meta, Meta Tech Partner, Gupshup, Tata, Karix, Redington, or custom partner). Sandbox channels and channels connected via **WhatsApp Co-existence** cannot claim a username.
{% endhint %}

### Username Statuses

| Status       | Badge colour | What it means                                                                                                                                                    |
| ------------ | ------------ | ---------------------------------------------------------------------------------------------------------------------------------------------------------------- |
| **Reserved** | Yellow       | Your username request was accepted and the handle is held for you. It becomes visible to WhatsApp users once Meta rolls out the username feature in your region. |
| **Approved** | Green        | Your username is active and visible to your customers on WhatsApp.                                                                                               |

### How to Claim a Username

1. Go to **WhatsApp** in the left nav.
2. Open **Channel Settings** and select your WhatsApp number from the connection dropdown at the top right.
3. In the channel header, find the **Claim username** banner ("Reserve your handle") and click **Claim**.
4. In the **Claim Username** window, pick one of the **Suggested usernames for your business**, or type your own handle in the **Username** field.
5. Click **Claim**.

You'll see a **Username claimed** confirmation, and the banner updates to show your handle with its status — **Username successfully reserved** (yellow) or **Username claimed — visible to your customers** (green).

#### Username rules

Gallabox validates your username before submitting it to Meta:

* 3–24 characters
* Lowercase letters, numbers, periods (`.`), and underscores (`_`) only

Meta applies additional rules on its side — a request that breaks any of these is rejected:

* Must contain at least one letter
* Must not start or end with a period, or contain two consecutive periods
* Must not start with `www`
* Must not end with a domain suffix (`.com`, `.org`, `.net`, `.in`, and so on)
* Case is ignored when comparing usernames, but periods and underscores are not — `mayacakes`, `maya.cakes`, and `maya_cakes` are three different usernames

{% hint style="success" %}
**Pro tip:** If WhatsApp has already reserved a username for you that matches your Facebook Page or Instagram handle, you must link your business phone number to that Page or Instagram account before you can claim it. Do this in Meta Business Suite, or by adding your phone number directly on the Page or Instagram account.
{% endhint %}

### How to Delete a Username

1. In the **Channel Settings** header, find the banner showing your **@username**.
2. Click the **trash icon** on the right of the banner.
3. In the **Delete Username** window, click **Delete**.

Your username is released immediately and is no longer visible to WhatsApp users. You may not be able to reclaim the same handle straight away.

To **change** your username, delete the current one and claim a new one using the steps above.

### Example

**Scenario:** Maya Cakes, a home bakery, runs Instagram ads but customers keep losing the bakery's phone number. The owner wants customers to find the bakery on WhatsApp by name.

1. The account **Owner** opens **WhatsApp → Channel Settings** and selects the **Maya – Gupshup** number.
2. She clicks **Claim** on the **Claim username** banner. The suggestions show **@mayacakes** and **@mayacakesbakery**.
3. She selects **@mayacakes** and clicks **Claim**.
4. The banner turns yellow with **Username successfully reserved**. Once Meta activates usernames in her region, it turns green — and customers can now find the bakery on WhatsApp by searching **@mayacakes**, no phone number needed.

### FAQs

<details>

<summary>I claimed a username but it says "Reserved" — why can't my customers see it?</summary>

**Reserved** means Meta accepted your request and is holding the handle for you, but the username feature hasn't been rolled out in your region yet. It switches to **Approved** and becomes visible automatically once Meta activates the feature — you don't need to do anything.

</details>

<details>

<summary>The Claim button is greyed out for me. Why can't I click it?</summary>

Claiming and deleting usernames requires the **Update Channel** permission, which Admins and Owners have. Ask an admin or owner on your account to claim the username, or to upgrade your role.

</details>

<details>

<summary>I don't see the Claim username banner in Channel Settings at all.</summary>

The banner only appears for WhatsApp channels connected through the Cloud API (Meta, Meta Tech Partner, Gupshup, Tata, Karix, Redington, or a custom partner). It's not available on sandbox channels or numbers connected via WhatsApp Co-existence.

</details>

<details>

<summary>My username was rejected even though it follows the character rules.</summary>

Meta enforces extra rules beyond the character set: the username must contain at least one letter, can't start with "www", can't end with a domain suffix like .com or .in, and can't start/end with a period or contain two consecutive periods. It also fails if the exact handle is already taken by any other WhatsApp number — usernames are unique across all of WhatsApp.

</details>

<details>

<summary>It says the username is already in use by another phone number in my portfolio.</summary>

A username maps to exactly one phone number. If another number in your business portfolio (or your Facebook Page / Instagram account) already holds that handle, either pick a different username, or release it from the other number first. If the handle belongs to your Facebook Page or Instagram account, link your WhatsApp business phone number to that Page or account in Meta Business Suite, then claim it again.

</details>

<details>

<summary>I deleted my username by mistake — can I get it back?</summary>

Claim it again from the same **Claim username** banner. Be aware the handle may not be immediately available for reclaiming after deletion, and another business could claim it in the meantime.

</details>

<details>

<summary>Will claiming a username hide my phone number?</summary>

No. A business username does not hide your business phone number in WhatsApp — customers who have your number can still see it. The username is an additional way for customers to find you.

</details>

### Next Steps

* Complete your WhatsApp profile (display picture, address, business description) in **Channel Settings → Profile** so customers who find you by username see a complete business page
* Add your **@username** to your Instagram bio, website, and marketing material once it shows **Approved**


# Gallabox Conversations Glossary

Discover key conversation terms in Gallabox with our alphabetical glossary. Get clear definitions for a better understanding. Start exploring now!

This Glossary provides definitions for key terms related to conversations in Gallabox. The glossary is organized alphabetically.

<details>

<summary><strong>AI Rewrite</strong></summary>

A feature that allows users to rewrite messages using artificial intelligence (AI).

</details>

<details>

<summary><strong>Attach Files</strong></summary>

The ability to add files, such as images, videos, and documents, to customer messages.

</details>

<details>

<summary><strong>Assigned conversation</strong></summary>

A conversation that has been assigned to a specific team member.

</details>

<details>

<summary><strong>Canned Responses</strong></summary>

Pre-written messages that can be quickly inserted into conversations.

</details>

<details>

<summary><strong>Chat Window</strong></summary>

The window where chat conversations take place.

</details>

<details>

<summary>Compose Box</summary>

The text box where users can create messages for customer chat, include private notes, and mention team members.

</details>

<details>

<summary><strong>Contact Tags</strong></summary>

Labels that can be applied to contacts to organize and track them.

</details>

<details>

<summary><strong>Conversation filter</strong></summary>

A way to view only conversations that meet certain criteria, such as tag, status, or team member.

</details>

<details>

<summary><strong>Conversation note</strong></summary>

A private note that can be added to a conversation to track its progress or share information with other team members.

</details>

<details>

<summary><strong>Emojis</strong></summary>

Symbols and emoticons that can be used to add expression and personality to messages.

</details>

<details>

<summary><strong>Formatting</strong></summary>

The ability to format customer messages using bold, italics, strikethrough, and code.

</details>

<details>

<summary><strong>GIF</strong></summary>

A short animated image that can be used to demonstrate a process or to add personality to a message.

</details>

<details>

<summary><strong>Mention</strong></summary>

The act of notifying a Gallabox user about a customer conversation by using their name in a note.

</details>

<details>

<summary><strong>New conversation</strong></summary>

A conversation that has not yet been assigned to a team member or tagged.

</details>

<details>

<summary><strong>Open conversation</strong></summary>

A conversation that is currently active and being handled by a team member.

</details>

<details>

<summary><strong>Product Catalogue</strong></summary>

A list of products that can be shared with customers in a single message.

</details>

<details>

<summary><strong>Record Audios</strong></summary>

The ability to record and send voice messages to customers.

</details>

<details>

<summary><strong>Request Payments</strong></summary>

The ability to request payments from customers via WhatsApp.

</details>

<details>

<summary>Saved Contact</summary>

A contact that has been saved in Gallabox.

</details>

<details>

<summary>Session Messages</summary>

These are responses from your business to a customer, when a *customer **initiates*** a conversation with your business on WhatsApp.

</details>

<details>

<summary><strong>Shared inbox</strong></summary>

A single inbox where all team members can view and manage conversations.

</details>

<details>

<summary><strong>Team member</strong></summary>

A user who has been assigned access to a Gallabox account.

</details>

<details>

<summary><strong>Translate</strong></summary>

A feature that allows users to translate incoming and outgoing messages into different languages.

</details>

<details>

<summary><strong>Unsaved Contact</strong></summary>

A contact that has not yet been saved in Gallabox.

</details>

<details>

<summary><strong>WhatsApp Templates</strong></summary>

Pre-approved messages that can be sent to customers using WhatsApp Business API. They are used to send a message on WhatsApp **to a contact who hasn't been in touch with your company before or who hasn't replied to an existing chat since at least 24 hours.**

</details>


# Team Inbox

Gallabox Conversations: Your superhero sidekick for building connections with customers. Handle inquiries, address concerns, and gather feedback effortlessly!

Gallabox Conversations is not just a tool; it's your superhero sidekick for building incredible connections with your customers. Imagine a world where you effortlessly handle customer inquiries, address concerns, and gather priceless feedback – that's the magic of Conversations!

<figure><img src="/files/3fSt6wKLA7N7sEm11ism" alt=""><figcaption></figcaption></figure>

> Picture this: You are a part of a dynamic 10-member team, and you're itching for a seamless way to tackle conversations across Whatsapp and Instagram Channels. Enter **Gallabox Conversations** – *your ultimate problem-solver*. When a customer drops a message on your WhatsApp, this tool swoops in to save the day. You can set it up to automatically assign messages – whether to a [super-smart chatbot](/bots/gallabox-bot-glossary) for lightning-fast responses or evenly distribute them among your awesome team using a [round-robin approach](/whatsapp-channel/assignments-rules).

<figure><img src="/files/hqlyliLnHP7vTtIYlTOQ" alt=""><figcaption></figcaption></figure>

But hold on, there's more to this superhero tool! **Gallabox Conversations** isn't just about message distribution; it's about boosting teamwork. Team members can use [mentions](/conversations/compose-box#mention), [share media](/conversations/compose-box#attach-files), [unleash powerful templates](/conversations/compose-box#whatsapp-templates), and a [whole lot more](/conversations/compose-box).

**The goal?** To supercharge your customer interactions, making it a breeze for you and your team.


# Initiate a New Chat

Learn how to initiate chat with customers using 4 different methods.

You can initiate a Chat with a customer if you have added their contact in Gallabox or you can add a contact and then send the customer a WhatsApp Template.

{% hint style="info" %}
You can only use [WhatsApp Templates](/basic-modules/whatsapp-template-guidelines) to initiate a conversation with a customer.
{% endhint %}

**Prefer a visual explanation?** Watch the video below.

{% embed url="<https://www.youtube.com/watch?v=jPR5uVsUQbA>" %}

**Prefer a written explanation?** Read the text below.

## Initiate chat with Customers in 4 ways

### Start Chat with Saved Contact in Gallabox Conversations

Follow the below steps to start a chat with the saved contact.

1. From the dashboard, go to "**Conversations**".

<figure><img src="/files/Na1AQzGOveZaFEeYulKk" alt=""><figcaption></figcaption></figure>

2. Click on <img src="/files/HdJCw2gqvw2lGeAdb2US" alt="" data-size="line"> to choose the contact you want to start the conversation with. Once you select the contact, the chat window will open.

<figure><img src="/files/kBIkwKXXzZOvni1pXiKW" alt=""><figcaption></figcaption></figure>

3. To start a chat with this contact, select a pre-approved template that you would want to send to the contact, fill variables and click send.

<figure><img src="/files/ab2GU5CLHCgSBzdeH1q2" alt=""><figcaption></figcaption></figure>

### Send WhatsApp Template to Unsaved Contact in Gallabox

If you want to send a message to a contact which is not yet saved on Gallabox, you can *create a contact* and then send a WhatsApp Template as a first Interaction.

Follow the GIF below:

<figure><img src="/files/rsAi3ADPJKXEmGujUU9h" alt=""><figcaption></figcaption></figure>

### Individually Send Text to Gallabox Contact

If you individually want to send a text to a contact (*while you are scrolling your contacts in Gallabox*), you can send it by clicking on <img src="/files/16k74HSmT69eFhBwFmre" alt="" data-size="line">as shown in the GIF below:

<figure><img src="/files/3bcKXBwPJUQMEVK6dHDy" alt=""><figcaption></figcaption></figure>

### Responding to the customer's message

When a customer sends you a message, you can instantly respond and engage in a chat conversation.

<figure><img src="/files/WmuYsDDvrCZNYg2fOHqo" alt=""><figcaption></figcaption></figure>


# Compose Box

Enhance productivity with features like triggering bots, attaching files, using emojis, and more.

The compose box is intended for Gallabox users to create messages for customer chat, include private notes, and mention team members.

The below screenshot displays how a **Compose Box** looks inside Conversations. You can either send a Response to the customer using [**Reply** ](#reply)or you can [**mention** ](#mention)Gallabox user in a private message using [**Notes**](#notes).

<figure><img src="/files/c0TLZeTZFtGLwLwJW5oE" alt=""><figcaption></figcaption></figure>

### Reply

Apart from sending a [session message](#user-content-fn-1)[^1] or [WhatsApp Template](#user-content-fn-2)[^2] (in case of first Interaction), you can add enclose [attachments](#attach-files), [Emojis](#emojis), [Format the text](#formatting), choose from the [Canned Response](#canned-responses), [Send WhatsApp templates](#whatsapp-templates), [rewrite using AI](#ai-re-write), and [translate](#translate) the message in your customers' language.

<details>

<summary>Product Catalogue</summary>

With Gallabox, you can search for products by their names, making it super convenient. You can share up to 30 products in one message. Whether you're showcasing a single item or a whole collection, we've got you covered for a smooth shopping experience.

<img src="/files/Y1aJ0OhsBztrJ5eTuJDA" alt="" data-size="original">

</details>

<details>

<summary>Attach Files</summary>

You can quickly find your recently used files with the 'Use Recent Files' feature and easily add new ones with 'New Upload.'

<img src="/files/8SnM0GukKW3vrO4Sj1jn" alt="" data-size="original">

</details>

<details>

<summary>Request Payments</summary>

You can easily request payments via WhatsApp. You choose the payment amount in USD, INR, EUR, and AED. Include a personal note to your payment request message to convey the purpose of the payment.

<img src="/files/UCycTrQKq7oxBYOfOlGs" alt="" data-size="original">

</details>

<details>

<summary>Record Audios</summary>

The "Record Audio" feature allows you to capture and send voice messages in your conversations.

<img src="/files/bLuqTd2oAd9zqCVJpwsn" alt="" data-size="original">

</details>

<details>

<summary>Emojis</summary>

Add Emojis with your text message to make the content **more engaging and visually appealing.**

<img src="/files/RuwYnLsXVxGJKsbqAYaR" alt="" data-size="original">

</details>

<details>

<summary>Formatting</summary>

You can format your content **Bold**, *Italic*, ~~Strikethrough~~, and paste a `code` within a message.

* Use **Bold** and *Italics* to highlight important words and phrases.
* Use ~~strikethrough~~ to cross out text, such as a discount offer or a change of plans.
* Paste `code` within a message to make it more engaging.

</details>

<details>

<summary>Canned responses</summary>

Canned responses can be used to save time and improve efficiency. They are typically used to answer frequently asked questions or to provide customers with standard information.

<img src="/files/QGt4YrRWnV0pbo6OjuYM" alt="" data-size="original">

</details>

<details>

<summary>WhatsApp Templates</summary>

WhatsApp templates are pre-approved messages that can be used to send updates, alerts, and other important information to customers. They can be customized to include specific information, such as the customer's name, order number, or appointment time making them more relevant and engaging for customers.

<img src="/files/DuroOV78gMqAFVgvg8s4" alt="" data-size="original">

[Learn more](/basic-modules/whatsapp-template-guidelines) on how you can create WhatsApp Templates in Gallabox.

</details>

<details>

<summary>AI Re-Write</summary>

Use AI to rewrite text in a different way to make the text shorter or longer, to improve its grammar & clarity, or to change its tone.

<img src="/files/VGPC4WzeTLMr4VLYGMEE" alt="" data-size="original">

You can:

1. **Change Tone** of the text: You can choose from **Professional**, **Friendly**, and **Humorous** tone for your text message.
2. Do **Spell & Grammar Check** of the text: Check the text message's Grammar and spelling to maintain professionalism with your customers.
3. **Make the text shorter**: You can make your text message short and crisp using this option.
4. **Make the text longer**: Use this option to make your content descriptive.
5. **Simplify Sentence**: Simply your text message for your customers to understand better.

The Quick AI-Rewrite button is positioned close to the Send button for better visibility.

![](/files/EVHZXxGaLc7EYqa6uBQh)

**The AI-Rewrite will be enabled once you input three words.**

<img src="/files/EVHZXxGaLc7EYqa6uBQh" alt="" data-size="original">

</details>

<details>

<summary>Translate</summary>

Translate the text from your native language to customer's native language with AI translate.

<img src="/files/tVm7yWWFHKAPBFqLhZZS" alt="" data-size="original">

You can also [translate ](#user-content-fn-3)[^3]the incoming message directly in the chat box. Follow the below GIF.

<img src="/files/RqG3z8ZKhwQON8lnyPK9" alt="" data-size="original">

**Make sure you have** [**selected**](https://docs.gallabox.com/conversations/pages/ai7R4ULkJ4ZZtjOoS116#5.-language) **your Native Language for the Account.**

You can also view the source language for the translated message in the message info.

![](https://docs.gallabox.com/~gitbook/image?url=https%3A%2F%2F3137140735-files.gitbook.io%2F%7E%2Ffiles%2Fv0%2Fb%2Fgitbook-x-prod.appspot.com%2Fo%2Fspaces%252FZcl3T6ePz95GpzjAeOLW%252Fuploads%252FlIWaqVnkWTmxQwoUBLEV%252FSource%2520Language.png%3Falt%3Dmedia%26token%3D6599f098-519a-4edb-a2d0-4dcc8b98387c\&width=768\&dpr=4\&quality=100\&sign=85d60d69\&sv=1)

</details>

### Trigger Bot

**Prefer a visual explanation?** Watch the video below.

{% embed url="<https://www.youtube.com/watch?v=IO4cizCm5lQ>" %}

**Prefer a written explanation?** Read the text below.

Gallabox provides users with the capability to trigger bots directly from the compose box. This feature streamlines workflows, enhances productivity, and ensures seamless integration of automated responses into your conversations. You can trigger Bot right from your compose box in two ways:

1. Using the Bot Trigger icon
2. Using Reply to Config
3. Use Button Payloads

#### **Accessing the Bot Trigger Icon:**

Within the compose box interface, users will find a dedicated icon for triggering bots. This icon is conveniently located for easy access during message composition. A flow has to be selected which you want to trigger, the conversation will get assigned to bot and flow will be triggered.

<figure><img src="/files/YqScKJRXdI7H1ynMVTee" alt=""><figcaption></figcaption></figure>

{% hint style="info" %}
Note:

1. Recently created 25 flows will show in the list. You can search the other flows using the search bar.
2. Flow will be listed within the respective bots, after selecting a flow, the user can trigger the bot flow.
3. Once a flow is triggered, all the cards from the flow will be triggered without any intent.
   {% endhint %}

#### **Accessing the Reply to Config**

When you are sending a Template, under Advanced options, you will see ***Reply to Config Settings***. You can *Assign* the conversation to any Bot flow.

<figure><img src="/files/yjXRDonU7Q1xvjK46Emn" alt=""><figcaption></figcaption></figure>

{% hint style="info" %}
The chat will be assigned to you and will be moved to MINE tab.
{% endhint %}

#### Button Payloads

In your WhatsApp Templates, if you've incorporated buttons, the payload serves as a trigger or intent for a Bot flow, activating the Bot upon selection. Follow the below GIF to add the payload for a button.

<figure><img src="/files/Kro0jRNU480oAVg0Lkbd" alt=""><figcaption></figcaption></figure>

### **Notes & Mention**

**Prefer a visual explanation?** Watch the video below.

{% embed url="<https://www.youtube.com/watch?v=Qq5yAihzVqU>" %}

**Prefer a written explanation?** Read the text below.

Gallabox's note-taking tool works like your modern-day sticky notes, a helpful way to attach internal comments or context to customer conversations. Notes enhance your understanding of the customer's concern and enable smooth collaboration across teams.

<figure><img src="/files/YwcOuwwdmw4fZ56EycUT" alt=""><figcaption></figcaption></figure>

{% hint style="info" %}
These notes are **internal-only**, meaning your customers never see them. They appear in a **yellow text bubble** to distinguish them from chat messages.

<img src="/files/eD08HFfBJs2hGEl6WQgJ" alt="" data-size="original">
{% endhint %}

When you mention a teammate using `@name` in a note, that conversation becomes visible in their [**Mention Inbox**](/conversations/inboxes#mentions-inbox), allowing for quick and efficient handovers.

<figure><img src="/files/jaeLPelzfmcL8ZA2WE2u" alt=""><figcaption></figcaption></figure>

You can also:

* Mention multiple teammates in a single note

<figure><img src="/files/GFi9bKeZXXgDByu9C8ul" alt=""><figcaption></figcaption></figure>

* Remove mentions from a chat if they’re no longer relevant

<figure><img src="/files/Hymilu64jGLGhQ0IPk5A" alt=""><figcaption></figcaption></figure>

To make it even easier to access and manage notes, Gallabox now offers a **Note Drawer** — a panel that opens from the side of your screen and displays all notes from a conversation in one view.

To view:

* Inside the **Conversation Inbox**, click the **three-dot menu** (⋮) on the top right. Choose **"View Notes."**

<figure><img src="/files/vwzC2rZV7iWLznmiVss5" alt=""><figcaption></figcaption></figure>

* The drawer will slide in from the right, showing a list of all notes related to that conversation.

<figure><img src="/files/dfVmSNiulwju0yGW408z" alt=""><figcaption></figcaption></figure>

* Click any note to **jump to its original location** in the chat — it’ll be highlighted briefly for easy reference.
* The drawer stays open even if you switch between the **message** and **note** composers.

### Receive and send reactions on Cloud API

Users can express their feelings, opinions, and responses to messages using predefined reactions like thumbs-up, thumbs-down, emojis, or other interactive options.

Hover to the Add reaction in the conversation pane to pick an emoji.

<figure><img src="/files/aZpAApxKfpk9GDjdGqDO" alt=""><figcaption></figcaption></figure>

To remove the reaction you can click on the reaction on the message.

<figure><img src="/files/hkq8Yzbiw3TFezvCGomj" alt=""><figcaption></figcaption></figure>

[^1]: These are **responses** from your business to a customer, **when a&#x20;*****customer initiates*** a conversation with your business on WhatsApp.

[^2]: These are used to send a message on WhatsApp **to a contact who hasn't been in touch with your company before or who hasn't replied to an existing chat since at least 24 hours.**

[^3]: Translate into your language.


# Inboxes

Gallabox streamlines your chats into different inboxes like Unassigned, Mine, Mentions, Pinned, Open, and Resolved. Manage and organize your conversations effectively with Gallabox!

Gallabox streamlines your chats into various inboxes, providing an effective way to manage and organize your conversations.

Let's explore how to make the most of these chat organization features!

The different inboxes are : [**Unassigned**](#unassigned), [**Mine**](#mine), [**Mentions**](#mentions), [**Pinned**](#pinned), [**Open**](#open), and [**Resolved**](#resolved).

Let's take a closer look:

At the top, horizontally, you'll find six inboxes to sort your chats:

<figure><img src="/files/4LJZSDPted2qjBsfkwww" alt=""><figcaption></figcaption></figure>

### Unassigned Inbox <img src="/files/fDu0mXcTCuqeLagp5O1A" alt="" data-size="original">

Here you will find the conversations that are not assigned to any agent yet. Anytime a customer replies to a broadcast you shared or a new customer reaches out, the chat will be in Unassigned Inbox. They will be visible to all the Gallabox users.

### Mine Inbox <img src="/files/3WsqI3GhhRDCGfROzNX4" alt="" data-size="original">

If a Gallabox user replies to a chat that is in [Unassigned](#unassigned) Inbox, it will shift to Mine Inbox and will be assigned to that user. The Gallabox users can have a to and fro conversation.

### Mentions Inbox <img src="/files/RK2Y1YSOKMJZCxSYRewJ" alt="" data-size="original">

For more effective collaboration, you can [mention](/conversations/compose-box#mention) your team-mates within a customer's chat using @name and the conversations will be listed under Mention inbox.

### Pinned Inbox<img src="/files/n31vnBWeEXsVdjrDEcHR" alt="" data-size="original">

With the "**Pinned**" feature, you can have a visibility of specific chats for easy access and quick retrieval.

### Open Inbox <img src="/files/jqprsWnHM7KDKi7tI7f9" alt="" data-size="original">

Open chats provide a comprehensive overview of all customer conversations with Gallabox users, enhancing overall efficiency.

### Resolved Inbox <img src="/files/HItM1Mf9HTdM33xAOJwy" alt="" data-size="original">

Gallabox users can mark a chat as "[**resolved**](/conversations/manage-inbox#resolve-chat)" when they have successfully addressed a customer's query, making it easy to distinguish between chats that are still open and require attention, and those that are resolved and no longer need to be reviewed.


# Manage Inbox

Easily manage user assignments with Gallabox. Set reminders, track session windows, and organize conversations with tags. Block and unblock contacts with a simple click.

### User Assignment

User assignment is crucial for a smoothly functioning shared inbox, facilitating teamwork and improving efficiency by distributing tasks effectively. With Gallabox, you have the flexibility to assign chats to Gallabox Users, Team, or to a Bot created within the system.

<figure><img src="/files/sAwR8uUTJ2QN8TjhA0M2" alt=""><figcaption></figcaption></figure>

Conversations assigned to a team but not yet to an agent will appear in the unassigned tab, where agents can manually assign to themselves. In the shared team inbox header, the assignment dropdown will show all teams, users, and bots eligible under their plan, provided they have at least one team in their account.

Users with the “Can view and manage all of their teams' conversations” permission can view their team conversations, while those with the “Can view and manage all conversations” permission can access all conversations across all teams, provided they have access to the relevant channel.

#### Assign a Conversation to a Team:

If teams are selected in the assignment rules drop-down, we will filter and display the teams mapped to the channel. For old teams without a channel ID, we will display all teams. Since old teams lack a mapped channel, we will assign conversations to the team and use the default round-robin method. Users with access to that channel can view and manage the conversation; otherwise, it will be marked as unassigned.

#### Assign a Conversation to a Bot:

The assignment rules should function as usual. For new bots or when editing an existing flow, all teams should be displayed in the drop-down when "assigned to team" is selected for both actions and the assignment node.

{% hint style="info" %}
Note:

1. If the bot is running in channel 1 and team A (used for assignment) has all its users mapped to channel 2, all conversations will be moved to unassigned.
2. If the bot is running in channel 1 with team A assigned, and team A is mapped to channel 2, all conversations will also be moved to unassigned.
3. You can assign conversations to either a team or an individual user. If a conversation is assigned to a team, the team will use round-robin approach to distribute the conversation to an agent or leave it unassigned, depending on the chose method of assignment.
4. If assigned to a bot, the bot will engage with the user. For user assignments, an empty team icon will be displayed next to the assignment dropdown, allowing the agent to map the conversation to their team if needed.
   {% endhint %}

#### Remove Team assignment

If you want to remove Team Assignment, click on the Team icon and select remove team option.

### Follow-up Reminders

**Prefer a visual explanation?** Watch the video below.

{% embed url="<https://www.youtube.com/watch?v=vzmu1jhG5Js>" %}

**Prefer a written explanation?** Read the text below.

Add the reminder to follow-up for a conversation. The reminder will alert agents within the contact conversation as a private note. You have [Predefined ](#user-content-fn-1)[^1]and [Customized ](#user-content-fn-2)[^2]type of reminders.

{% hint style="info" %}
Setting a reminder for a conversation will ensure that it is prioritized and appears at the top of the assigned conversations list at the designated time.
{% endhint %}

<figure><img src="/files/SiyrVoQ8xjP7D85jlhC1" alt=""><figcaption></figcaption></figure>

### Conversation Window Session

This displays the timer for WhatsApp's [24 hour Session Window.](#user-content-fn-3)[^3]

<figure><img src="/files/kkYDODrvZ4871PKL4zga" alt=""><figcaption></figcaption></figure>

You can also track the 24 hour session window for the contacts assigned you by monitoring the the ring around their contact thumbnail.

<figure><img src="/files/THbO6GG8alhfR7ZYa0Lk" alt=""><figcaption></figcaption></figure>

### Conversation Tags

**Prefer a visual explanation?** Watch the video below.

{% embed url="<https://www.youtube.com/watch?v=fStb6PZkISY>" %}

**Prefer a written explanation?** Read the text below.

Conversation tags are ***labels*** you can assign to chats helping you *categorize* and *organize* based on specific criteria, topics, or statuses. This makes it easier to search for, track, and manage conversations, enhancing overall communication efficiency.

You can either create a Tag before assigning it to a chat or you can type and click on Create Tag option to create & assign Tags withing seconds.

Let's see how you can do that in the below GIF:

<figure><img src="/files/rm1T4d2Z08cGkSI3QRQ2" alt=""><figcaption></figcaption></figure>

{% hint style="info" %}
When a tag is added to a chat, it stays linked to that specific version of the chat. If that chat is later marked as resolved and then reopened, Gallabox treats it as a *new* chat. That means it gets a new ID, and any tags from the original chat would not carry over automatically.
{% endhint %}

### Block the Contact

Click on the three dots <img src="/files/16k74HSmT69eFhBwFmre" alt="" data-size="line"> on the right side of the chat to view the ***Block*** action you can perform.

<figure><img src="/files/IMCYmVgBBgX3aTLRQfR7" alt=""><figcaption></figcaption></figure>

Once you **Block** the contact, you cannot send or receive messages. If you want to send a message to a Blocked contact, [*unblock*](#unblock-the-contact) them and then send message.

### Unblock the Contact

Click on the three dots <img src="/files/16k74HSmT69eFhBwFmre" alt="" data-size="line"> on the right side of the chat to view the ***Unblock*** action you can perform or you can click on Unblock Button at the bottom of the Chat section as shown in the GIF below:

<figure><img src="/files/Z3RnLqnBBafeY1Z3CAGB" alt=""><figcaption></figcaption></figure>

### Resolve Chat

This enables the chat to be resolved once appropriate support has been provided to customers.

<figure><img src="/files/aUoP2C97A3dPYeZfX6qx" alt=""><figcaption></figcaption></figure>

{% hint style="info" %}
If there is a follow-up set for a conversation and it is resolved, users will be prompted to choose one of the following options:

1. Clear follow-up and resolve
2. Remind the follow-up at the set time

If the "**Clear follow-up and resolve**" option is selected, the follow-up will be cleared, and the conversation will be resolved as usual.

If the "**Remind when it's time**" option is selected, a private note of the follow-up, along with a mention of the person who configured the follow-up, will be added to the conversation and it will automatically be unresolved and assigned back to you.

<img src="/files/FKx9QHoJOQFIrtd1b1v5" alt="" data-size="original">
{% endhint %}

### Bulk Action on Chats

To bulk unassign all the chats or assign to a specific Gallabox user or a Bot, go to Table view. Select the chats you would like to assign to a user or a Bot.

<figure><img src="/files/v8YbzRlLfb065zZCjSlj" alt=""><figcaption></figcaption></figure>

[^1]: A reminder can be set 2 hours from, 24 hours from, and 1 week from the exact time it was set.

[^2]: Choose the date and time you would like a reminder according to your clients needs. This customized reminder can also be edited as and when required.

[^3]: When a **conversation is initiated by the user or a user responds to a template message**, the WhatsApp policy allows for a business account to reply within the period of **24hrs**. A session lasts for 24hrs after the last inbound message is sent from the user.


# Views

Easily organize, filter, and prioritize customer conversations with Custom Views in Gallabox.

Gallabox now lets you **create and manage Custom Views** in your Inbox—making it easier to filter, organize, and prioritize conversations based on your business workflows.

### What is a Custom View?

Custom Views allow Admins and Owners to create pre-filtered views of conversations inside the Inbox. These views help you focus on specific types of customer conversations—based on tags, segments, and other filters—without having to set filters repeatedly.

These views are **shared (public)**, so once created, all teammates with access to the relevant channels can use them.

### Why Use Custom Views?

1. **Improve process** by grouping conversations based on business priorities.
2. **Reduce manual filtering** for agents and ensure quick access to high-impact chats.
3. **Improve response time** by giving your teams a ready-made filtered view of conversations that matter.

### Who Can Create & Manage Custom Views?

| Role                                 | Access to Create/Edit/Delete | Access to Use Views                  |
| ------------------------------------ | ---------------------------- | ------------------------------------ |
| Owner/Admin                          | Yes                          | Yes                                  |
| Team Manager/ Member (no permission) | No                           | Yes (if channel access is available) |
| Custom Role (with permission)        | Yes                          | Yes                                  |

> To manage views, a user must have the permission: **Roles → Conversations → “Can create and manage custom views”**

### What Do Custom Views Include?

Custom Views include tabs based on your role and visibility permissions:

1. **Unassigned** – Conversations not yet assigned to any agent or bot
2. **Mine** – Conversations assigned to you
3. **Open** – All active conversations in that view

> Conversations update **dynamically** based on filter criteria. As chat attributes change, the view updates in real time.

### How to Create a Custom View

To create a custom view:

1. Navigate to Conversations, click on 'Create View' on the bottom left side of the window.

<figure><img src="/files/Wb0xlww29rgGBRVyVL2d" alt=""><figcaption></figcaption></figure>

2. In the pop-up, enter the name for the view you will be creating. You can also customize the view icon as per your needs.

{% hint style="info" %}
Each view must have a **unique name** — even across different users.
{% endhint %}

<figure><img src="/files/6oGlPr0c3hV1msRuUzhh" alt=""><figcaption></figcaption></figure>

3. The **WhatsApp channel** will be selected for which this view should apply (mandatory). If you have more than one channel connected, you can change it based on your requirements.

<figure><img src="/files/Ge0HH6PHC6X4PeQ9BsjJ" alt=""><figcaption></figcaption></figure>

4. Choose from the available Criteria's:
   * **Conversation Tags** – e.g., “Hot lead”, “Support”
   * **Segments** – pre-defined user segments from your account
   * **Contact Fields** – e.g., Country = India, Plan = Pro

To make your view more precise, apply filters As you apply filters, Gallabox shows a preview of matching conversations so you can validate before saving.

{% hint style="info" %}
You can use **up to 5 filters** in total.
{% endhint %}

<figure><img src="/files/WC2ZJkJKNhc7BAJIsoZQ" alt=""><figcaption></figcaption></figure>

5. Click **‘Save View’** to make it available in the Inbox for all users with access to the selected channel.

<figure><img src="/files/ZsirG3dEK9gCTWqTW7B3" alt=""><figcaption></figcaption></figure>

All views are **public by default**. Everyone with access to the selected channel can see and use them.


# Efficiently using inbox

Optimize the Inbox with Chat Filtering, efficient message searches, and Quick Contact Views. Search chats and view contact info. Get detailed insights into message status, source, and more.

We will delve into the essential features that make optimizing the Inbox a breeze: Chat Filtering, efficient message searches, and the convenience of Quick Contact Views.

### **Filter conversations**

On the top left side, you also have the option to sort out what type of chats you would like to see:

Available inboxes to filter are:

* **Open** - Shows ALL chats apart from the Unassigned Inbox chats.
* **Unread** - Chats that have not read yet or are under the Unassigned Inbox.
* **Resolved** - Chats that are resolved after providing correct resolution to customer's issues.

#### **Filter by Tags**

It is possible to filter Open, Resolved, and Unread Chats according to a specific conversation tags associated with them.

<figure><img src="/files/Shp5JUYzD5DFk3rIkzYr" alt=""><figcaption></figcaption></figure>

#### **Filter by Assign to**

You can sort your chats Gallabox User wise and see how many chats every Gallabox user is working on.

<figure><img src="/files/CmGwAca9RgRV9LHlkVmY" alt=""><figcaption></figcaption></figure>

#### **Filter by Channel**

You can see all Resolved, Open, or Unread Chats [Channel ](#user-content-fn-1)[^1]Wise. If you have more than 1 Channel[^1] connected with Gallabox, this filter will be useful.

<figure><img src="/files/eS4uuNvOyMJmt2MnIL1J" alt=""><figcaption></figcaption></figure>

#### Search Chat

Search any message within the customer's chat utilizing this button.

<figure><img src="/files/BSRxhvG9rEyfs67p5T1S" alt=""><figcaption></figcaption></figure>

#### Contact View

You can see the contact information for the customer who you are conversing with. Gallabox allows you to edit or change the information like email address, or Contact Tags or any other field while you are in the middle of providing a solution to your customers.

<figure><img src="/files/Bf6p711R3EUnmdSgH0Zx" alt=""><figcaption></figcaption></figure>

#### **Message Info**

Gallabox provides an extensive look into WhatsApp message details, including message status, source, and error handling. This feature is essential for businesses to manage communications and troubleshoot efficiently.

#### **Message Tracking and Details**

Gallabox offers detailed insights into each message's status, source, send time, delivery time, and read status, empowering users with valuable information to monitor and manage their communications effectively.

* **Message Status:** Indicates the current status of the message, such as Sent, Delivered, or Read.
* **Message Source:** Identifies the origin of the message, providing clarity on its source, whether it's from a Sequence, Broadcast, API, Bot, Integration, or manual agent sending via conversation.
* **Send Time:** Displays the timestamp indicating when the message was sent.
* **Delivered Time:** Indicates the timestamp when the message was successfully delivered to the recipient.
* **Read Status:** Indicates whether the message has been read by the recipient.

<figure><img src="/files/W6aOyuREtOoObGykHcV6" alt=""><figcaption></figcaption></figure>

You can also view the source language for the translated message in the message info.

<figure><img src="/files/4KWyPSWiDYltxERcF5Sb" alt=""><figcaption></figcaption></figure>

#### **Error Handling and Resolution**

In cases where messages encounter errors preventing their delivery, Gallabox provides comprehensive error handling features to diagnose and resolve issues promptly.

* **Message Source:** Identifies the source of the message, aiding in pinpointing the origin of the error.
* **Message Status:** Highlights the status of the message, indicating if it failed to be delivered.
* **Remarks:** Offers additional context or remarks related to the error, providing insight into the nature of the issue.
* **Error Description from META:** Provides specific error descriptions retrieved from Gallabox's metadata, offering clarity on the underlying problem.
* **Possible Solutions:** Offers guidance and recommended solutions for resolving the message error, helping users address issues efficiently.

<figure><img src="/files/07kDyH2lFiyLh6bJNl33" alt=""><figcaption></figcaption></figure>

### Tabular View or Conversation Report

The **Conversation Report** in Gallabox provides a clear, organized view of all your WhatsApp chats. It helps you quickly identify issues, manage conversations efficiently, and improve overall response performance.

Here’s how Gallabox makes chat management easier:

* **Unified View:** See all your conversations in one place for easier tracking and navigation.
* **Advanced Filters:** Quickly find specific chats using filters like date, status, or assignment.
* **Tags:** Categorize chats with custom tags based on topic, priority, or customer type.
* **Assigned To:** Filter conversations by the assigned team member or bot for better coordination.
* **Chat Status:** Easily switch between open and closed chats to stay on top of active discussions.
* **Sort by Date:** Arrange chats by the latest or oldest messages for quick follow-ups.

<figure><img src="/files/fe21jHheDCKoWfQpPY94" alt=""><figcaption></figcaption></figure>

* **Bulk Actions:** Select multiple chats to assign to users or bots, or mark them as resolved—all in one go.

<figure><img src="/files/v8YbzRlLfb065zZCjSlj" alt=""><figcaption></figcaption></figure>

This structured view ensures your team can stay organized, act faster, and never miss an important conversation.

[^1]: WhatsApp Business Number


# Gallabox Conversations FAQs

Discover answers and solutions to common issues with conversation access, management, and functionality in our FAQs. Get insights for using this feature effectively.

Welcome to the FAQs for the Conversation Feature. Here, we provide answers and solutions to common issues related to conversation access, management, and functionality. Browse through to find helpful insights for effectively using this feature.

<details>

<summary>I am not able to see the user in the assignment list.</summary>

Check to see if the user is listed under the users list. If the user has not been added, [add the user](/account-management/user-teams-and-roles#users). If you have added the user already, make sure they have accepted the invite.

</details>

<details>

<summary>I am not able to resolve a conversation.</summary>

You can resolve the conversation only if it is assigned in your name.

</details>

<details>

<summary>Why cannot I see this conversation and I am getting an error message that I do not have access?</summary>

1\. Please check if the chat/conversation is assigned in your name.\
2\. Please check your user & role access, if it is "**member**" the user can only view chats which are assigned to them.\
Note: If the user is mapped to a member access then the user can see only those chats which are assigned to them.

</details>

<details>

<summary>Where I can see the conversation of all my team members?</summary>

Please check whether your roles and responsibilities are mapped as **admin** or **owner**.

* In the conversation page, on the left hand menu you will have a tab name called **OPEN** where you can see all your team members conversations.
* The open conversations are listed based on the recent conversations of Gallabox user with the customers.

</details>

<details>

<summary>Why are all conversations assigned under one Agent?</summary>

* Check the API details of the automated template messages to see if only that agent's name is mentioned. If yes, please change the type to "notification".
* Check whether while using google sheet broadcasting you have mentioned assignee as that agent.
* Check under bot actions whether you have assigned the action under that agent's name.

</details>

<details>

<summary>We have integrated our platform and sending automated template messages, but we are not able to see the messages in the conversation list. How can I know if it has been delivered or not?</summary>

1. There are two options under the analytics tab- [Notifications](/reports-and-analytics/whatsapp-notification-messages) and [Failed ](/reports-and-analytics/whatsapp-failed-messages)messages.
2. Under notification messages, you will be able to see all the delivered messages along with read status. Under failed message tab, you will see all the failed messages along with the reasons.

Note:- Please note that the analytics can be viewed only by the users who are mapped as "**admin**" or "**owner**."

</details>

<details>

<summary>How contact search works in Team Inbox?</summary>

When you search for a contact number in Team Inbox, you will see all recent conversations that customer has had across all your channels, regardless of the conversation status (open, unassigned, or resolved).

When searching for specific messages, the channel color will now be displayed, making it easier to identify where the message originated from. Additionally, for resolved conversations, the "Reopen" button will be available as a secondary option, allowing you to easily resume the conversation if needed.

</details>

<details>

<summary>Why aren't I receiving notifications for WhatsApp messages from customers?</summary>

Below are the possible reasons why this might be happening:

1. You haven't enabled Push Notification in Gallabox.
2. Your browser settings have notifications disabled for this website.
3. Your system notifications are turned off for the browser.

</details>

<details>

<summary>How are failed messages handled?</summary>

If by any chance while sending a Message to your customer, it fails we will update you the reason why this might have happened. You can correct as per the solution provided by us and try re-sending the WhatsApp Message.

You can view all the errors you might encounter while sending WhatsApp message [here](https://docs.gallabox.com/whatsapp-channel/whatsapp-business-api-errors).

</details>

<details>

<summary>What is the average message delivery success rate?</summary>

After META rolled out **Frequency capping** update, protecting WhatsApp users from spam messages, ensuring that users receive a limited number of promotional messages on WhatsApp from businesses over a defined time (not disclosed by META), it is recommended to send only a handful of WhatsApp Marketing Messages to your customers.

Until you are not spamming your customers either by sending a ton of Utility or Marketing Messages, your message delivery rate will be **high**. You can monitor the status of you Messages under [Analytics](https://app.gallabox.com/analytics/report/notification-message).

</details>

<details>

<summary>What if I'm assigned a conversation and I don’t have access to their team?</summary>

A pop-up will inform them that they are assigning the conversation to a user outside their team. If they proceed, the assignment will go through. The user (not part of the team) will be able to view the conversations, but the team will remain the same.

For example, if Rajesh from the QA team is assigned to Vikas from the Engineering team, the assignment will show: Team: QA, User: Vikas.

</details>

<details>

<summary>What to do if I am mentioned in a different team that I do not have access to?</summary>

We will display your name in mentions only if you have access to the channel.

</details>

<details>

<summary>Why am I not able to create tags.</summary>

Check with your Team Admin if the option to manage tags is disabled for your role. If that is the case, you will not be able to create tags in conversation and contacts module but will be able to use the existing tags.

</details>


# Gallabox Contact Glossary

Discover Gallabox, the centralized hub for businesses to efficiently manage and utilize customer data. Simplify contact management for effective communication.

Managing contacts is a crucial aspect of effective communication, and Gallabox provides a centralized hub for businesses to maintain and utilize customer data efficiently.

Now, let's delve into the key terms to understand contacts in more detail.

<details>

<summary><strong>Bulk Contact Import</strong></summary>

The process of importing multiple contacts into Gallabox at once.

</details>

<details>

<summary><strong>Column Preferences</strong></summary>

The ability to rearrange contact fields in the order you prefer.

</details>

<details>

<summary><strong>Contact Owner</strong></summary>

The Gallabox user who is responsible for managing a particular contact.

</details>

<details>

<summary><strong>Contact Tags</strong></summary>

Labels that can be applied to contacts to organize and track them.

</details>

<details>

<summary><strong>Marketing Opt-in</strong></summary>

A setting that indicates whether a contact has opted in to receive marketing messages from your business.

</details>

<details>

<summary><strong>Sample File</strong></summary>

A file that contains example contact information in the format required for Gallabox imports.

</details>

<details>

<summary><strong>Search Bar</strong></summary>

A text field that allows you to search for contacts using keywords.

</details>

<details>

<summary><strong>Simple Import</strong></summary>

A method of importing contacts into Gallabox that allows you to upload only one tag along with the contact information.

</details>

<details>

<summary><strong>Single Contact Creation</strong></summary>

The process of creating a single contact in Gallabox.
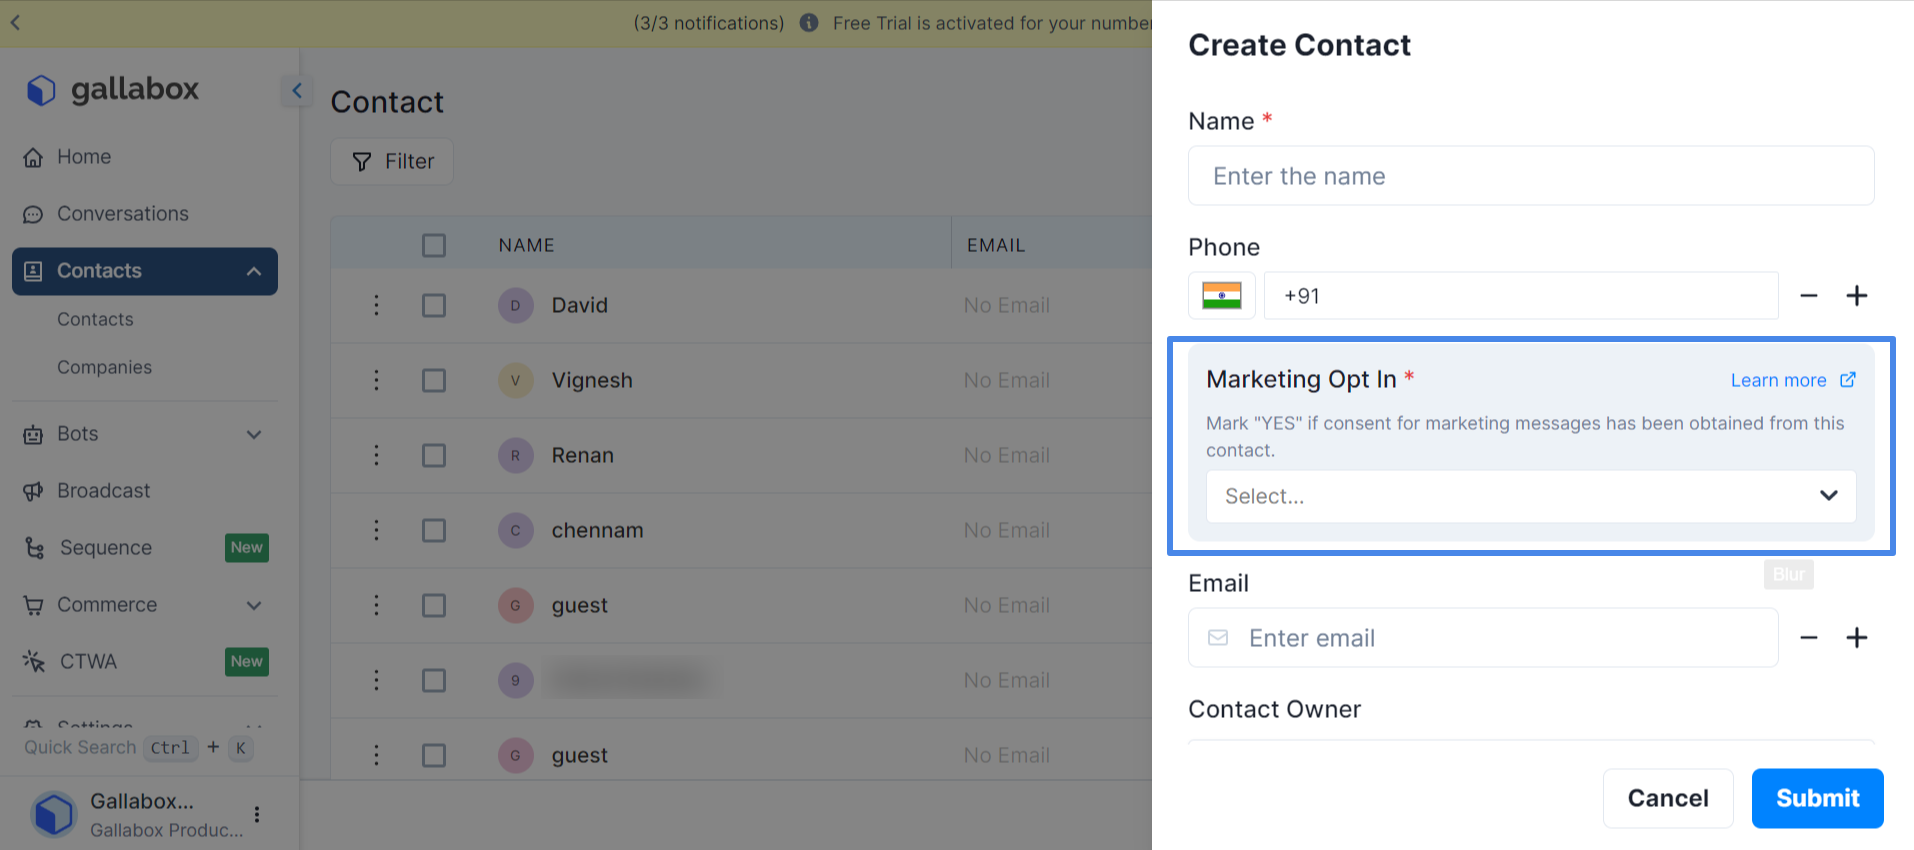
</details>


# Add Contact

Easily create contacts in Gallabox through single contact creation or bulk contact import. Follow simple steps to add details and upload contacts efficiently.

**Contacts** in Gallabox can be created through the below mentioned ways:

* [Single contact creation](#single-contact-creation).
* [Bulk contact import](#bulk-contact-import).
* [User-Initiated Message](#user-initiated-message).

### Single contact creation

To create a Single Contact, click on "Add New". A side window will open prompting you to add the details to create the contact - Name, Phone, email, Tags, and other contact details.

<figure><img src="/files/WD1RJ7idPkGfqhomRWg6" alt=""><figcaption></figcaption></figure>

{% hint style="success" %}
It is possible to add multiple mobile numbers as well as email addresses.
{% endhint %}

### Bulk Contact Import

1. To import contacts in Bulk to Gallabox, you have to click on Import and then "Import File".

<figure><img src="/files/US23JobG3BJEgtQVTBmc" alt=""><figcaption></figcaption></figure>

2. As a next step in the process, download a "**sample file**" for referencing. You can download the sample file either with Country Code or without Country Code.

{% hint style="info" %}
If you are using the sample file without Country Code, your Gallabox Account will add the country code of the country your business is working in by default.\
To change your Business Country - Change the country in [Account Details](/account-management/account-details#country) of your Gallabox Account.
{% endhint %}

<figure><img src="/files/XtPidWRcHh7cKfbFt5Gk" alt=""><figcaption></figcaption></figure>

3. Once you have referred the sample file and created in the same format, you can upload that file to Gallabox. Once uploaded, rename the import file, select the Import type as "**Add New Contacts**".

The marketing opt-in option will remain **Yes** as default. You can also add the contact tags for the contacts you are uploading in Bulk.

<figure><img src="/files/oRaQlt80ikaKvN0C5rXS" alt=""><figcaption></figcaption></figure>

4. The next step is to map the contact fields you have on file with the [Gallabox contact fields](/basic-modules/contact-fields).

If you don't have any contact fields created on Gallabox, you can create it at that moment. Once mapped, click on Confirm and **the contacts will be uploaded in Gallabox.**

<figure><img src="/files/zJBnQzAlKuETuWCUN3Nx" alt=""><figcaption></figcaption></figure>

{% hint style="warning" %}
When importing contacts, in instances where a contact name is not associated with a specific phone number, Gallabox automatically assigns the designation “**Guest**” to such entries.
{% endhint %}

### Auto-Saving Customer Details

When a customer starts a chat, Gallabox automatically saves their mobile number and name in your account. This makes managing contacts easier and keeps your list current without manual updates.

<figure><img src="/files/Wj7DBdOuDVv8kjZc6N1Q" alt=""><figcaption></figcaption></figure>

{% hint style="info" %}
When the contact owner for a specific contact is updated, any new incoming conversation will be automatically assigned to the updated contact owner in the Mine bucket.
{% endhint %}

### Contact Creation Date

After adding a contact to your Gallabox account, you can find out when they were added by looking at their contact details. This date shows you exactly when the contact joined your list. Remember, this information is only available in the main list view and not in their individual details.

<figure><img src="/files/bWORs2DBQjoSOTh2DWOC" alt=""><figcaption></figcaption></figure>


# Contact Segments

### What are Contact Segments?

Contact segments are groups within your contact list, categorized by specific criteria such as Contact Tags, Email, or any other contact field.

By creating contact segments, you can personalize your communications and marketing efforts, ensuring that each message is tailored to the interests and needs of specific groups within your contact database.

### Video Guide

{% embed url="<https://youtu.be/-cFPc4gAuKk>" %}

### How to create a Contact Segment?

To create a contact segment, follow the below steps:

1. Navigate to the Contacts section from the left navigation of your Gallabox Account.

<figure><img src="/files/05mrvuRXD6i0sPWPJutT" alt=""><figcaption></figcaption></figure>

2. Choose the "Segments" option.

<figure><img src="/files/CRedoh1lzwD3tckPMQRp" alt=""><figcaption></figcaption></figure>

3. Click on the "New Segment" button.

<figure><img src="/files/PlcLzzeCK7QHq7JjuxR9" alt=""><figcaption></figcaption></figure>

4. Add the specific criteria for your segment. You can use the filters such as Contact Tags, Email, Subscription Date, or any other relevant information.

<figure><img src="/files/qUkq6Q7XzRtTM3KDEFmC" alt=""><figcaption></figcaption></figure>

5. Give your segment a name and click "Save".

<figure><img src="/files/NBqUSha6zvVROhM8NGpB" alt=""><figcaption></figcaption></figure>

Your new contact segment is now ready, and you can use it to target specific groups for your campaigns.


# Contact Management

Manage contacts efficiently with Gallabox! Learn how to push contacts to sequences, filter contacts by specific criteria, and customize column preferences for a streamlined experience.

Contact Management is an important aspect of ensuring your contacts are organized. This article explores how to push contacts to sequences, utilize filters, search through contacts, and adjust column preferences for a streamlined experience.

### Push to Sequence

Pushing to Sequence enables automated follow-up actions and efficient contact categorization. Make sure to create a [sequence ](/whatsapp-drip-campaigns/understanding-drip-marketing)before following the steps.

To push the contacts to Sequence, follow the steps below:

1. In Contacts, select the contacts you would like to Push for Sequence.

<figure><img src="/files/qSko66rqQ7zoz2WUEhHd" alt=""><figcaption></figcaption></figure>

2. Select the option "**Push to Sequence**" at the top right corner. A pop-up will appear to select the Channel and the published sequence to enroll the contacts in.

<figure><img src="/files/Gmq8MqYywuiDJmea09wC" alt=""><figcaption></figcaption></figure>

3. Choose the Channel and the Sequence name from the dropdown. Click on "Push Contacts".

<figure><img src="/files/aM7mEY6zayQdpVB4hPVM" alt=""><figcaption></figcaption></figure>

The contacts will be pushed to sequence.

{% hint style="info" %}
You can also push contacts to a desired sequence using Action option in the workflow for Integrations.

For Instance: If you would like to push the contacts from Shopify to a sequence, choose the option - "**Push to Sequence**" in the dropdown of [Action button](/integration/e-commerce-platforms/shopify/workflows-for-shopify).
{% endhint %}

### Filter Contacts

Click on the "Add Filter" button on the left of the screen to reveal the filters. Contacts can be filtered by the parameters set to collect contact data. To filter click on "**Add Filter**", input the necessary information, and click "**Apply**".

Common conditions to filter contacts:

#### - Filter by Name

If you have many contacts with same name, you can use this filter.

<figure><img src="/files/lmUfcAbqYv0S7Mb6rCAR" alt=""><figcaption></figcaption></figure>

#### - Filter by Marketing Opt-in

Use this filter to filter out the contacts having Marketing Opt-in as "**No**" or "**Yes**".

<figure><img src="/files/cXZ2ywHhv1qjVP7GXGOU" alt=""><figcaption></figcaption></figure>

#### - Filter by Tags

You can filter your contacts by Tags created during the data collection of customers.

<figure><img src="/files/YFJKTRPFtBI00poQdO1d" alt=""><figcaption></figcaption></figure>

{% hint style="success" %}
Multiple filters can be added to find the desired information. There is no limit to the number of filters that can be added.

<img src="/files/1WVufrgzBPBybK0gPeMG" alt="" data-size="original">
{% endhint %}

### Save Contact Filters as Segments

Users can now save applied contact filters as reusable segments directly from the **Contacts** page. This feature streamlines the process of creating and managing targeted contact groups.

Here is how you can do it:

1. Start by applying filters on the **Contacts** page to narrow down your contact list. For example, you might filter by tags, activity status, or custom fields.

   Once you apply filters you will see a new button called **Save as Segment** near the search bar.

<figure><img src="/files/ximG3quFLsJXQvZAbBqe" alt=""><figcaption></figcaption></figure>

2. Click on **Save as Segment** to open a pop-up where you can name your segment.

   In the pop-up, enter a name for your segment in the **Enter Segment Name** field (maximum 50 characters). Click **Create Segment** to save.

   Once saved, you’ll see a success message confirming your segment has been created.

{% hint style="info" %}
The name you enter should be clear and descriptive, like **"Engaged Users - Last 30 Days"** or **"VIP Customers"**.
{% endhint %}

<figure><img src="/files/8UPeAgMGKeSxGQYrfPAF" alt=""><figcaption></figcaption></figure>

3. After saving, the **Save as Segment** button will be disabled—this helps prevent saving the same filters again. If you change or add new filters, the button will be re-enabled so you can save it as a new segment.

### Column Preferences

On Gallabox, you can rearrange your contact fields according to your preference by clicking on "**Column Preference**" with various data fields you have set in your account. You can also drag and drop the fields to create a contact view for you.

It can act as a basic **CRM** helping your business to keep track of contacts and allowing your teams to personalize WhatsApp Messages.

![](/files/NcwKRaBaVy9uCsMePuKE)

{% hint style="success" %}
**Please Note**:

Column Preference applies only to the user account and not to all members accessing the Gallabox account.
{% endhint %}

### Search Contacts

You can search using any keyword like name, tags, first numbers of Contact number using the search bar in Contacts. Refer to the GIF below for guidance.

<figure><img src="/files/ubiCQxbjQr9qzyMl11Ny" alt=""><figcaption></figcaption></figure>


# Contact Updation

Update contact information in Gallabox. When updating contacts individually, you can send messages and view the contact's Updation date.

### Bulk Update Contacts

You also have an option to update the common information such as Tags in bulk for the selected contacts. Click on the checkbox on the left side of "Name" to choose all the contacts on the page in one go.

<figure><img src="/files/Z8jjvPcz3oPHLtKjE3BZ" alt=""><figcaption></figcaption></figure>

{% hint style="info" %}
5 is the maximum limit of fields you can choose to update in Bulk Update at one go. If you have more than 5 fields to update, kindly Bulk Update the leads twice.
{% endhint %}

> Apart from the contact tags, you can update the information which will be common among the selected contacts like Attach Files or associate the Onboarding Form for the contacts. [Quick read](/basic-modules/contact-fields#create-a-contact-field) on how to create the Fields for Contacts.

### Send Message to a Contact

If you individually want to send a text to a contact while you are scrolling through Contacts, you can send it by clicking on <img src="/files/16k74HSmT69eFhBwFmre" alt="" data-size="line">as shown in the GIF below:

<figure><img src="/files/cLWHep9e6y2vyF3pzCT2" alt=""><figcaption></figcaption></figure>

You will be redirected to the conversation window of that particular contact. You can choose from the [WhatsApp Templates](/basic-modules/whatsapp-template-guidelines) in [Compose Box](/conversations/compose-box) to [initiate the conversation](/conversations/initiate-a-new-chat).

### Contact Updation Date

Once you update a contact, the contact Updation date and time will be visible. This field will not be listed in field collection or Column preference in contacts.

<figure><img src="/files/uSz4ku3IVda4Qsei3z9Y" alt=""><figcaption></figcaption></figure>

### Contact Activity Log

The Contact Activity Log shows a timeline of all changes for a contact. It helps you track the history and keep a clear record of communications.

<figure><img src="/files/RWu2jaAUbTPDbXl0LzPy" alt=""><figcaption></figcaption></figure>


# Contact Deletion

Easily delete contacts in 3 ways: individually, in bulk, or using a filter. Be cautious, once deleted, data cannot be recovered. Check out our guide now!

You can delete contact in 3 ways:

### Delete Contacts Individually

Select the contact you want to delete. Navigate to **Delete** and Click.

![](/files/7TaZivj70TIIw6s3w6nU)

### Bulk Delete Contacts

Select the checkboxes beside the Names you want to delete, Navigate to **Delete** and Click.

![](/files/ZKGhlbzY7ChQ31OQfEGa)

### Bulk Delete Contacts Using a Filter

Choose the filter and Put the conditions and Apply. Select the checkbox beside Name you want to delete. Navigate to **Delete** and Click.

<figure><img src="/files/3lxENMpbytUu990FOQZd" alt=""><figcaption></figcaption></figure>

Once you delete the contacts, you will not be able to retrieve the data. It is suggested to check twice before proceeding with deletion of the contact.


# Export Contacts

Export your contact records from your Gallabox account. View past exports and download the processed list from your account. Delete export history if needed.

## Export Contacts

You can export your Contact records from your Gallabox account. You can also view a list of your [account's past exports](#user-content-fn-1)[^1].

### To Export:

1. Go to **Contacts** on your Gallabox account. Hover to **Export**. From the drop-down select "**Export Contacts**". Click on "Confirm" to get your contacts list on email id.

![](/files/45JfpaBWSmrdIQbDIdpm)

3. The processed contact list will be sent to your ***registered email ID*** with Gallabox. Go to your designated inbox and open the email received from **<notifications@gallabox.com>** and click on **Download.**

You can also download the processed list from your Gallabox account.

![](/files/NzSJAG06XQdxfSWJJglC)

To view your contact list open the downloaded file in your local device.

> If you want to delete the export history from Gallabox Account before 7 days, you can click on the delete button as shown in the GIF below.

<figure><img src="/files/xX2zpzZjdbzejMeScQwR" alt=""><figcaption></figcaption></figure>

By deleting this the export history, the executed changes will not be reverted only the history will be deleted.

[^1]: Active Contact Exports will only be available to download for approximately 7 days after initiation.


# Marketing Opt-In

Learn about Marketing Opt-In: Understand the importance of opt-in marketing, respect individual preferences, enhance relevance, ensure legal compliance, and collect opt-ins outside WhatsApp.

## **What is Marketing Opt-In?**

Marketing opt-in refers to the process of obtaining explicit permission from individuals to receive marketing communications. It is a fundamental aspect of responsible and ethical marketing, ensuring that recipients willingly provide their consent to receive promotional messages, updates, or other marketing materials.

#### **Why is Marketing Opt-In Important?**

1. **Respect for Individual Preferences:** Opt-in ensures that marketing messages are delivered to individuals who genuinely want to receive them. It respects the autonomy and preferences of recipients, promoting a more positive user experience.
2. **Enhanced Relevance and Engagement:** When people choose to opt-in, they demonstrate a genuine interest in a company's offerings. This consent-driven approach leads to more targeted marketing, increasing the likelihood of delivering relevant content and boosting engagement with the audience.
3. **Legal Compliance:** In various jurisdictions, marketing opt-in is a legal requirement to protect individuals' privacy rights. Adhering to opt-in regulations helps companies avoid legal consequences and maintain a trustworthy reputation.

#### **How to Collect Marketing Opt-In Outside WhatsApp**

While WhatsApp is a popular messaging platform, marketing opt-in can be collected through various other channels. Here are some effective methods:

1. **Website Forms:** Incorporate opt-in checkboxes or consent forms on your website's sign-up or registration pages. Clearly explain the types of marketing communications individuals can expect to receive.
2. **Email Subscription:** Encourage visitors to subscribe to your email newsletter or updates through opt-in forms on your website. Provide clear information about the content and frequency of emails.
3. **Social Media:** Leverage social media platforms to promote opt-in opportunities. Create engaging posts or ads that direct users to a landing page where they can provide their consent to receive marketing communications.
4. **Events and Conferences:** At industry events or conferences, offer the option for attendees to opt-in to your marketing communications. Use physical or digital sign-up sheets with clear instructions and purpose.

#### **Consequences of Disregarding Marketing Opt-In**

Failure to respect marketing opt-in preferences can have several negative consequences for businesses:

1. **User Experience Impact**: Sending messages to users who have opted out can result in a negative user experience. These users have explicitly expressed their preference not to receive marketing communications, and sending messages despite their opt-out status can lead to annoyance, frustration, and a decline in customer satisfaction.
2. **Quality Rating Reduction**: Consistently sending messages to opt-out users can lead to a reduction in your business's quality rating on the WhatsApp Business API. This rating is based on user feedback, including reports of spam or unwanted messages. Lower quality ratings may result in restrictions or penalties imposed on your WhatsApp Business account.
3. **Account Suspension**: Persistent disregard for opt-out preferences and continued messaging to opt-out users may result in temporary or permanent suspension of your WhatsApp Business account. WhatsApp takes user privacy and consent seriously, and violations of opt-out preferences can lead to account suspension as a measure to protect user trust and privacy.
4. **Negative Brand Image:** News of non-compliance or spammy marketing practices can spread quickly, tarnishing your brand's image. This can discourage potential customers from engaging with your business.
5. **Reduced Effectiveness:** Targeting individuals who have not explicitly opted in may result in lower engagement rates and conversions. By focusing on an opt-in audience, you can deliver more personalized and relevant content, increasing the effectiveness of your marketing efforts.

## **How Marketing Opt-In is Managed by Gallabox**

Gallabox takes charge of effectively managing your marketing opt-in process. Here's an overview of how we handle it:

1. **Opt-In Management:** Gallabox assumes responsibility for managing your marketing opt-in. As a business, you will collect opt-in information from your customers and provide us with their consent status as either "YES" or "NO" during contact creation.
2. **Opt-Out Handling:** In the event that a customer interacts with your marketing template and sends the keyword "STOP," Gallabox promptly updates their marketing opt-in status to "NO." This ensures that they will no longer receive any marketing category template messages from your business.
3. **Cessation of Marketing Messages:** Once a customer's opt-in status is set to "NO," Gallabox immediately ceases sending any form of marketing category template messages to them. This approach respects their preference to opt out and ensures compliance with their wishes.
4. **Warning System:** Gallabox incorporates a warning system to prevent inadvertent sending of marketing templates to customers who have opted out. If you attempt to send a marketing template to an opt-out customer, Gallabox will display warnings and recommend refraining from sending the message.
5. **Avoiding Negative Consequences:** It is crucial to refrain from sending marketing messages to customers who have opted out. Gallabox emphasizes that sending marketing messages to opt-out customers may provoke them to block your number, potentially leading to a decrease in your quality rating.

By utilizing Gallabox's opt-in management services, you can effectively handle customer preferences, ensure compliance with opt-in regulations, and maintain a positive reputation with your audience.

Please note that the information provided in this section reflects the specific opt-in management practices implemented by Gallabox.


# Marketing opt-in on contact creation

Manage marketing opt-ins during contact creation in Gallabox through various methods like single contact creation or  integration. Set opt-ins easily and efficiently for effective market

Contacts can be created in various ways, which include:

1. [Single contact creation in the contact module.](#single-contact-creation-in-the-contact-module)
2. [Single contact creation in the conversations module.](#single-contact-creation-in-the-conversations-module)
3. [Contact creation upon receiving an incoming message.](#contact-creation-on-an-incoming-message)
4. [Bulk contact import.](#creating-contacts-through-an-excel-sheet-in-the-broadcast-module)
5. [Creating contacts through an excel sheet in the broadcast module.](#creating-contacts-through-an-excel-sheet-in-the-broadcast-module)
6. [Contact creation through integration and webhook.](#contact-creation-through-integration-and-webhook)
7. [Contact creation via API.](#contact-creation-via-api)

Let's delve into the specifics of how marketing opt-in is managed during contact creation in each of these scenarios.

### Single contact creation in the contact module

* When a new contact is created via the contacts module, there is a field for marketing opt-in.
* You can provide the consent your customer has given you in this field.
* If the field is set to **YES**, you will be able to send marketing templates to them.
* If the field is set to **NO**, Gallabox will automatically detect it and skip sending marketing messages to this particular customer.
* Gallabox will also provide a warning when you try to send a marketing message to them.

<figure><img src="https://files.gitbook.com/v0/b/gitbook-x-prod.appspot.com/o/spaces%2FZcl3T6ePz95GpzjAeOLW%2Fuploads%2FFEgr9lxxPfw7r12kMrrS%2Fimage.png?alt=media&#x26;token=b2132f7f-5185-4145-85e0-5121f073d118" alt=""><figcaption></figcaption></figure>

### Single contact creation in the conversations module

* When a new contact is created via the compose box, the marketing opt-in is set to **YES by default.**
* The marketing opt-in option is displayed on the right side of the screen.
* If you haven't received marketing opt-in from that specific customer, you can easily change it to **NO by editing it** with a single click.

<figure><img src="/files/8oF7jQBpeJyafRIpyNdX" alt=""><figcaption></figcaption></figure>

### Contact creation upon receiving an incoming message <a href="#contact-creation-on-an-incoming-message" id="contact-creation-on-an-incoming-message"></a>

* When a new incoming message is received, Gallabox automatically creates a contact.
* During this contact creation, the marketing opt-in is automatically set to **YES**.

### **Bulk contact import**

* Bulk import can be done in two ways: Simple import and Advanced import.

**Simple Import:**

* During simple import, you can bulk import four details: Name, email, phone number, and tags.
* When uploading an excel file, you can set the marketing opt-in via a dropdown.
* If you select "**YES**" in the dropdown while importing 1000 contacts, all the contacts' opt-in will be set as "**YES**".
* Similarly, if you set the value as "**NO**", all the contacts' opt-in will be set as "**NO**".

<figure><img src="/files/aUFzZcmMwjkEo1dQs0Vq" alt=""><figcaption></figcaption></figure>

{% hint style="info" %}
In simple import, the dropdown value is only considered for new contacts, and existing contacts' opt-in is not overwritten.
{% endhint %}

**Advanced Import**

* During advanced import, you can individually provide the marketing opt-in consent for each contact by using "**TRUE**" for "**YES**" and "**FALSE**" for "**NO**".

<figure><img src="/files/8UJ8HwnFohw3xTutxTtS" alt=""><figcaption></figcaption></figure>

* During the file upload, you can also set the marketing opt-in via a dropdown.
* ***Scenario:** You are importing 1000 contacts, and around 10 of these contacts have said "No" to marketing messages. How can you do this?*
  * *In the sheet, fill the value of Marketing opt-in for those 10 contacts as "FALSE" and leave the rest blank.*
  * *Now in the drop-down, select value as YES and proceed*
  * *Except for those 10 contacts, all other contacts will be created with marketing opt-in set as "YES".*

<figure><img src="/files/RbzDkYOoCQ00xOnGoWZu" alt=""><figcaption></figcaption></figure>

{% hint style="info" %}
In advanced import, the dropdown value is only considered for new contacts, and existing contacts' opt-in is not overridden. However, the value provided in the sheet will be considered for both new and existing contacts, and overwrite will occur.
{% endhint %}

### Creating contacts through an excel sheet in the broadcast module

* When uploading an excel sheet, you can bulk import two details: Name and phone number.
* During the excel file upload, there is a dropdown to set the marketing opt-in.
* If you choose "YES" in the dropdown, all 1000 contacts' opt-in will be set as "YES".
* Similarly, if you choose "NO", all the contacts' opt-in will be set as "NO".

<figure><img src="/files/UmQkax81Ck0M4xIYy2CS" alt=""><figcaption></figcaption></figure>

{% hint style="info" %}
The dropdown value is only considered for new contacts, and existing contacts' opt-in is not overwritten.
{% endhint %}

### Contact creation through integration and webhook

* When a message is sent to a new contact via integration or webhook, Gallabox automatically creates a contact.
* During the contact creation process, the marketing opt-in is automatically set to **YES**.

### Contact creation via API

* When a contact is created via API, you have the option to provide the marketing opt-in values as **YES** or **NO**.
* If you do not pass a value, Gallabox sets the marketing opt-in as **YES** by default.


# Marketing opt-in Handling Methods

Learn how to manage marketing opt-ins when sending messages through various methods like compose box, API & integrations on our website. Identify customers who have opted out easily.

Messages can be sent in various ways, such as:

* Compose box in the conversations module.
* Broadcast.
* Sequence.
* API & Integrations.
* Incoming conversations handled by Bot.

Now, let's explore how marketing opt-in is managed when sending a message in each of these scenarios.

### Compose box in the conversations module

* When attempting to send a message to a customer who has opted out of marketing (marked as NO), we will display a notification to inform you about it.
* This notification helps you easily identify customers who have opted out.

<figure><img src="/files/nbBPgVx637UnTlOlcLtA" alt=""><figcaption></figcaption></figure>

* If you select a marketing template and try to send the message, we will also provide a warning to ensure you don't miss this information.

<figure><img src="/files/h6QEsFcf0z5LFAIRN4qP" alt=""><figcaption></figcaption></figure>

### Broadcast

* In a broadcast, when you are sending a marketing category template, there will be a toggle option displayed.
* The toggle is labeled as "send message to contacts who opted-in for marketing."
* By default, this toggle will be ON, and it will show the number of contacts that the broadcast will be sent to.
* *For example, if there are 1000 contacts and 10 of them have opted out of marketing, when the toggle is ON, the message will be sent to 990 contacts, excluding the 10 contacts.*

<figure><img src="/files/N2AXH2B38UoPHZ7jjTCs" alt=""><figcaption></figcaption></figure>

* It is recommended to send messages only to customers who have opted in for marketing.
* However, if you want to send the message to all customers for some reason, you can toggle the option OFF, and the broadcast will be sent to all selected clients.
* But please note that turning this option OFF may affect your quality rating, as indicated by the warning message.

<figure><img src="/files/yUZpiosvweDbtUJJXRsn" alt=""><figcaption></figcaption></figure>

### Sequence <a href="#contact-creation-on-an-incoming-message" id="contact-creation-on-an-incoming-message"></a>

* In a sequence, if a marketing category template is used, those messages will only be sent to contacts with marketing opt-in.
* If a contact with marketing opt-in set to NO enters the sequence, the message will fail for that contact.
* The contact will be moved to the next step in the sequence.

<figure><img src="/files/F5WXm6Qj9JaK1hjeEPuP" alt=""><figcaption></figcaption></figure>

### API & Integrations

* If a marketing template is attempted to be sent to a contact with a marketing opt-in set to NO, the message will fail.
* The failure, along with the reason, will be displayed in the report.

### Incoming conversations handled by Bot

* During a conversation with a bot, marketing opt-in is ignored since the conversation is initiated by the bot.
* If you are using a marketing template in a bot flow, the message will be sent to the contact regardless of their opt-in consent.


# Marketing opt-out Management

Automatically inform contacts who unsubscribe from marketing messages. Change their opt-in status and allow them to resubscribe with a click.

1. The footer content mentioned below is made mandatory by default during the creation of marketing templates.

<figure><img src="/files/UNYUGr8BCZJYKHJCdsLE" alt=""><figcaption></figcaption></figure>

2. When a contact, whose marketing opt-in was previously set as YES, responds with STOP,
3. Gallabox automatically sends a message informing them that they have unsubscribed from marketing messages.
4. Additionally, the marketing opt-in of the contact is changed from YES to NO.

<figure><img src="/files/aaVMFNqo8CPevzAiM8DH" alt=""><figcaption></figcaption></figure>

5. If the contact chooses to subscribe back by clicking on the displayed button,
6. Gallabox will subscribe them back and change the marketing opt-in from NO to YES.

<figure><img src="/files/ue90ANGmicj2V45tbVuc" alt=""><figcaption></figcaption></figure>


# Merging of Contacts

#### COMING SOON...


# WhatsApp Calling - Overview

### What is WhatsApp Calling? <a href="#id-8cdd5c6f-f25d-4dda-a5ba-f7fbb5106405" id="id-8cdd5c6f-f25d-4dda-a5ba-f7fbb5106405"></a>

WhatsApp Calling lets your business make and receive **voice calls** with your customers, right inside WhatsApp. Every call sits alongside the chat history in your Gallabox inbox — so whoever takes the call always has full context.

When a customer calls your business, you choose **who picks up**:

* **A real person on your team** — calls are routed to a User or team.
* **A Voice AI Agent** (Alpha Stage) — an AI answers your calls automatically, 24/7.

Note that currently in Gallabox an incoming call can be either handled by an Human or an Voice AI Agent and not both for the same call.

And calls go in two directions:

* **Incoming calls (User Initiated)** — a customer calls your business on WhatsApp. → see the **Incoming Calls** guide.
* **Outgoing calls (Business Initiated)** — your team calls a customer from within the conversation, once that customer has given permission. → see the **Outgoing Calls** guide.

***

### How It Works <a href="#a00012b5-74be-42d1-bb6c-ad6f87dda8c4" id="a00012b5-74be-42d1-bb6c-ad6f87dda8c4"></a>

**Incoming:** When calling is enabled, customers see a call button in your business chat and can call you for free. You decide who handles the call — a **Human Agent** (routed to a User or team by your assignment rules) or a **Voice AI Agent** (answers automatically, around the clock).

**Outgoing:** Because WhatsApp protects users from unwanted calls, your business must have the customer's permission before calling. Once permission is active, your team clicks the call button, confirms, and the call connects.

***

### Before You Start: Prerequisites <a href="#a496bb18-9ca4-4f80-8f57-a8429d0f8b70" id="a496bb18-9ca4-4f80-8f57-a8429d0f8b70"></a>

**1. An eligible Gallabox plan** WhatsApp Calling is available on eligible plans. If your current plan doesn't include it, you'll see the Calling page with an option to upgrade.

**2. The right permission inside Gallabox** Only team members with the **Can manage WhatsApp, Instagram and Web channel** permission can turn calling on and manage its settings. Owners and Admins have this permission by default.

**3. Your WhatsApp number must be eligible for calling** This is determined by Meta. When you open the Calling page, Gallabox checks your number, and gates you based on it. If your channel doesn't support calling, you'll be asked to contact support.

**4. A messaging volume threshold** Meta requires your WhatsApp number to reach a **daily limit of 2,000 unique recipients** before calling can be activated. Until you cross it, the Calling configurations can't be set up. Once you do, calling becomes available automatically.

**5. Message credits (for outgoing calls only)** Incoming calls are free.

Outgoing calls carry a charge, deducted from your Gallabox message credits. Keep enough credit to cover your expected outgoing calling.

> **Region availability:**
>
> * **Fully unavailable:** WhatsApp Business Calling is not yet available for numbers in GCC regions like **Saudi Arabia, the UAE, Kuwait, Qatar, Bahrain, and Oman**.\
>   These numbers can neither make nor receive calls for now.
> * **Outgoing restricted:** Meta currently restricts *outgoing (business-initiated)* calls for numbers in the **USA, Canada, Egypt, Vietnam, and Nigeria**. These numbers can still receive incoming calls.

***

### Setting Up Calling <a href="#id-556b22e7-87bb-446f-98fc-e2113251d530" id="id-556b22e7-87bb-446f-98fc-e2113251d530"></a>

1. Go to **WhatsApp → Calling** in Gallabox.
2. Switch on **Enable WhatsApp Calling**.
3. Choose **who handles incoming calls** — **Human Agent** or **Voice AI Agent**.
   * For a real person, select **Human Agent** and set your routing.
   * For automated answering, select **Voice AI Agent** and pick the agent (built in **AI Agents & Bots**).
4. Set your **Call Assignment Rules** (how incoming calls reach your team — see the Incoming Calls guide).
5. Write a **Busy Message** — sent automatically when no agent can take the call.
6. **Save Changes.**

<figure><img src="/files/IDu979w6JT0RCF5yriC0" alt=""><figcaption></figcaption></figure>

Once enabled, **Human Agent** configuration lets your team receive incoming calls and place outgoing calls. Human-handled incoming calls are always free.\
\
**Voice AI Agent** supports incoming calls only.&#x20;

***

### Quick Reference <a href="#id-9857eac0-7c0a-4b70-8ad9-139e09e84e77" id="id-9857eac0-7c0a-4b70-8ad9-139e09e84e77"></a>

| Topic                  | Summary                                                                                |
| ---------------------- | -------------------------------------------------------------------------------------- |
| What it is             | WhatsApp voice calls, inside your inbox                                                |
| Who handles calls      | A Human Agent (your team) or a Voice AI Agent (automated, 24/7)                        |
| Incoming calls         | Free; routed by your assignment rules; busy message if no one's free                   |
| Outgoing calls         | Require customer permission; charged to message credits                                |
| Plan                   | Available on eligible plans                                                            |
| Who can set it up      | Users with *Can manage WhatsApp, Instagram and Web channel* (Owners/Admins by default) |
| Messaging prerequisite | 2,000 daily unique recipients before calling activates                                 |
| Fully unavailable in   | Saudi Arabia, UAE, Kuwait, Qatar, Bahrain, Oman                                        |
| Outgoing restricted in | USA, Canada, Egypt, Vietnam, Nigeria (incoming still works)                            |

***

### Where to next <a href="#id-7f2a9a84-128b-42a8-bf3c-d3f9f821d26e" id="id-7f2a9a84-128b-42a8-bf3c-d3f9f821d26e"></a>

* **Human Calling** — handling calls with a real person on your team.
* **Voice AI Agent Calling** — letting an AI answer your calls automatically.
* **Incoming Calls** — routing, assignment rules, agent availability, busy/missed handling.
* **Outgoing Calls** — permissions, requesting consent, placing calls, limits, charges.

***


# WhatsApp Calling - Incoming Call

Incoming calls (also called **User Initiated Calls**) are when a customer calls your business on WhatsApp. **Human Agent** incoming calls are free for both sides. **Voice AI Agent** incoming calls are charged and use AI credits.

Every incoming call can be picked up in one of two ways:

* **A Human Agent** — the call is routed to a User or team on your side, and a real person talks to the customer.
* **A Voice AI Agent** (Alpha Stage) — an AI answers the call automatically, 24/7.

You choose one handler per WhatsApp number — a single incoming call is handled **either** by a human **or** by a Voice AI Agent, never both at once.

<figure><img src="/files/BdkUaHDm0sPFXg55VksK" alt=""><figcaption></figcaption></figure>

This guide focuses on **incoming calls handled by a Human Agent**. For a quick look at the Voice AI option, see Handled by a Voice AI Agent near the end.

***

### How a Human Incoming Call Works <a href="#b74cad3b-e63b-48e3-b3ec-489646807b26" id="b74cad3b-e63b-48e3-b3ec-489646807b26"></a>

When calling is enabled on your WhatsApp number and **Human Agent** is set as the handler, customers see a call button in your business chat. When they call:

* The call rings to your team or a specific agent, based on your **Call Assignment Rules**.
* The agent sees who's calling, with actions to **Accept**, **Decline**, or **Jump to Conversation** (which opens the caller's chat).
* If no one is available, your configured **Busy Message** is sent automatically.
* Every call appears in the conversation as a call record, and in your call logs — so your team always has context to follow up.

<figure><img src="/files/o1t86jlQEJne6WDlbFZP" alt=""><figcaption></figcaption></figure>

***

### Setting Up Incoming Calls <a href="#id-4bb96be4-e48b-4fe5-928a-4edeba282fc3" id="id-4bb96be4-e48b-4fe5-928a-4edeba282fc3"></a>

1. Go to **WhatsApp → Calling** in Gallabox.
2. Switch on **Enable WhatsApp Calling**.
3. Under **Who handles incoming calls**, select **Human Agent**.
4. Configure your **Call Assignment Rules** (below).
5. Write your **Busy Message**.
6. **Save Changes.**

***

### Call Assignment Rules <a href="#id-477fdbb4-9568-49ec-9829-53cee478afea" id="id-477fdbb4-9568-49ec-9829-53cee478afea"></a>

Call Assignment Rules decide which agent an incoming call rings — for calls where the conversation isn't already owned by a human agent.

**Assignment depends on the conversation's current state:**

* **Already with a human agent or team** → the call is routed directly to them, and your assignment rule is *not* applied.
* **A new conversation, or one currently handled by a bot or AI agent** → your Call Assignment Rule applies.

**Your Call Assignment Rule can route to either:**

* **A specific User** — those calls always ring the same person.
* **A Team** — the call rings one available agent in the team, chosen by **round robin** (rotation). Only one agent is rung at a time, never the whole team at once.

**Who's eligible to be rung** (for team round robin): an agent must be set to **Active** *and* **not already on another call**. Agents who are **Away** are skipped.

The conversation moves to an agent **only when the call is answered** — an unanswered call never reassigns a bot or unassigned conversation.

<figure><img src="/files/YBzKAey44IOk803Ym8v8" alt=""><figcaption></figcaption></figure>

***

### Agent Availability <a href="#b6a247ca-927c-445c-82fe-9fef3f1fcd05" id="b6a247ca-927c-445c-82fe-9fef3f1fcd05"></a>

| Agent state               | Can receive a call?                                    |
| ------------------------- | ------------------------------------------------------ |
| Active, not on a call     | Yes                                                    |
| Active, already on a call | Yes — but only as a lighter "second call" notification |
| Away                      | No                                                     |

* **If everyone in the team is busy (all on calls):** one agent from the team still gets a lighter "second call" notification.

<figure><img src="/files/GuVN3UbPqEu4CAsBQEMZ" alt=""><figcaption></figcaption></figure>

* **If everyone in the team is Away:** the call goes unanswered and your Busy Message is sent.

***

### On the Call <a href="#c87bdb13-06ec-4cff-a1f5-4e202b4f9075" id="c87bdb13-06ec-4cff-a1f5-4e202b4f9075"></a>

When a call comes in, a floating call card appears for the agent. From it, the agent can:

* **Accept** the call to start talking, **Decline** to reject it, or **Jump to Conversation** to open the caller's chat alongside the call.
* **Silence the ring** for an incoming call without rejecting it.

<figure><img src="/files/tlyT1C8IKFNM4I0q3qeI" alt=""><figcaption></figcaption></figure>

Once the call connects, the agent can:

* **Mute / unmute** their microphone.
* **Open the conversation** to see chat history and notes while talking.
* **Hang up** to end the call. A call timer shows the live duration.

<figure><img src="/files/G5BiZ5eKy54EU5XM6tDw" alt=""><figcaption></figcaption></figure>

**Connection warnings:** if the agent's internet drops or weakens during a call, the card shows a gentle warning (for example, *weak connection — voice may be delayed*, or *you are offline — call may drop*) so they know the audio may be affected.

**Second (waiting) calls** — when a new call arrives while an agent is already on a call:

* It appears as a **second call**, marked **Waiting**.
* To answer it, the agent must **end the current call first** — the Accept button stays disabled until then.
* Declining or ignoring it marks the call missed and sends the Busy Message.

<figure><img src="/files/DjxCpE21ctApQY7fcWbX" alt=""><figcaption></figcaption></figure>

***

### When a Call Isn't Answered <a href="#bdcf7cc7-7353-46c7-b7ca-e21a30a2e562" id="bdcf7cc7-7353-46c7-b7ca-e21a30a2e562"></a>

A call is treated as **missed** when no one answers within the pickup window (set by WhatsApp) or when an agent declines it. In either case:

* Your **Busy Message** is sent to the customer.
* The conversation stays in its original state (a bot conversation reverts to the bot; an unassigned one stays unassigned; a brand-new caller goes to unassigned).
* The call is logged so your team can follow up.

***

### The Busy Message <a href="#id-8d014458-a879-4515-a6e6-16e448100254" id="id-8d014458-a879-4515-a6e6-16e448100254"></a>

This is the message sent automatically whenever a call can't be answered — when every eligible agent is busy or Away, or when a call is missed or declined. It comes with a default message that you can edit anytime in your Calling settings.

> The Busy Message applies to **Human Agent** calling only. Voice AI Agents answer automatically, so they don't use a Busy Message.

***

### Handled by a Voice AI Agent (Overview) <a href="#id-2fabfc4a-c6b7-4f6d-be9f-84b30fa6c718" id="id-2fabfc4a-c6b7-4f6d-be9f-84b30fa6c718"></a>

Instead of routing calls to your team, you can let a **Voice AI Agent** answer incoming calls automatically — around the clock, with no one needing to pick up. Incoming calls handled by a Voice AI Agent are charged and use AI credits. This feature is currently in **Alpha**. If you want to explore it, [contact our product team](https://calendly.com/balakrishnanr/gallabox-ai-calling-discovery-call?month=2026-06).

A few things that work differently from Human calling:

* **The AI answers every call**, so there's no ringing to agents, no "busy" state, and no Busy Message.
* **After the AI call ends**, the conversation is handed off to your team using **Post Call Assignment Rules** — you decide whether it lands with a specific User, a Team, the contact's owner, or the agent who previously handled that conversation.
* **You build the Voice AI Agent** in **AI Agents & Bots**, then select it on the Calling page when you choose *Voice AI Agent* as the handler.

Remember, a WhatsApp number uses **one** handler at a time — switching to a Voice AI Agent means incoming calls are answered by the AI rather than your team.

***

### Quick Reference <a href="#id-0a583560-bb59-4391-b3d3-619392fc949d" id="id-0a583560-bb59-4391-b3d3-619392fc949d"></a>

| What it is             | Customers calling your business on WhatsApp (User Initiated)                              |
| ---------------------- | ----------------------------------------------------------------------------------------- |
| Cost                   | Human incoming calls are free. Voice AI incoming calls are charged and use AI credits.    |
| Who can handle it      | A Human Agent (your team) or a Voice AI Agent (automated, 24/7 — Alpha)                   |
| Routing (Human)        | By Call Assignment Rules — to a specific User or a Team (round robin)                     |
| Eligible agent (team)  | Active **and** not already on another call; Away agents skipped                           |
| Rules don't apply when | The conversation is already owned by a human agent or team (call goes straight to them)   |
| Agent actions          | Accept, Decline, Jump to Conversation, Silence ring; Mute & Hang up once connected        |
| Second call            | Shows as "Waiting"; end the current call before answering                                 |
| If unanswered          | Busy Message sent; conversation stays in its original state; call is logged               |
| Busy Message           | Human calling only; default text, editable in settings                                    |
| Voice AI difference    | AI answers automatically; no Busy Message; uses Post Call Assignment Rules after the call |

***

*Incoming calling behavior depends on Meta's WhatsApp Business Calling rules, which may change.*


# WhatsApp Calling - Outgoing Calls

## WhatsApp Human Calling — Outgoing Calls <a href="#id-6e4956ab-74a8-4a37-8f53-769dd1f64327" id="id-6e4956ab-74a8-4a37-8f53-769dd1f64327"></a>

Outgoing calls (also called **Business Initiated Calls**) are when your agent calls a customer from within a conversation. Because WhatsApp protects users from unwanted calls, **your business must have the customer's permission first.** That permission flow is the most important part of this guide.

> **Before you begin:** Outgoing calls are restricted by Meta for numbers in **the USA, Canada, Egypt, Vietnam, and Nigeria**. If your business number is in one of these countries, you can receive calls but can't place them until Meta enables it.

***

### Call Permission Requests (The Key Concept) <a href="#id-3f68064f-8fc5-49f2-adc5-a7ac28b2a26b" id="id-3f68064f-8fc5-49f2-adc5-a7ac28b2a26b"></a>

Your business can't call a customer out of the blue. The customer must grant permission first.

#### How you request permission <a href="#id-0b09516c-b370-4eb5-82cb-1b8b1d9430de" id="id-0b09516c-b370-4eb5-82cb-1b8b1d9430de"></a>

There are two ways to send a permission request:

|                     | Free Form Request                                      | Template Permission Request               |
| ------------------- | ------------------------------------------------------ | ----------------------------------------- |
| When you can use it | Only while the 24-hour customer service window is open | Anytime, even with no recent conversation |

<figure><img src="/files/OQ3Afwzs8r9GO3hPIQwd" alt=""><figcaption></figcaption></figure>

<figure><img src="/files/JtoqA9oGUvQZ3LsTVEwN" alt=""><figcaption></figcaption></figure>

A customer can also grant permission **without you asking**, in two ways:

* **They call you** — when a customer calls your business, they automatically grant temporary permission for you to call back.
* **Through your Business Profile** — they can allow calls directly from your profile in WhatsApp.

#### What the customer sees and chooses <a href="#d4009807-fc50-4a21-997c-a48daf6f2b3b" id="d4009807-fc50-4a21-997c-a48daf6f2b3b"></a>

The request arrives in their WhatsApp as two parts: your message text, followed by a native card titled **"Can \[Your Business] call you?"** with a **Choose preference** button. Tapping it gives them three options:

* **Allow calls** → permanent permission (no expiry; they can revoke anytime).
* **Temporarily allow calls** → permission valid for **7 days**.
* **Not at this time** → declined.

<figure><img src="/files/U4ilKFeyeXi7c2oNJs2N" alt=""><figcaption></figcaption></figure>

Image Source : Meta

#### What happens after they respond <a href="#id-798e6fef-9568-439f-a0e1-874fa466c8c8" id="id-798e6fef-9568-439f-a0e1-874fa466c8c8"></a>

| Customer's response | Can you call?            | Details                                                                               |
| ------------------- | ------------------------ | ------------------------------------------------------------------------------------- |
| Allows (permanent)  | ✅ Yes, until they revoke | Stored indefinitely                                                                   |
| Allows (temporary)  | ✅ Yes, for 7 days        | Window starts at the moment they approve                                              |
| Declines            | ❌ No                     | The request stays visible for 7 days; they can still change their mind in that window |
| No response         | ❌ No                     | The request expires after 7 days                                                      |

***

### Placing the Call <a href="#id-073edc42-6099-4368-905c-0ad99f07b6c8" id="id-073edc42-6099-4368-905c-0ad99f07b6c8"></a>

Once permission is active, click the call button in the conversation. Gallabox shows a quick confirmation with the customer's name and how long the permission is still valid (e.g. *"Permission valid · 6 days left"*). Confirm, and the call connects.

<figure><img src="/files/q5twhoOX7PvrjvJneE2S" alt=""><figcaption></figcaption></figure>

***

### Limits You Should Know About <a href="#id-1c527bad-2fa3-4dba-8b71-c430946eed6d" id="id-1c527bad-2fa3-4dba-8b71-c430946eed6d"></a>

These apply per business number + customer pair:

* **Permission requests:** at most **1 per 24 hours** and **2 per 7 days** to the same customer. (Both counters reset whenever a connected call happens between you and that customer.) If you hit a limit, the send button is disabled and tells you when you can try again.
* **Connected calls:** up to **100 connected calls every 24 hours** per business number.
* **Unanswered/rejected calls:**
  * After the **2nd consecutive** missed or rejected call, Meta sends the customer a message asking them to reconsider allowing your calls.
  * After the **4th consecutive** missed or rejected call, Meta **automatically revokes** the permission. The customer is notified and can re-grant it if they wish.

***

### Pricing <a href="#b595d364-c931-4557-9ffc-ebe5852e08a5" id="b595d364-c931-4557-9ffc-ebe5852e08a5"></a>

* **Outgoing calls:** charged based on the call's duration and the destination country, and **deducted from your Gallabox message credits**.
* **Permission request template:** sent as utility template and billed at standard per-message rates.

Note: A minimum balance is needed to start a call. If your message credit balance falls below the cost of one minute (Rs. 1 / 10 cents), outgoing calls are blocked until you top up — so it's worth keeping enough credit on hand to cover your expected calling.

***

*Outgoing calling behavior depends on Meta's WhatsApp Business Calling rules, which may change.*


# Pricing

## Human Calling Pricing <a href="#aa19a0c7-bfc3-4b82-b52b-a3ba202f3555" id="aa19a0c7-bfc3-4b82-b52b-a3ba202f3555"></a>

Effective: June 2026

### How Pricing Works <a href="#df857c31-311f-47f9-a826-c71becd6ef3e" id="df857c31-311f-47f9-a826-c71becd6ef3e"></a>

Human Calling charges are based on the duration of completed calls. Here's what you need to know:

* Calls are billed per minute in six-second increments
* Pricing depends on the destination country of the phone number being called

### Call Duration Rounding <a href="#id-905864be-7431-43b7-9ba4-c77c370f5308" id="id-905864be-7431-43b7-9ba4-c77c370f5308"></a>

Call duration is rounded up to the nearest six-second pulse. For example, a 56-second call is billed as 10 pulses (60 seconds). This ensures fair billing for both short and longer calls.

### Country-Based Pricing <a href="#id-631d235b-944d-4457-ba94-6f02c3933d73" id="id-631d235b-944d-4457-ba94-6f02c3933d73"></a>

The price per minute is determined by the country code of the phone number you're calling. Each destination has its own rate. Calls to numbers in different countries will have different pricing.

### Pricing by Currency <a href="#id-0f05213d-7929-4e2a-9fed-815b057c69b1" id="id-0f05213d-7929-4e2a-9fed-815b057c69b1"></a>

Rates shown below are per minute of call duration.

| Country                          | USD      | INR         |
| -------------------------------- | -------- | ----------- |
| Argentina                        | $0.01212 | Rs. 0.88836 |
| Brazil                           | $0.01296 | Rs. 0.94992 |
| Chile                            | $0.01452 | Rs. 1.06428 |
| Colombia                         | $0.01332 | Rs. 0.97632 |
| Egypt                            | $0.01524 | Rs. 1.11708 |
| France                           | $0.01188 | Rs. 0.87084 |
| Germany                          | $0.01236 | Rs. 0.90600 |
| India                            | $0.00636 | Rs. 0.46620 |
| Indonesia                        | $0.02904 | Rs. 2.12868 |
| Israel                           | $0.01524 | Rs. 1.11708 |
| Italy                            | $0.01452 | Rs. 1.06428 |
| Malaysia                         | $0.01296 | Rs. 0.94992 |
| Mexico                           | $0.01128 | Rs. 0.82680 |
| Netherlands                      | $0.00756 | Rs. 0.55416 |
| Nigeria                          | $0.01236 | Rs. 0.90600 |
| Pakistan                         | $0.01428 | Rs. 1.04676 |
| Peru                             | $0.01452 | Rs. 1.06428 |
| Russia                           | $0.01164 | Rs. 0.85320 |
| Saudi Arabia                     | $0.01524 | Rs. 1.11708 |
| South Africa                     | $0.01296 | Rs. 0.94992 |
| Spain                            | $0.01548 | Rs. 1.13472 |
| Turkey                           | $0.01296 | Rs. 0.94992 |
| United Arab Emirates             | $0.01524 | Rs. 1.11708 |
| United Kingdom                   | $0.01188 | Rs. 0.87084 |
| North America                    | $0.01452 | Rs. 1.06428 |
| Rest of Africa                   | $0.01236 | Rs. 0.90600 |
| Rest of Asia Pacific             | $0.01368 | Rs. 1.00272 |
| Rest of Central & Eastern Europe | $0.01140 | Rs. 0.83568 |
| Rest of Latin America            | $0.01392 | Rs. 1.02036 |
| Rest of Middle East              | $0.01524 | Rs. 1.11708 |
| Rest of Western Europe           | $0.01236 | Rs. 0.90600 |
| Other                            | $0.01584 | Rs. 1.16112 |

### Example Calculations <a href="#id-4f696c9f-2f21-4518-8fa5-f51b8d749d66" id="id-4f696c9f-2f21-4518-8fa5-f51b8d749d66"></a>

**USD Example**

A 3-minute call to Brazil:

* Call duration: 3 minutes = 30 six-second pulses
* Rate per minute: $0.01296
* Total cost: 3 minutes × $0.01296 = **$0.03888**

**INR Example**

A 5-minute call to India:

* Call duration: 5 minutes = 50 six-second pulses
* Rate per minute: Rs. 0.46620
* Total cost: 5 minutes × Rs. 0.46620 = **Rs. 2.331**

### Billing and Payment <a href="#id-046c68e1-ad95-40ff-8b82-369946020732" id="id-046c68e1-ad95-40ff-8b82-369946020732"></a>

Call charges are deducted from your Message Credit Wallet at the end of each call. Ensure your account has sufficient credits to place calls. Your credit balance is visible in the Gallabox dashboard.

**Incoming calls are not charged.** You only pay for outgoing calls that you initiate. Incoming calls from customers are completely free.

Note that A minimum balance is needed to start a call. If your message credit balance falls below the cost of one minute (Rs. 1 / 10 cents), outgoing calls are blocked until you top up — so it's worth keeping enough credit on hand to cover your expected calling.

***

Rates are effective as of June 2026 and are subject to change.


# Gallabox Bot Glossary

Enhance customer interactions and automate communication processes with Gallabox's powerful chatbot. Explore the glossary for key terms and functionalities.

Gallabox's Chatbot stands out as a powerful tool for enhancing customer interactions and automating communication processes. Gallabox Users can harness the potential of this feature to create dynamic and responsive chatbots tailored to their specific business needs.

Creating a chatbot with Gallabox is a straightforward process. The chatbot's adaptability makes it a versatile tool, capable of handling a range of inquiries and scenarios.

<figure><img src="/files/sZfGscf009I6a6BrIjoK" alt=""><figcaption></figcaption></figure>

For a deeper understanding of key terms and functionalities, exploring the below glossary will provide insights into the specific terms of the Gallabox Chatbot.

<details>

<summary>Chatbot</summary>

A chatbot is a computer program that imitates conversation with human users and are often used in customer service to provide automated and round the clock support to customers.

</details>

<details>

<summary><strong>Trigger</strong></summary>

A trigger is an event that causes a chatbot to start a conversation. Triggers can be user input, such as a message or a button click for the listed topics.

</details>

<details>

<summary><strong>Variable</strong></summary>

It is a placeholder for a piece of information. For example, the chat bot might use a variable to store the user's location.

</details>

<details>

<summary>Chat <strong>Flow</strong></summary>

A flow is a sequence of intents and actions that directs the chat bot to complete a task.

</details>

<details>

<summary><strong>Integration</strong></summary>

An integration is a connection between a chatbot and another system. Integrations allow chatbots to access data from other systems, such as CRMs or e-commerce platforms.

</details>

<details>

<summary><strong>Intent</strong></summary>

An intent is basically a user's first message in a conversation with a chatbot. For example, the intent of a user might be to book a hotel room, get customer support, or learn more about a product.

In Gallabox, we have a special Intent - \*. If you use that in a chat-flow, the flow will get triggered irrespective of what customer has asked.

</details>

<details>

<summary><strong>Condition</strong></summary>

A condition is an expression that determines whether or not a node should execute.

</details>

<details>

<summary>Webhook</summary>

A webhook is a URL that is called by the chat bot when a certain event occurs. For example, the chat bot might call a webhook when the user books a product demo, so that the business can send the user a confirmation WhatsApp Message.

</details>

<details>

<summary>Template</summary>

A template is a pre-defined verified WhatsApp message that can be sent to the user.

</details>

<details>

<summary>Validation</summary>

Process of checking whether the input from a user is valid. This can be done by checking the length, format, or content of the input.

</details>

<details>

<summary>Regex</summary>

It is a regular expression, which is a special text pattern that can be used to match or search for text. For example, a regex can be used to match a valid email address or a phone number.

A step by step guide on how to create [Regex](https://www.sitepoint.com/learn-regex/).

[Regex Editor](https://regex101.com/) to Build and Test Regex.

</details>

<details>

<summary>API</summary>

An API (application programming interface) is a set of rules that allow two software programs to communicate with each other.

</details>

<details>

<summary>Logs</summary>

Records of WhatsApp Messages that were shared when a workflow is triggered. This include errors, and completed status.

</details>

<details>

<summary>Call to Action</summary>

It is a marketing term to prompt an immediate response.(CTA) is a button that tells the user what to do next. It can be a link in WhatsApp Template Message or a call button.

</details>

<details>

<summary>Quick Reply</summary>

They are buttons displayed during a conversation or a Template to allow users to quickly choose from a set of predefined options without having to type anything.

</details>


# Things to know before building your first bot

Understand key concepts like Bots, Bot Flows, triggers, variables, and critical configurations to create effective and personalized automated interactions.

Before you start building your first Bot with Gallabox, here are some important things to know. This guide will break down the basics of chatbots, so you can understand how they work and what it takes to build one.

### What is Bot and Flow?

Imagine having a helpful assistant available 24/7 who can answer your questions and assist with different tasks. This assistant is called a **bot**. It’s a special type of software designed to interact with you through chat or messaging.

Within this bot, there are different **"flows"**—these are like specific guides or scripts that tell the bot how to handle various situations. Each flow is set up to manage a different type of request or question you might have.

To illustrate:

* A Bot might be named "Customer Support Bot".
* Within this Bot, you could have several Bot flows like "Order Inquiry", "Returns and Refunds", "Product Information", and "Feedback".

Each Bot flow would contain specific steps, such as asking questions, providing information, or directing the customer to relevant resources.

Now that we have an idea of the Bots and Bot flows, let's explore how Bots are brought to life.

### How Bot gets triggered?

Bot alone can't be triggered but the flows inside the Bot are triggered. To understand how flows are triggered, let us look at two key concepts: [matching logic](#matching-logic) and the [default bot](#default-bot).

#### Matching Logic

To initiate a particular flow, a trigger is required. This trigger is defined by keywords associated with the flow. When a user's message contains these keywords, the corresponding flow is activated.

For instance, if a flow is designed to handle order inquiries and has keywords like "order," "purchase," or "status," any message containing these terms will trigger the order inquiry flow.

You can assign either one or multiple keywords to a Bot flow. If multiple flows share the same keyword, the Bot will differentiate between them using information provided in the payload.

#### Default Bot

A default Bot is the one that interacts with customers whenever they initiate contact with your business. There are two ways to set a default Bot in Gallabox. The first is during Bot publication, where you have the option to designate it as default.

Alternatively, if you already have a default Bot, you can go to Assignments under the WhatsApp Channel and assign new conversations to the desired Bot to make it the default.

{% hint style="info" %}
Make sure the user conversation is already resolved before a bot interacts with the user.
{% endhint %}

### What are Variables?

In everyday terms, think of **variables** as empty boxes that you can label with different names. You can put different things into these boxes, like numbers, words, or other types of information.

In Gallabox, you use these **variables** when setting up WhatsApp Templates and Bots.

Examples:

1. A WhatsApp Template for order confirmation might use variables like `{{order_id}}`, `{{customer_name}}`, and `{{total_amount}}` to display unique information for each order.
2. If a customer provides their name as a response, you can store it in a variable named customer\_name and use it later in the conversation, like "Hello, `{{customer_name}}`! How can I help you today?"

In Gallabox, the different data types you can use for variables are:

1. **Text**: For storing and displaying strings of characters, such as names or messages.
2. **Number**: For handling numerical values, which can be used in calculations or to display quantities.
3. **Date**: For representing dates and times, useful for tracking events or deadlines.
4. **Boolean**: For values that are either true or false, often used for decision-making or conditional logic.
5. **List**: For storing multiple values in a single variable, like a list of items or options.
6. **Object**: For complex data structures that can include multiple fields and values, allowing for more detailed and organized information storage.

These data types help you manage and utilize information effectively.

#### Gallabox System Variables and Formats

Gallabox provides built-in system variables to streamline your workflow, such as:

{% tabs %}
{% tab title="Intent" %}
You can use either the `{{intent.text}}` or `{{intent.payload}}` variable under Intent. `{{intent.text}}` is the detected intent name, or keyword to trigger the flow and `{{intent.payload}}` is the payload that goes with it.
{% endtab %}

{% tab title="Receipient" %}
The Recipient variables are `{{recipient.name}}`, `{{recipient.phone}}`, `{{recipient.formattedPhone.countryCode}}`, and `{{recipient.formattedPhone.phoneNumber}}`.

* `{{recipient.name}}`: Use this to address the customer by name.
* `{{recipient.phone}}`: Use this for the customer's contact number.
* `{{recipient.formattedPhone.countryCode}}`: This variable includes the country code.
* `{{recipient.formattedPhone.phoneNumber}}`: This variable excludes the country code.
  {% endtab %}

{% tab title="Session variables" %}
Session variables includes the variables - `{{session.triggerType}}`, `{{session.triggerBy}}`, `{{session.cart.items}}`, and `{{session.cart.amount}}`.

`{{session.triggerType}}:` Indicates how the current session was triggered. If the session was triggered from compose, it will have the value as compose. On the other hand, if the session was triggered by any keyword, it will have the value as intent\_match.

`{{session.triggerBy}}`: Provides the account id if the session was triggered by a user or the bot id.

`{{session.cart.items}}`: Stores information about the items currently in the user's cart in object data type.

`{{session.cart.amount}}`: Calculates and stores the total amount of the items in the user's cart.
{% endtab %}

{% tab title="Contact Fields" %}
For the contact fields, use the information stored in the variables `{{contact.name}}`, `{{contact.email}}`, `{{contact.phone}}`, `{{contact.tags}}`, `{{contact.messageOptIn}}`, and `{{contact.contactOwner.name}}`.
{% endtab %}

{% tab title="Contact custom fields" %}
You can use any custom contact fields you've created to personalize the flow for your customers.
{% endtab %}
{% endtabs %}

### How to Test and Debug a flow?

Before publishing the bot, you can test it out by clicking on the Test bot button. All you have to do is enter your number and then click on Test. You can adjust the customer's experience based on your testing feedback.

<figure><img src="/files/TXiUa4ZAwAcYbgHNQ50l" alt=""><figcaption></figcaption></figure>

If incase you encounter any issues, you can debug it by looking at the logs. The Cards will have a label- Succeeded, Answered, Unanswered, and Failed.

**Succeeded**: If the cards have this label, it means the card was viewed by your customer.

**Answered**: If the cards have this label, it means the customer answered the question posed on that card.

**Unanswered**: If the cards have this label, it means the customer did not answer the question posed on that card.

**Failed**: If the cards have this label, it means either of two things - customer didn't reply in the asked format incase of Send & Ask Cards. For utility, Actions, and Connectors if you see any failed cards, connect with the Support Team to understand the cause for this.

<figure><img src="/files/MKkIt3vpEMFvlvYBtZG0" alt=""><figcaption></figcaption></figure>

### Critical Config you should know about

Before publishing the Bot to interact with your customers, be mindful of two key configurations: the Drop-off conditions and the [post-flow actions](#flow-completed).

#### Drop-off

In Gallabox, there are two types of drop-off settings you can configure: **Bot Drop-Off** and **Flow Drop-Off**.

1. **Bot Drop-Off**: This setting is used for the entire bot. When creating your bot, you'll encounter a section that asks, "What if the contact didn't respond to the bot's questions?" Here, you configure how to track and understand why a customer might not respond at various stages. This helps you analyze overall bot performance and make necessary adjustments to improve the overall customer experience.

<figure><img src="/files/n40vqLxjFVMqJwAnBYrF" alt=""><figcaption></figcaption></figure>

2. **Flow Drop-Off**: For more detailed tracking, you can set up drop-off settings at the flow level. While creating a specific flow within your bot, you can specify:

* **How long the bot should wait** for a reply from the contact.
* **What the bot should say** to the contact if the designated wait time expires.
* **What actions the bot should take** after the wait time ends.

Setting up flow-level drop-off helps you fine-tune individual parts of your bot, improving the interaction quality and ensuring a better experience for your customers.

<figure><img src="/files/UNuPbbgiqv6ywPbeTtAa" alt=""><figcaption></figcaption></figure>

#### Flow Completed

Configuring the correct action after a customer's interaction with the Bot is essential when building it. This can be done while creating a flow, under custom configurations. The section with title - *What actions should the bot take after the flow completion?* If Toggled On, an action or more than 1 action can be added. This will help you to connect your customers with the right support person, or a Team or even resolve the conversation if the resolution has been provided.

<figure><img src="/files/mgXz1LrBbpWfsQVwItxj" alt=""><figcaption></figcaption></figure>

### How to Share the Bot?

There are multiple ways in which you can share a bot:

1. From Compose Box: You can activate a Bot when a customer enters your WhatsApp and also assign any Bot to a customer's conversation directly from the Compose Box. A dedicated icon for triggering bots is conveniently located within the compose box for easy access. Simply select the desired flow to trigger, and the conversation will be assigned to the Bot and the flow activated.
2. Making the Bot default: When a user connects with your business, the default bot will activate and continue the conversation.
3. WhatsApp Magic Link: After creating a magic link for your business phone number, customers can scan the QR code to initiate a conversation with your WhatsApp Chatbot.

### FAQs

<details>

<summary>Why my bot did not trigger?</summary>

Your bot did not trigger because the user's query didn't match the keyword for any of the Flows. Here are some troubleshooting tips:

1. Check if your keywords match the user's query.
2. Check if the user conversation is resolved.
3. Set the Flow to trigger "For all keywords" to activate the bot for all query terms.
4. Ensure you select the correct Flow Type.

</details>

<details>

<summary>Will my Bot rerun?</summary>

Your Bot will rerun for any customer if the previous conversation is marked as resolved in the Inbox.

</details>

<details>

<summary>How to trigger another flow?</summary>

Another flow can be activated by using [JUMP ](/bots/bot-utilities/jump-to)TO Card. It helps to jump from one flow to another.

</details>

<details>

<summary>Can you trigger a bot from Inbox?</summary>

Yes, you can trigger a bot from Inbox using the dedicated icon located in the compose box interface for easy access.

</details>


# Bot Essentials

Create and personalize your chatbot with Gallabox Interface's Bot Builder tool. Test your chatbot on WhatsApp and publish with confidence.

### Gallabox Bot Interface

Our Bot Builder is the heart of the app, where you can create and customize your chatbot to take conversations to the next level. Let's take a closer look at the interface.

<figure><img src="https://lh7-us.googleusercontent.com/9tgR8ycV2fhae7ySwuNXFT25uG2UHtC_oFi5zqOZ0klQdies2DrWOHo9TvFfVaGf2DS-xCTYT48Gr_xtI73GzGlAOrZ4U9P96n5nPWtmHLJpdTUMbo_8wFsx3AxfULTMT3vxXOjD0C7j-zpEfwvAq8A" alt=""><figcaption><p>Bot Interface</p></figcaption></figure>

### Auto grid alignment

<figure><img src="/files/zxIEWwhahZxCczBRL3e6" alt=""><figcaption><p>Grid Alignment in Bot Interface</p></figcaption></figure>

1. **'+' (Zoom In):** This feature allows you to zoom in on the content displayed on the screen. Useful for focusing on specific details or elements within the content, especially in situations where there's a need for a closer view.
2. **'-' (Zoom Out):** This feature allows you to zoom out, providing a broader view of the content on the screen. Helpful for getting an overview of the entire canvas or content, especially when you want to see a larger portion of the information.
3. **'\[ ]' (Fit to Screen View):** This feature adjusts the view to fit the entire content within the screen. Useful when you want to quickly see the entirety of the canvas or content without manually adjusting the zoom level.
4. **Lock (Enable View-Only Mode):** This feature locks the interactive elements on the canvas, preventing the movement of cards or objects. It is particularly helpful when you want to present information without the risk of accidentally moving or modifying the content. This feature is ideal for a view-only or presentation mode.
5. **Beautify Flow**: This feature automatically rearranges the cards or elements on the canvas to improve readability and maintain a logical flow. The purpose is to enhance the visual presentation of the content, making it more easier to comprehend.

### Card Limit Indicator for Bot Flows

To help you manage large bot flows better, we’ve introduced a **card usage tracker** and **smart alerts** as you approach the **100-card limit.** As you build your bot, you’ll now see a **card usage indicator** near the *Publish Status* that shows the count of cards used.

This number updates in real time, so you always know how many cards you’ve used and how many you have left. The indicator will **change color** as you use more cards (based on thresholds), so you get visual cues when you're nearing the limit.

<figure><img src="/files/OiFpFvwqkPdMEH2XURxC" alt=""><figcaption></figcaption></figure>

> **Smart Alerts While Building**
>
> To ensure you're aware before hitting the limit, alerts will be shown at key points:
>
> 1. At **50, 75, and 95–99 cards, it will show the below message:**\
>    \&#xNAN;*"You’ve created 75 cards! Only 25 more remaining. Be mindful of the 100-card limit."*
> 2. At **100 cards, it will show the below message:**\
>    \&#xNAN;*"You’ve created 100 cards! You can’t publish the flow if you add more than 100 cards."*\
>    → The **Publish/Republish** button will be disabled.
> 3. If you try to add more than 100 cards, **it will show the below message:**\
>    \&#xNAN;*"You’ve added more than 100 cards! Please delete extra cards to publish the flow."* **The Publish/Republish** button remains disabled until you're back within the limit.

### Start Block

The Start Block serves as the initial point in a bot flow, where the operation begins. It acts as the trigger for various actions or events within the bot. Connect the cards in two ways:

1. Choose a Bot Card from the drawer, configure the card, and then connect the start block with the card.

<figure><img src="/files/v3AxJQrJcBux6s5kdc74" alt=""><figcaption></figcaption></figure>

2. Click on '+' on the start block, the bot drawer will open, search or select the desired card, it will be connected and you can configure the bot card.

<figure><img src="/files/szbp1wihH9HScirWpvJh" alt=""><figcaption></figcaption></figure>

### Bot Flow Card Drawer

It contains all the blocks you can use to build your bot. To hide or show the Side panel, you just have to click on this arrow: <img src="/files/gbJcLUauFPXNdtwD3OCz" alt="" data-size="line">

The Side panel has 5 categories - **Send Text**, **Ask Questions**, **Actions**, **Utilities**, and **Connections**. For a quicker way to select a card or node, just start typing the name of the card and it will show:

<figure><img src="/files/XzWCxG7zr4cYIvw9BANC" alt=""><figcaption><p>Side panel in Bot Interface</p></figcaption></figure>

### Renaming a Node

This feature lets you change the names of your bot cards or nodes, making the flow easier to understand and manage. Assign custom names up to 32 characters following the familiar edit icon process. These names will be visible in the Canvas, node editing mode, and bot session logs.

<figure><img src="/files/SMcFsRjMdfTMv1YMAKhv" alt=""><figcaption></figcaption></figure>

### Test Bot

This feature will let you test the bot on WhatsApp before publishing it. All you have to do is enter your number and then click on Test.

<figure><img src="/files/XYEH0JjLqhBzkjVduHMT" alt=""><figcaption><p>Test Bot Button in Bot Interface</p></figcaption></figure>

### Publish

Every time you make a new change inside your bot, you will need to Publish the bot so it updates. It's very important you remember to do this when you're testing your bot.

When publishing or republishing the bot, we will identify and display errors in the bot flow. Each error will include a description and a "Go to card" button that directs the user to the relevant card, highlighting it.

<figure><img src="https://lh7-us.googleusercontent.com/j0pE4kZTtpNPWWLUWE_Icvs9iNInP8CY6opckYPlqkL9XY5dCTLfv9Rozh8997iMs9VbgyKE7o5bCpiFliwPcjRuAYr_y2pebmOayklYLL8pyMTXHDs6rNq-u5L3OQ1_DFOOOnIVTQG7okJH0wjwpzE" alt=""><figcaption><p>Publish Button in Bot Interface</p></figcaption></figure>

### What is a Variable?

In Gallabox bot, a variable is like a digital box where we store all your customer's answers from your questions. Imagine it as a labeled container where we keep different kinds of information.

For example, when you ask a question in the bot, and someone answers, that answer is saved in a variable.

**Here are some examples of how you can use variables for your Gallabox chatbot:**

* Store the **customer's name** so that you can address them by name.
* Store the **customer's email address** so that you can send them a confirmation email after the conversation.
* Store the **customer's interests** so that you can recommend products or services that they might be interested in.

### Format of Variables available in Gallabox

Variables come in different formats based on the kind of information they store. Here are some formats:

1. **String (Text):** The most flexible type, perfect for storing text, numbers, emojis, hyperlinks, and more.
2. **Number:** Reserved strictly for numbers; no symbols or letters allowed.
3. **Date:** Ideal for storing dates within the variables.
4. **Array:** An advanced feature for developers, allowing the storage of multiple elements of the same data type, such as strings or numbers.
5. **Object:** A sophisticated container for holding structured data with multiple pieces of information.
6. **Boolean:** While you can't create or save variables in this type, it's used in Condition blocks to check if agents are online.

<figure><img src="/files/vkxwyyn0soNHbPMkwn7A" alt=""><figcaption><p>Variables in Gallabox</p></figcaption></figure>

### Creating Variables

The value inside a variable changes based on the answers given by users or choices made in the bot flow.

To create a variable inside a Card in Gallabox:

1. Choose a card and scroll down to the "**Store response in the variable**" field.
2. Name the variable whatever you want, but note it should start with alphabet; Cannot have special characters except underscore (\_).
3. Click on create.

<figure><img src="/files/zyAhr329v7qHas0ujNxL" alt=""><figcaption><p>Creating Variables in Gallabox</p></figcaption></figure>

{% hint style="info" %}
The Name you assign to your variable should be descriptive and understandable to use.
{% endhint %}

**Example - 1**

If you have asked your customer for their name, you can save it in the variable "name".

Scroll to "Store response in the variable" in the **Ask Text Card,** type the name of the variable and then click on create.

<figure><img src="/files/UAUoPDEjr63lXudAHsPL" alt=""><figcaption><p>Variable to store customer's name</p></figcaption></figure>

**Example - 2**

If you have asked your customer for their phone number, you can save it in the variable "phone".

Scroll to "Store response in the variable" in **Ask Phone Card**, type the name of the variable and then click on create.

<figure><img src="/files/Q5jhMSlGEPcusEQ3NpLX" alt=""><figcaption><p>Variable to store customer's phone number</p></figcaption></figure>

{% hint style="warning" %}
The variable name cannot have special characters except underscore (\_).
{% endhint %}

### Deleting Variables

To create a variable inside a Card in Gallabox:

1. Choose a card and scroll down to the "**Store response in the variable**" field.
2. Click on the variable, and hover on the delete button for the variable you would like to delete.
3. Click on Delete on the pop-up confirming if you really want to delete a variable.

<figure><img src="/files/IpBtEV8SdqC6qaMFx4Ew" alt=""><figcaption><p>Deleting variables</p></figcaption></figure>

{% hint style="danger" %}
This will delete the variable from the Card. However, if a variable is used in flow A which is connected to another flow B via **Jump to card**, then the variable will be displayed in the flow B also to use it.
{% endhint %}

### Validation Settings for Cards

Validation settings play a crucial role in ensuring the accuracy of data captured in a BotFlow. These settings help define how Gallabox Bot handles user input and responds to various scenarios during interactions with the bot.

### Core Validation Settings

1. **Attempt**: Specifies the number of attempts allowed for a user to provide valid input.

<figure><img src="/files/kT45CnQp3nKCILyQJLPq" alt=""><figcaption><p>Attempt count in Core Validation settings</p></figcaption></figure>

2. **Validation Error Message**: Optional field to enter a custom error message displayed when user input fails validation.

<figure><img src="/files/aluxeMv94RLSLNuT33t8" alt=""><figcaption><p>Validation Error Message</p></figcaption></figure>

3. **Action on Invalid Response**: Defines the action to be taken when the user provides invalid input.

<figure><img src="/files/3GLHVPZofA1ndweJIaL7" alt=""><figcaption><p>Actions to be taken in case of an invalid Response</p></figcaption></figure>

### Additional Validation Settings

1. **Minimum Range**: Specifies the minimum numeric value considered valid.
2. **Maximum Range**: Specifies the maximum numeric value considered valid.
3. **Regex (Regular Expression):** Regex stands for regular expression. It is a way to describe patterns in text. Regex uses special characters to describe patterns.

For example, the regular expression \d{10} matches any 10-digit phone number.

The `\d` character matches any digit, and the `{10}` character asks to match the preceding character 10 times.

Here are some examples of regex patterns:

1. `\d{3}-\d{3}-\d{4}` matches any phone number in the format ###-###-####.
2. `[a-zA-Z0-9._%+-]+@[a-zA-Z0-9.-]+\.[a-z]{2,}` matches any email address in the format @.
3. `^https?://` matches any URL that starts with the http or https protocol.

<figure><img src="/files/7r1YyCzJQRwdfPcRxVlL" alt=""><figcaption><p>Additional Validation Settings for Bot Cards</p></figcaption></figure>


# Bot in Gallabox

Create personalized chatbots effortlessly with Gallabox! Whether starting from scratch or using our diverse templates, follow simple steps to craft engaging bots for impactful customer interactions.

Ready to explore the world of chatbot creation in Gallabox? Whether you're starting from scratch or leveraging our diverse templates, follow these simple steps to effortlessly craft, edit, and enhance your bots for impactful and engaging customer interactions. Let's dive in and master the art of chatbot creation!

### Create a Bot in Gallabox

You can create a Bot in Gallabox using three options - Build with AI, Use a Template, or Start from Scratch.

<figure><img src="/files/yhhtyyEAYZ6ZFCLtErIL" alt=""><figcaption></figcaption></figure>

<table data-view="cards"><thead><tr><th></th><th data-hidden data-card-target data-type="content-ref"></th></tr></thead><tbody><tr><td>Create a Bot using AI</td><td><a href="/pages/yp2KbNaxCu1MHfxcYQFb">/pages/yp2KbNaxCu1MHfxcYQFb</a></td></tr><tr><td>Create a Bot using Template</td><td><a href="/pages/HQgThUZMyJogn8HyjBZN">/pages/HQgThUZMyJogn8HyjBZN</a></td></tr><tr><td>Create a Bot from scratch</td><td><a href="/pages/9tZhlltOyItcKkgFoNnZ">/pages/9tZhlltOyItcKkgFoNnZ</a></td></tr></tbody></table>

### Edit or Update a Bot

After creation of the bot, you can edit the details like the **Bot Name, or** the **time** you want the bot to wait for the response from the user after the last question you asked, or the **message** you want to share with the customer after the wait time, or the **action** you want the bot to do at the end of the conversation. Follow the below GIF to get an understanding.

<figure><img src="/files/HSPEAEjINknIY29n6h9t" alt=""><figcaption></figcaption></figure>

### Clone a Bot

To clone a bot, follow these steps:

1. Find the bot you wish to clone within your list of bots. Click on the 'Clone Bot' option for the bot you selected. The entire bot, including all its flows and settings, will be duplicated. The new bot will have 'copy of' prefixed to its name.

<figure><img src="/files/EYowqELEowlPELCEb6tn" alt=""><figcaption></figcaption></figure>

3. All connectors, templates, and actions are retained within the same account. All the flows in the duplicated bot will be in the draft state. You will have to publish them individually.

<figure><img src="/files/9SLAUyvfyReBmv17zbBV" alt=""><figcaption></figcaption></figure>

4. Log data and session data will be cleared in the cloned bot.

<figure><img src="/files/Y8FljwUPX29ndV9zywj2" alt=""><figcaption></figcaption></figure>

{% hint style="danger" %}
If the bot being cloned is a default bot, the cloned bot will **not** be marked as a default bot.
{% endhint %}

Copying a bot in Gallabox keeps its settings and data unchanged.

### Bot Logs

**Logs** provides an overview of different flows details like the flow name, associated intents, last published date, session completion statistics, and overall status. This summary allows users to track the performance and status of various flows within Gallabox.

<figure><img src="/files/964YIs8fDKKghezzqHpX" alt=""><figcaption></figcaption></figure>

{% hint style="info" %}
When the Bot limit for the plan you are subscribed to has been reached and you would want more number of Bots in your account, reach out to the support team on **<support@gallabox.com>**.

<img src="/files/GzrbPYzgwaRpYMK5cDEC" alt="" data-size="original">
{% endhint %}

### Voice-enabled bot

Gallabox now supports **voice input and output** for bot interactions. Here’s how you can configure and use it effectively.

{% hint style="info" %}
"Voice" refers to a note recorded directly in WhatsApp, not an audio file like a song or an externally.
{% endhint %}

To enable the voice for your bot, check for the toggle under the Custom Configurations while creating a Bot.

<figure><img src="/files/7BpThqXR9QPQCamQawZT" alt=""><figcaption></figcaption></figure>

<details>

<summary>Nodes That Accept Voice Input But Don’t Use It for Response Validation</summary>

[Ask Location](/bots/ask-questions/ask-location) and [Ask File](/bots/ask-questions/ask-file) cards can accept voice input. However, voice input will not be considered a valid response to the questions for these two nodes.

</details>

<details>

<summary>Nodes That Support Voice Input and Matching</summary>

For the following nodes, Gallabox will transcribe the voice input, match it to the correct option, select it, and store the result in a variable (if applicable):

1. [Ask Button Option](/bots/ask-questions/ask-button-option)
2. [Ask List Option](/bots/ask-questions/ask-list-option)
3. [Ask Keyword Option](/bots/ask-questions/ask-keyword-option)
4. [Ask Collection List](/bots/ask-questions/ask-collection-list)

</details>

<details>

<summary>Asking Questions as Voice Messages</summary>

The following **Ask nodes** now support delivering the question as a **voice message** instead of text:

1. [Ask text](/bots/ask-questions/ask-text)
2. [Ask number](/bots/ask-questions/ask-number)
3. [Ask phone](/bots/ask-questions/ask-phone)
4. [Ask email](/bots/ask-questions/ask-email)
5. [Ask date](/bots/ask-questions/ask-date)
6. [Ask location](/bots/ask-questions/ask-location)
7. [Ask URL](/bots/ask-questions/ask-url)
8. [Ask File](/bots/ask-questions/ask-file)

These nodes support **three modes** of question delivery:

<table><thead><tr><th width="155.25">Mode</th><th>Description</th></tr></thead><tbody><tr><td><strong>Text</strong></td><td>The question is sent as regular text</td></tr><tr><td><strong>Static Voice</strong></td><td>Record and send a pre-recorded voice message</td></tr><tr><td><strong>Dynamic Voice</strong></td><td>Type your message (with optional variables), select a voice style, and Gallabox will generate and send it as a voice message</td></tr></tbody></table>

</details>

<details>

<summary>Sending Voice Notes with a Bot</summary>

To send a voice note to the user:

1. Use the **Send Voice** card in your bot flow.
2. Choose between:
   * **Static Voice**: Upload or record a voice note manually.
   * **Dynamic Voice**: Enter your message as text (can include variables), select a voice type, and Gallabox will convert it to audio and send it to the customer.

</details>

<details>

<summary>Intent Matching with Voice</summary>

If a bot is configured to accept voice input:

1. Gallabox will transcribe the voice message.
2. The transcription will be used for **intent matching** within the flow logic.

</details>

### Delete Bot

Deleting a bot can impact active conversations, automation flows, and channel assignments. To prevent disruption, Gallabox introduces **warnings, validations, and restrictions** based on the bot’s role in your workspace.

Depending on whether the bot is set as a **default** for any channel or not, the deletion flow varies:

<details>

<summary>Deleting a Non-Default Bot</summary>

A confirmation popup will appear showing active conversations tied to the bot. You must choose what to do with these:

* [x] Move to **Unassigned**
* [x] Mark as **Resolved**

The **Delete** button will remain disabled until one of these options is selected. If there are **0 active conversations**, the options won’t appear and deletion is allowed directly.

**On successful deletion:**

Conversations are moved as per your choice. Logs are updated in both **Conversation Report** and **Activity Log**.

</details>

<details>

<summary>Deleting a Default Bot (Blocked)</summary>

1. If a bot is set as default for any WhatsApp channel, deletion will be blocked.

You’ll see a message like this:

> Delete "bot name"\
> 🛑 Heads-up
>
> This bot is currently set as the default for the following channels.\
> Channel Name 1,Channel Name 2\
> You must change your assignment before proceeding.
>
> Go to assignments

A **Go to Assignments** button is provided for quick redirection.

</details>


# Create a Bot using AI

### Overview

Gallabox makes it simple to build powerful AI-driven bots to automate your conversations. With just a prompt or by choosing from pre-built use cases, you can quickly create a bot tailored to your business needs.

Once your bot is created, you can personalize the flow by adding your business details, setting up variables to capture customer inputs, and configuring connectors to push data directly to your CRM. You can also rename the bot flow, define the bot’s intent, and fine-tune custom settings to optimize its performance.

### Prefer watching than reading? Watch the below YouTube Video:

{% embed url="<https://www.youtube.com/watch?v=g702Vdy_2wA>" %}

### Prefer reading? Read the steps below:

To build a bot with AI in Gallabox, you will have to provide a prompt or select from the use-cases provided.

<figure><img src="/files/qmEx3lflzDtqrMPlLD2B" alt=""><figcaption></figcaption></figure>

Once the Bot is created, you have to personalize the flow adding your details, variables to store the data, and connectors to push the data to your CRM.

<figure><img src="/files/wAzhWjxpRwcWL5FreVbD" alt=""><figcaption></figcaption></figure>

{% hint style="info" %}
You can rename the bot flow, intent for the bot flow, and configure custom settings.

<img src="/files/yAVWP1sSUgVwXlqe4C4x" alt="" data-size="original">
{% endhint %}


# Create a Bot using Bot Templates

### Overview

Gallabox offers a wide range of ready-to-use bot templates designed for different industries to help you build conversational bots quickly. Simply browse through the available templates, find the one that best fits your business needs, and click **Use**. From there, select **Create your own bot** from the dropdown and click **Deploy** to start customizing. Using templates makes it easy to launch powerful bots without starting from scratch.

### Prefer watching than reading? Watch the below YouTube Video:

{% embed url="<https://youtu.be/tE3J2Yn3Wow>" %}

### Prefer reading? Read the steps below:

To build a Bot using the Templates, choose the template that resonates with your business. We have a plethora of templates segregated into Industries. Click on the the button Use for the any template. Select the option - **Create your own bot** from the Dropdown and click on **Deploy.**

<figure><img src="/files/D1LaqosvJpDAkPLuC1Db" alt=""><figcaption></figcaption></figure>


# Create a Bot from Scratch

### Overview

Building a bot from scratch in Gallabox gives you complete control to design conversations tailored to your business needs. You can create unique bot flows, define custom messages, capture user inputs with variables, and set up actions like pushing data to your CRM. Start with a blank canvas, map out your ideal customer journey, and fully personalize the bot to deliver seamless interactions.

### Prefer watching than reading? Watch the below YouTube Video:

{% embed url="<https://youtu.be/MhRs_iAfVEI>" %}

### Prefer reading? Read the steps below:

To create a Bot from scratch, choose the option. In the side window, fill in the Bot Name, Configure the nudge for the bot, and custom configurations.

**What if the contact didn't respond to the bot's questions?**

1. Add the session out Time for the Bot in ***How long the bot can wait for reply?***

<figure><img src="/files/JQ0CoXvmd4EHatKaf8DE" alt=""><figcaption></figcaption></figure>

2. Add the session Message for the Bot in ***What should the bot say to contact after the designated wait time?***

<figure><img src="/files/8WhcE0maAi7M6CFzNzSx" alt=""><figcaption></figcaption></figure>

3. Add the action once the Bot session expires in ***What should the bot do after the designated wait time?***

<mark style="background-color:yellow;">You can choose from 8 actions:</mark> *<mark style="background-color:yellow;">**Assign Conversation to Users**</mark><mark style="background-color:yellow;">,</mark>* *<mark style="background-color:yellow;">**Assign Conversation to Team**</mark><mark style="background-color:yellow;">,</mark>* *<mark style="background-color:yellow;">**Assign Conversation to Contact Owner**</mark><mark style="background-color:yellow;">,</mark>* *<mark style="background-color:yellow;">**Unassign Conversation**</mark><mark style="background-color:yellow;">,</mark>* *<mark style="background-color:yellow;">**Resolve Conversation**</mark><mark style="background-color:yellow;">,</mark>* *<mark style="background-color:yellow;">**Update Conversation Tag**</mark><mark style="background-color:yellow;">,</mark>* *<mark style="background-color:yellow;">**Remove Conversation Tag**</mark><mark style="background-color:yellow;">, and</mark>* *<mark style="background-color:yellow;">**Push to Sequence**</mark><mark style="background-color:yellow;">.</mark>*

<figure><img src="/files/BUKtDeiq4yyrIeR9mTQ5" alt=""><figcaption></figcaption></figure>

**Custom Configurations**

To accept the messages and send the messages in [voice ](#voice-enabled-bot)- **Toggle On** the Accept voice messages also as input option.

![](/files/wFXb6X8ZF3I7yNOaC4gk)

Once the bot is created, you can add **multiple** flows in any bot to create a well-flourished conversational chatbot.

<figure><img src="/files/nzGjsgjh9hXLc6YpSVhW" alt=""><figcaption></figcaption></figure>


# Flow in the Bot

Whether you want to create a flow from scratch or use a template, this guide will show you how to seamlessly create Bot Flows in Gallabox. Start building your conversational interface today!

### What is Flow?

A **Flow** or **Bot Flow** is a sequence of intents and actions that direct the chat bot to complete a task. You can create a Flow inside the bot from [**scratch**](#create-a-flow-from-scratch) or use any template from the Intensive [**Template Library**](#create-a-flow-using-the-template-library) to create a flow in the bot.

Let's dive in understand the types of **flows** in Gallabox.

### Types of Flows

There are four types of flows that you can utilize in Gallabox to enhance your chat bot's interaction with users. Each flow serves a specific purpose and can be tailored to meet your business needs. Let's explore the types of flows available:

#### 1. Message Based Flow

A Message-Based Flow is like chatting with a friend. It uses set messages to help the bot talk to users and give information. It's good for general chats, answering questions, or casual conversations.

#### 2. Order Based Flow

This flow is automatically triggered when the contact places an order from your Catalogue.

#### 3. WhatsApp - Flow Based

This flow will trigger when a customer responds to the WhatsApp Form or Flow.

#### 4. CTWA Ad- Based Flow

This flow lets you handle conversations triggered by CTWA ads separately from regular inquiries.

### How to add a Flow in Gallabox?

You can add a flow in Gallabox using three methods: From [Scratch](#create-a-flow-from-scratch), using a [Template](#create-a-flow-using-the-template-library), or using AI Bot.

### Create a Flow from Scratch

1. Under **Bots** click on the Bot for which you want to add the bot flows.

<figure><img src="/files/YAW2TVHj0sBctKTTuwTR" alt=""><figcaption></figcaption></figure>

2. Click on "**Add New Flow**" at the top right corner. You will be prompted to provide the **Flow name**, [**Flow type**](#what-is-flow), When to trigger this flow?, and Custom Configurations. Click on create once you enter the details.

<figure><img src="/files/lNjXqIZJ6UTvtal3TGqg" alt=""><figcaption></figcaption></figure>

***Great! You created a Flow inside the Bot. You will be redirected to bot builder to create using the Bot Cards/Nodes.***

### Create a Flow using the Template Library

1. Go to "**Bot Templates**" from the drop-down option in Bots as shown in the GIF.

<figure><img src="/files/0J1QeeXo4srb8FF9Q88W" alt=""><figcaption></figcaption></figure>

2. Choose the **Bot Template** and click on "**Use**" as shown in the GIF. Choose the Bot from the drop-down to add as a flow template under the Bot.

<figure><img src="/files/1oic2bZJFXWEGlvcqnLt" alt=""><figcaption></figcaption></figure>

3. Click on "**Go to Flow**" to edit the content as per your company's voice or edit the template using the "**Bot Cards**" which Includes **Send Message**, **Ask Questions**, **Utilities**, **Actions**, and **Connectors**.

<figure><img src="/files/YVbxfw2W2yzXQaxWtid2" alt=""><figcaption></figcaption></figure>

### Create a Flow using AI

1. Under **Bots** click on the Bot for which you want to add the bot flows.

<figure><img src="/files/CdJczD4kHA33zdju5m9n" alt=""><figcaption></figcaption></figure>

2. Click on "**Add New Flow**" at the top right corner and choose AI Bot (Agent) option from the dropdown. You will be prompted to provide the **Flow name**, trigger conditions, and Custom Configurations. Click on create once you enter the details.

<figure><img src="/files/Fx48XopAReOdVBzTFUvo" alt=""><figcaption></figcaption></figure>

3. Once you click on 'Create', you will be asked to provide the context for the AI Bot. The context includes what role and goal you would like the bot to have. You can provide the additional actions, and instructions for your Bot. Additionally, you can upload any files which will help your Bot to work efficiently with customer queries. Once you are done, click on Publish.

For example:

**Role:** Customer Support Agent\
**Goal:** Assist customers with troubleshooting and resolving issues.

In Order to achieve the goal, we need to add the instructions. In an AI flow, **instructions** guide the chatbot’s behavior, responses, and decision-making processes during interactions.

You can provide the following Instructions:

* Greet the user and ask how you can assist them.
* Ask the customer to describe their issue or problem in detail.
* Based on the user’s initial description, ask follow-up questions to narrow down the issue.

<figure><img src="/files/gcdkittjF7sfn4MsqAjb" alt=""><figcaption></figcaption></figure>

***Great! You created a AI Flow inside the Bot.***

### Flow Essentials

#### 1. When to trigger the flow?

You can trigger the flow for two options: For any keyword and For specific keywords.

**For any keyword**: They bot flow will triggered for any user message (keyword) that comes to your Bot.

**For specific Keywords**: You can select which Bot flow will trigger for which user messages (keywords). Under Advance option for a specific keyword you can add a payload. A payload in a chatbot carries information within a message that helps the bot understand what the user is saying and respond accordingly. Here in Gallabox, we have two main ways to make sense of payloads: **Case Match** and **Regex Match**.

<details>

<summary>Case Match</summary>

It's ideal for situations where the user's input needs to precisely match a predetermined phrase or keyword.

Here's how it works:

1. You define a list of specific phrases or keywords the chatbot should recognize (e.g., "Hi", "Order Status", "Help").
2. When a user types one of these exact phrases, the chatbot recognizes it as a match.
3. Based on the matched phrase, the chatbot can be programmed to deliver a specific pre-written response (e.g., "Hello there!", "Track your order here!", "What can I help you with today?").

</details>

<details>

<summary>Regex Match</summary>

Regex Match, short for Regular Expression Match, can recognize patterns within user input, even if the exact wording isn't a perfect match.

Here's how it works:

1. You define a pattern using special characters and symbols (e.g., "ord\ser\s+\[0-9]{5}"). This pattern can capture variations of a phrase, like "order number 12345" or "what's my order 12345?".
2. When a user's message matches the defined pattern, the chatbot recognizes it.
3. The chatbot can then respond based on the captured information within the pattern (e.g., retrieve order details for order number 12345).

</details>

#### 2. Custom Configurations

Under custom configurations you have the option to set up nudge for the bot flow, What actions should the bot take after the flow completion?, Allow users to navigate back and forth within the flow, and Enable flow-level drop-off for every flow.

<details>

<summary>Enable nudge before dropping user off the bot</summary>

After a question is asked, if the user doesn't respond, a bot dropout occurs. However, by enabling this feature, we can proactively engage the customer before they are dropped from the bot, thereby recovering potentially lost customers. Here's how to enable this nudge feature:

1. Select the bot for which you want to activate the nudge feature.
2. Click on the "**edit**" icon on the flow.
3. Navigate to "**Custom Configurations**."
4. Locate the option titled "**Nudge contact if question message is unanswered**" and toggle it ON.
5. Specify the following settings:

![](https://docs.gallabox.com/~gitbook/image?url=https%3A%2F%2F3137140735-files.gitbook.io%2F%7E%2Ffiles%2Fv0%2Fb%2Fgitbook-x-prod.appspot.com%2Fo%2Fspaces%252FZcl3T6ePz95GpzjAeOLW%252Fuploads%252FHvCzPv0rpyZnDr6gDLXP%252FEnable%2520Nudge.gif%3Falt%3Dmedia%26token%3Dfd2f128e-680f-477e-b9b3-e40114df9acc\&width=768\&dpr=4\&quality=100\&sign=85fced3a\&sv=1)

By following these steps, you can effectively utilize the nudge feature to enhance user engagement and retention within the bot.

</details>

<details>

<summary>What actions should the bot take after the flow completion?</summary>

Toggle this on if you would like the bot can perform some actions upon completion of the flow.

To configure this,

Click the toggle button for "***What actions should the bot take after the flow completion?***" under Custom Configurations when you create Flow.

![](https://docs.gallabox.com/~gitbook/image?url=https%3A%2F%2F3137140735-files.gitbook.io%2F%7E%2Ffiles%2Fv0%2Fb%2Fgitbook-x-prod.appspot.com%2Fo%2Fspaces%252FZcl3T6ePz95GpzjAeOLW%252Fuploads%252FwapMabkdpPwvr87fWuBz%252FAction%2520after%2520flow%2520completion.gif%3Falt%3Dmedia%26token%3D49247e15-4a86-4eed-a840-e624929e9b03\&width=768\&dpr=4\&quality=100\&sign=64f4b0d7\&sv=1)

</details>

<details>

<summary>Allow users to navigate back and forth within the flow</summary>

Users are allowed to navigate back and forth within the flow for enhanced interaction. Navigation options within the flow enable users to either return to previous steps for clarification or additional information or proceed forward to continue with the flow and complete desired actions.

To configure this,

Click the toggle button for "***Allow users to navigate back and forth within the flow***" under Custom Configurations when you create Flow. Enter the minutes, the bot will wait even after the customer has reached the end of the flow, giving them a chance to navigate other options within the flow.

![](/files/2eJIhZMln6U6TbgDRkBI)

The time can be set to a minimum of 1 minute and a maximum of 60 minutes (1 hour).

</details>

<details>

<summary>Enable flow-level drop-off</summary>

Enabling flow-level drop-off in Gallabox Bot allows you to override the bot-level session timeout setting.

To enable flow-level drop-off:

1. Open the desired flow in Gallabox.
2. Go to the `Edit` using the <img src="https://docs.gallabox.com/~gitbook/image?url=https%3A%2F%2F3137140735-files.gitbook.io%2F%7E%2Ffiles%2Fv0%2Fb%2Fgitbook-x-prod.appspot.com%2Fo%2Fspaces%252FZcl3T6ePz95GpzjAeOLW%252Fuploads%252FEorMF7cqqBaXrgd9EmgQ%252Fmenu-removebg-preview.png%3Falt%3Dmedia%26token%3Dbf7b3589-8f21-4d82-aaca-ec9a88dc54a0&#x26;width=22&#x26;dpr=4&#x26;quality=100&#x26;sign=1a7785bf&#x26;sv=1" alt="" data-size="line">beside the desired flow.
3. Scroll down and locate the *Enable Flow Drop-off Tracking* option.
4. Toggle it on.
5. Add the session out Time for the Bot in *How long the bot can wait for reply?*
6. Add the session Message for the Bot in *What should the bot say to contact after the designated wait time?*
7. Add the action once the Bot session expires in *What should the bot do after the designated wait time?* Choose from the actions below:

![](https://docs.gallabox.com/~gitbook/image?url=https%3A%2F%2F3137140735-files.gitbook.io%2F%7E%2Ffiles%2Fv0%2Fb%2Fgitbook-x-prod.appspot.com%2Fo%2Fspaces%252FZcl3T6ePz95GpzjAeOLW%252Fuploads%252FUBnx3bKO3WhQZI10fu7Z%252FEnable%2520flow%2520drop%2520off.gif%3Falt%3Dmedia%26token%3Dc36ded3b-f651-41fe-959f-d3268c448338\&width=768\&dpr=4\&quality=100\&sign=69d961de\&sv=1)

Drop-off data can be found in the **Analytics** section, helping you optimize the flow based on user behavior.

</details>

{% hint style="info" %}
When the Bot flow limit for the plan you are subscribed to has been reached and you would want more number of Bots in your account, reach out to the support team on **<support@gallabox.com>**.

<img src="/files/GzrbPYzgwaRpYMK5cDEC" alt="" data-size="original">
{% endhint %}

### Manage Bot Flows

#### 1. Moving a Flow from One Bot to another

To move a flow from one bot to another:

Find the flow you wish to move to another bot. Click on the 'Clone Flow' option. You will be prompted to enter the new flow name and select the bot from the drop-down where this flow will be created.

<figure><img src="/files/7EVX7vCZUfp82OJ7awEo" alt=""><figcaption></figcaption></figure>

{% hint style="info" %}
By default, the dropdown will prefill with the current bot's name, allowing you to change it if needed.

To address the issue of reply settings failing:

* The listing page will display the presence of a payload upfront for each flow.
* On the flow edit page, the payload will be shown in an expanded format.
  {% endhint %}

### Flow Matching using payload

**Think of "flows" as conversations or exchanges of information.** This could be anything from ordering a product online to sending a message to a customer service rep.

**The "payload" is the information attached to the flow.** This information is like the details. It might include things like the type of product you're ordering, the reason you're contacting customer service, or even your location.

**Flow Matching uses the payload to connect the flow with the right system.** So, if you're ordering a red shirt, you'll be connected to the department that handles clothing orders, not the one that deals with electronics.

For each bot flow intent, you can add a payload using either a [case-match](#payload) or [regex- match](#payload).

{% hint style="info" %}
The usage is recommended if you are having same intents for more than 1 bot flow.
{% endhint %}

For each bot flow intent, you can add a payload using either a static value or a dynamic value.

For example:

* **Static Value:**

For the "order\_product" intent, the payload may include options such as clothing, shirt, or red.

<figure><img src="/files/OJMyV8XpXoTbtviVUl4T" alt=""><figcaption></figcaption></figure>

* **Dynamic Value:**

For "intent": "contact\_support", you can use the payload as {{user\_reason}} or {{user\_location}}.

<figure><img src="/files/nXGUZnFQhtMNONiAXCQP" alt=""><figcaption></figcaption></figure>


# AI Based Flow

With the **AI Bot Builder**, you can create smart, personalized conversations that help your business engage with customers 24/7. Whether you're building a bot to handle support queries or answer FAQs, the Flow Builder gives you full control—without needing to write a single line of code.

This guide walks you through everything you need to know to set up a new flow, define how your bot should behave, and create natural conversations that match your brand’s tone and goals.

Let’s see how we can create AI flow in Gallabox.

1. From the homepage go to Bots. Choose the Bot under which you would like to add an AI flow. Click on 'Add New Flow' at the top right corner. Choose the option 'AI Based Flow'.

<figure><img src="/files/4PsmsegVOtuhZTS41NaO" alt=""><figcaption></figcaption></figure>

2. Enter the name for the flow, choose if you want to trigger the bot flow for a specific keyword or for any keyword. Define the Custom Configurations as per your business needs. Click on Create.

<figure><img src="/files/vldCxZJsnDeQezpfPoF8" alt=""><figcaption></figcaption></figure>

3. Once your flow is created, the next important step is to **define the Role and Goal of your chatbot**. These two fields help shape the bot’s personality, behavior, and purpose—guiding both how it communicates and what it tries to achieve during conversations.

{% tabs %}
{% tab title="What is the Role of the Bot?" %}
The **Role** describes the bot’s identity, function, and how it should behave during interactions. Think of this like a job description or the "persona" of the bot.

When defining the **Role**, consider:

* Who the bot is (e.g., a support assistant, a product expert, a friendly guide)
* What kind of queries it should handle
* How it should speak (tone, level of formality)

**Examples:**

* “Acts as a friendly assistant to help customers check order status, track deliveries, and manage returns.”
* “Behaves like a professional product consultant, helping users choose the right software plan.”
* “Guides new users through onboarding, answers FAQs, and encourages feature adoption.”
  {% endtab %}

{% tab title="What is the Goal of the Bot?" %}
The **Goal** explains what outcome the bot is expected to achieve. This could range from answering common questions, to reducing support load, to converting leads.

When writing the **Goal**, focus on:

* The core objective of the bot
* How it supports your business or team
* What success looks like

**Examples:**

* “Reduce the number of repetitive support queries handled by agents by 60%.”
* “Guide new users through setup and ensure they complete onboarding within 24 hours.”
* “Answer frequently asked questions to improve user satisfaction and reduce wait times.”
  {% endtab %}
  {% endtabs %}

Once you define the role and the goal of the bot, click on save changes.

<figure><img src="/files/FYPy1mpznjgsJ9H31Id6" alt=""><figcaption></figcaption></figure>

4. Now it is time to provide the Instructions to the Bot. Switch to 'Instructions' Tab. These help your bot handle specific scenarios like failure, query not found etc.

<figure><img src="/files/B3xoadjISeYOyOAgcVgb" alt=""><figcaption></figcaption></figure>

5. When the instructions are set, you can proceed to add Actions. They allow you to trigger or receive information from third-party services, or assign the conversation to a Gallabox user. Choose from API Call or Assignment, make sure the toggle switch is on for 'Process in Background', and enter the details.

{% tabs %}
{% tab title="API Call" %}
The **API Call Action** allows you to do simple actions—like fetching values from google sheet.
{% endtab %}

{% tab title="Assignment" %}
Instead of handling every conversation manually, you can set up an **Assignment Action** to route conversations to a selected **team** when specific rules are met.

For example, if a user has a question that the AI bot can't answer or mentions a specific keyword like "pricing," you can assign that chat to your **Sales Team** instantly.

<table><thead><tr><th width="245.6666259765625">Field</th><th>What to Enter</th></tr></thead><tbody><tr><td><strong>Action Name</strong></td><td>A clear name for your rule. Example: <code>Assign to Sales Team</code></td></tr><tr><td><strong>Action Type</strong></td><td>Choose <code>Assignment</code></td></tr><tr><td><strong>Process in Background</strong></td><td><em>(Keep this checked to auto-assign without interrupting the user)</em></td></tr><tr><td><strong>Assign Conversations To</strong></td><td>Select the team that should handle these queries — e.g., <code>Sales Team</code></td></tr></tbody></table>
{% endtab %}
{% endtabs %}

<figure><img src="/files/lc9AjtX5uUfuEECOjGGn" alt=""><figcaption></figcaption></figure>

{% hint style="info" %}
This action can now be used inside instructions by typing `@get_order_details` to insert it directly into your bot flow.
{% endhint %}

6. Add DOCX, PDF, MD, or TXT resources (up to 15MB) for your bot to reference. This enables it to provide information from documents like product manuals, company policies, FAQs, and pricing documents.

{% hint style="danger" %}
Only textual information can be uploaded. If you uploaded an image, it might show error.
{% endhint %}

<figure><img src="/files/3mGrZS7TpcZTgLLXZhMf" alt=""><figcaption></figcaption></figure>

7. You can display a custom message when AI takes longer than 10 seconds to respond. Also you can enable the AI to analyze and respond to images sent by users. This allows your bot to handle visual inputs like photos or screenshots intelligently. They are available under settings.

<figure><img src="/files/lZ1LS0NsOZNuJaV2GoDV" alt=""><figcaption></figcaption></figure>

8. Once you everything is added, click on Publish button to make the AI bot flow start interacting with your customers.


# CTWA Ad Based Flow

### **Overview**

CTWA Ad Based flows help you connect with users who click on your WhatsApp ads. In Gallabox, setting up a CTWA Ad-based bot ensures you instantly engage users, collect important details, and guide them smoothly. This article walks you through the key fields and settings required to create your CTWA Ad Bot Flow.

***

### CTWA Ad-Based Bot Flow

1. Start by clicking on '**Add New Flow**' inside your Bot. From the dropdown choose '**Rule-Based Flow**'.

<figure><img src="/files/DaOY2gpI02wQbKMZ0u4S" alt=""><figcaption></figcaption></figure>

2. Give your bot flow a clear and meaningful name. (Example: *Lead Capture - CTWA Campaign*).

<figure><img src="/files/mv7CocaTupZ4iIN6hbfT" alt=""><figcaption></figcaption></figure>

3. Select **CTWA Ad Based** from the Flow Type dropdown. This links your bot flow specifically to users coming through your Click-to-WhatsApp ads.

<figure><img src="/files/HDCZw71VYSy4PhOemPHB" alt=""><figcaption></figcaption></figure>

4. Choose when this flow should be triggered. You have three options - For Any Ads, For specific Ads, and For any Ad/post. If you choose the option - For specific Ads, you will have to enter the Ad Id for which you would like to run this bot flow.

<figure><img src="/files/3aM14oAKu1R3dGVDCJE6" alt=""><figcaption></figcaption></figure>

***

### Custom Configurations

These options let you tailor the user experience even more:

1. **Nudge Contact if Question Message is Unanswered**\
   This setting allows the bot to automatically remind the user if they haven't responded to a question. You can set the number of attempts (up to 2) and the delay time (up to 60 minutes) before the reminder is sent. Optionally, you can add a custom nudge message.

<figure><img src="/files/8oHG8gR1L1eVGiNMSMf4" alt=""><figcaption></figcaption></figure>

2. **What Actions Should the Bot Take After the Flow Completion?**\
   Specify what happens once the user completes the flow. (Examples: Add a tag, Assign, or Unassign conversation.)

<figure><img src="/files/d1TbxzV2W9GyZiiTpwkk" alt=""><figcaption></figcaption></figure>

3. **Allow Users to Navigate Back and Forth Within the Flow**\
   Enable this option if you want users to move easily between previous and next questions, offering a better experience. It will be enabled by default.

<figure><img src="/files/YjQX3ImFQICsDUWzyzzW" alt=""><figcaption></figcaption></figure>

4. **How Long the Bot Can Wait Before Completing the Flow?**\
   Set the maximum time (in minutes) the bot should wait for user inputs before automatically ending the flow.\
   (Default Example: *1 minute*)

<figure><img src="/files/AplCwos24lG3jabAlKpH" alt=""><figcaption></figcaption></figure>

5. **Enable Flow-Level Drop-off**\
   Activating this will track if users leave midway, helping you analyze and improve your CTWA bot performance. Here is how to configure:
   1. **Wait time**: Set how long the bot waits for a reply (e.g., 1 minute).
   2. **Inactivity message**: The bot notifies the user after the wait time (e.g., "Your session has expired").
   3. **Post-wait action**: Configure what the bot should do after the wait (e.g., end the conversation, redirect the user).

<figure><img src="/files/umu9YNAnz2n4gjz0ggBl" alt=""><figcaption></figcaption></figure>

Once you configure these settings, click on Create to start building your Bot.

<figure><img src="/files/GBRwiEKjbG0T0bXpl58E" alt=""><figcaption></figcaption></figure>


# Send Card

Connect with your customers instantly using Text, Media, Collection, Products, and Template cards on our website. Explore each card option now!

Reach out to your customers via Text, Media, Collection, Products and Template cards. Let's go through each one of them.

{% hint style="info" %}
Use these cards when you don't want to wait for the user's response.
{% endhint %}

<table data-view="cards"><thead><tr><th align="center"></th><th data-hidden data-card-target data-type="content-ref"></th><th data-hidden data-card-cover data-type="files"></th></tr></thead><tbody><tr><td align="center"><strong>Send Text</strong></td><td><a href="/pages/oZAFNsnGsLUkn13yf7aY">/pages/oZAFNsnGsLUkn13yf7aY</a></td><td><a href="/files/mzVNPXU01GV5khp3ikPa">/files/mzVNPXU01GV5khp3ikPa</a></td></tr><tr><td align="center"><strong>Send Media</strong></td><td><a href="/pages/LSKqcdtS8A6CeSvXiaCo">/pages/LSKqcdtS8A6CeSvXiaCo</a></td><td><a href="/files/7EwG0I5ASC77oCFaWvCl">/files/7EwG0I5ASC77oCFaWvCl</a></td></tr><tr><td align="center"><strong>Send Collections</strong></td><td><a href="/pages/0uj9lqKIpNKSUukWxET6">/pages/0uj9lqKIpNKSUukWxET6</a></td><td><a href="/files/F94RxoG4oT1DYalOGuHM">/files/F94RxoG4oT1DYalOGuHM</a></td></tr><tr><td align="center"><strong>Send Products</strong></td><td><a href="/pages/SulOE7TuxL04muGsVZAL">/pages/SulOE7TuxL04muGsVZAL</a></td><td><a href="/files/Z5tCmjriC9Ph9g9tq0wh">/files/Z5tCmjriC9Ph9g9tq0wh</a></td></tr><tr><td align="center"><strong>Send Template</strong></td><td><a href="/pages/nLaYLn8hFy0dSWI3czOI">/pages/nLaYLn8hFy0dSWI3czOI</a></td><td><a href="/files/kPHy14oAIM4MhBrolEmo">/files/kPHy14oAIM4MhBrolEmo</a></td></tr></tbody></table>


# Send Text

Easily send text messages to your customers with Send Text Card. Customize messages with variables, bold, italic, and strikethrough options. Duplicate or delete cards as needed.

> **Who can use this Card?**
>
> * Gallabox Users having permission to either build and deploy bots or manage bots.
> * Available on all Paid Plans.

## Send Text Card

Use this card when you don't require any input from the user.

**Send Text Card** allows you to send a text to your customers with just a couple of clicks.

To use Send Text Card, simply search as shown in the GIF and select **Send Text.**

<figure><img src="/files/YKpuyE1ZqjL5bIX3zkNw" alt=""><figcaption><p>Send a Text Card</p></figcaption></figure>

Once you type the message, you will see options to customize the content:

### **Use Variables**

Use them to add already collected data from your customers to the messages. E.g.: "How are you today, @name?" will display the customer's name at the end.

Just click on "Add Variables" to open up a dropdown with all the available fields. Just a quick tip – make sure the variable you choose actually has some data in it, or it won't show up as intended!

<figure><img src="/files/FXUqeRPKh6QspRkMpmWJ" alt=""><figcaption></figcaption></figure>

### **Bold**

Select the text you want to **bold** and click on the "**B**" below the text area to make it bold. The text will be enclosed within two asterisk (\*).

<figure><img src="/files/RXi2WN1kTxyOJlsqmdoP" alt=""><figcaption></figcaption></figure>

### **Italic**

Select the text you want to make *italic* and click on the "*I"* below the text area to make it italic. The text will be enclosed within underscore (\_).

<figure><img src="/files/TtzVRZmN6gQKMHSnhSyt" alt=""><figcaption></figcaption></figure>

### **Strikethrough**

Select the text you want to ~~strikethrough~~ and click on the "~~s~~*"* below the text area to make strikethrough. The text will be enclosed within Tilde (\~).

<figure><img src="/files/Rf2wefoOU7kF7gsQRCU2" alt=""><figcaption></figcaption></figure>

### **Duplicate/Delete/Edit Send Text Card**

When hovering over the card, you'll see the option to **duplicate** the card, to **edit** the block, and a "**x**" to delete the card.

<figure><img src="/files/c8adgYg5LX5ujLtwZbWA" alt=""><figcaption></figcaption></figure>

**This is how Send Card will work on WhatsApp**

<figure><img src="/files/yHnAu9u1eEAanZ4E0ZSU" alt=""><figcaption></figcaption></figure>


# Send Media

Share audio, video, image, and document with your customers using Send Media Card. Attach pre-recorded audio, image, video, or document files within size limits and supported formats.

> **Who can use this Card?**
>
> * Gallabox Users having permission to either build and deploy bots or manage bots.
> * Available on all Paid Plans.

## Overview

Use this card when you want to share any media with your customers. The media options you could send are Audio, Video, Image and Document.

<figure><img src="/files/765kF29FEOqyPhxqEcyM" alt=""><figcaption></figcaption></figure>

### **Audio**

When attaching a pre-recorded audio, make sure the file size doesn't exceed 16 MB. The allowed media formats are - aac, mp4, amr, mpeg, and ogg.

<figure><img src="/files/ijYDnsr3pFAD5ONxsOvJ" alt=""><figcaption><p>Audio Message</p></figcaption></figure>

### **Image**

When using this, make sure the file size doesn't exceed 5 MB. The allowed media formats are - jpeg and png. You could add a caption for the attached image.

<figure><img src="/files/p3kn7CKlpOIFPV9fYQIg" alt=""><figcaption><p>Image Message</p></figcaption></figure>

> You can add the descriptive text or context to an Image in ***Caption.***

### **Video**

The file size should not exceed 16 MB while sending the video to your customers. The allowed media formats are - mp4 and 3gpp. You could add a caption for the attached video.

<figure><img src="/files/bRjCHq3Wai9rV3XNbwzj" alt=""><figcaption><p>Video Message</p></figcaption></figure>

> You can add the descriptive text or context to a video in ***Caption.***

### **Document**

While sending the document to your customers, make sure the size is up to 16 MB.

<figure><img src="/files/4hggfMJBPCmTNXvDqerM" alt=""><figcaption><p>Document Message</p></figcaption></figure>

{% hint style="info" %}
Instead of uploading Text, Audio, Video, or a document, you could also paste the link of the media formats.
{% endhint %}

### **Duplicate/Delete/Edit Send Media Card**

When hovering over the card, you'll see the option to **duplicate** the card, a **pencil** to edit the block, and a "**x**" to delete the card.

<figure><img src="/files/f83JWmBPUfG0vJqwwadZ" alt=""><figcaption></figcaption></figure>

This is how Send Media card works on WhatsApp:

<figure><img src="/files/rlPNr10fUijdzX8nFf9N" alt=""><figcaption></figcaption></figure>


# Send Collection

Enhance your E-commerce business with Send Collection Card. Showcase your orders using META and provide detailed product information. Set up your catalog in Gallabox for seamless integration.

> **Who can use this Card?**
>
> * Gallabox Users having permission to either build and deploy bots or manage bots.
> * Available on all Paid Plans.

## Overview

This card is there for the E-commerce business. Using the Send Collection Card, the businesses can send the collection of orders showcasing on **META**.

<figure><img src="/files/wrydFcDo5JMUhNU9eDLO" alt=""><figcaption><p>Sending Collection of products in a chat-flow</p></figcaption></figure>

{% hint style="info" %}
Make sure the catalog is set-up in Gallabox before you use this card.
{% endhint %}

### Header

You can add a customizable title or headline providing a clear and concise summary of the collection you will be sending.

<figure><img src="/files/nxFey0aTUENwnG7wsWPT" alt=""><figcaption></figcaption></figure>

### Message

It is a space to provide detailed information about a collection of products, helping customers understand the products' features, benefits, or any other relevant information.

<figure><img src="/files/5cFqhEH70BAVx6aNaRHs" alt=""><figcaption></figcaption></figure>

### **Use Variables**

Use them to add already collected data from your customers to the messages.

Just click on "Add Variables" to open up a dropdown with all the available fields. Just a quick tip – make sure the variable you choose actually has some data in it, or it won't show up as intended!

<figure><img src="/files/lQXsJhmbRBBOWrn5JnXl" alt=""><figcaption></figcaption></figure>

### **Bold**

Select the text you want to **bold** and click on the "**B**" below the text area to make it bold. The text will be enclosed within two asterisk (\*).

<figure><img src="/files/QJ1AP2XtmwBYyKDxKEwM" alt=""><figcaption></figcaption></figure>

### **Italic**

Select the text you want to make *italic* and click on the "*I"* below the text area to make it italic. The text will be enclosed within underscore (\_).

<figure><img src="/files/RTgfWKoETsjfz3MVReG5" alt=""><figcaption></figcaption></figure>

### **Strikethrough**

Select the text you want to ~~strikethrough~~ and click on the "~~s~~*"* below the text area to make strikethrough. The text will be enclosed within Tilde (\~).

<figure><img src="/files/5JLWvxxodzMfrAUUHIRT" alt=""><figcaption></figcaption></figure>

### Catalogue

Select the catalogue from which the collections is to be listed. If you haven't connected your catalogue yet with Gallabox, [click here](https://app.gallabox.com/facebook-catalogs/catalogs).

<figure><img src="/files/rpHVVX6k2lTfEmKHUnZy" alt=""><figcaption></figcaption></figure>

### Collection

Collections are groups of products that help customers easily find and buy the things they want in your shop.

> [Detailed read](https://www.facebook.com/business/help/2658959294372394?id=1077620002609475) on how to create collection in your Commerce Manager. Your catalogue already has a default collection called **All products** containing all of the products in the catalogue.

<figure><img src="/files/YKA0G2VOEFiRRXlEEybT" alt=""><figcaption></figcaption></figure>

### Footer

A footer is a section at the bottom of a message containing data such as:

* The sender's name and contact information.
* The instruction to unsubscribe from getting messages.
* A disclaimer or copyright notice.
* A link to the sender's website or social media profiles.

<figure><img src="/files/PmtvjoxyYJ3wZYS930Wn" alt=""><figcaption></figcaption></figure>

### **Duplicate/Delete/Edit Send Collection Card**

When hovering over the card, you'll see the option to **duplicate** the card, a **pencil** to edit the block, and a "**x**" to delete the card.

<figure><img src="/files/9SBCNEHLTN8aLjjfahNY" alt=""><figcaption></figcaption></figure>

Here is how the collection looks when you send it across WhatsApp:

<figure><img src="/files/Wgq3sbi1IUl6XmKuLSOP" alt=""><figcaption></figcaption></figure>


# Send Products

Utilize the Send Products card to showcase products to customers. Include detailed information, features, benefits, and more. Personalize messages with variables and format text.

> **Who can use this Card?**
>
> * Gallabox Users having permission to either build and deploy bots or manage bots.
> * Available on all Paid Plans.

## Overview

You can use the Send Products card to share a **specific product** from your catalogue with your customers.

<figure><img src="/files/rw0jHGY7oGOLAaUweI42" alt=""><figcaption><p>Sending Products in a chat-flow</p></figcaption></figure>

{% hint style="info" %}
Make sure the catalog is set-up in Gallabox before you use this card.
{% endhint %}

### Message

It is a space to provide detailed information regarding the product(s), features, benefits, or any other relevant information.

<figure><img src="/files/vYhdrd6NjQcZCeYI1KRq" alt=""><figcaption></figcaption></figure>

### **Use Variables**

Use them to add already collected data from your customers to the messages.

Just click on "**Add Variables**" to open up a dropdown with all the available fields. Just a quick tip – make sure the variable you choose actually has some data in it, or it won't show up as intended!

<figure><img src="/files/Y7Y2GlVxhdobcryUbkTh" alt=""><figcaption></figcaption></figure>

### **Bold**

Select the text you want to **bold** and click on the "**B**" below the text area to make it bold. The text will be enclosed within two asterisk (\*).

<figure><img src="/files/fDTkJ9tBwm97ITeX6G0f" alt=""><figcaption></figcaption></figure>

### **Italic**

Select the text you want to make *italic* and click on the "*I"* below the text area to make it italic. The text will be enclosed within underscore (\_).

<figure><img src="/files/GTK15ADud1lJIp2vkTD5" alt=""><figcaption></figcaption></figure>

### **Strikethrough**

Select the text you want to ~~strikethrough~~ and click on the "~~s~~*"* below the text area to make strikethrough. The text will be enclosed within Tilde (\~).

<figure><img src="/files/az4ySfZySR6usHR16Syt" alt=""><figcaption></figcaption></figure>

### Catalogue

Select the catalogue from which the products is to be listed. If you haven't connected your catalogue yet with Gallabox, [click here](https://app.gallabox.com/facebook-catalogs/catalogs).

<figure><img src="/files/CfZvnpeGWbgCnGdwSo8O" alt=""><figcaption></figcaption></figure>

### Products Type

You have two options to choose the products from - **Static Products** and **Dynamic Products**.

#### 1. Static Products

From the drop-down, you have to select the products you would like to showcase from the catalog you connected to Gallabox. Incase you select more than one product to showcase, you will have to edit the **Header** too.

<figure><img src="/files/7RvePnVpngORJJi6D2BF" alt=""><figcaption></figcaption></figure>

#### 2. Dynamic Products

If you want to send some selected items to your customers dynamically, use the dynamic option. The values can be accessed using [API Call](/bots/bot-connectors/connect-your-system-with-the-whatsapp-chat-bot-using-api).

* **Variable to iterate**: Add the name of the variable here (the variable you stored the Response in the API Call Connector).
* **Path to ID**: Add the path from your internal database in curly brackets `{{}}`**.**

For instance, below is an example of JSON response you get from your API:

```
{
  "product_data": [
    {
      "sku_id": 1006,
      "name": "Idli"
    },
    {
      "sku_id": 1003,
      "name": "Buttermilk"
    },
    {
      "sku_id": 1030,
      "name": "Rosemilk"
    }
  ]
}
```

For the above response, the **Path to ID** will be **{{sku\_id}}** and the **Variable to iterate** will be the one in which the API response is stored. Check your API Call node for the variable and use the variable here.

{% hint style="warning" %}
Make sure your value for **Path to Id** and the **Retainer ID** in your catalog connected to Gallabox is same for the products to lessen the chance of error.
{% endhint %}

<figure><img src="/files/WGulBLRkliy3T9hUnM3P" alt=""><figcaption></figcaption></figure>

#### Dynamic Options with sections

This feature lets you send a selected group of product items to your customers, arranged in sections, and dynamically created from a JSON/API response stored in your variable.

For instance, below is an example of JSON response you get from your API:

```
{
  "itinerary": [
    {
      "day": "Day 1",
      "activities": [
        {
          "activity_id": "act001",
          "name": "Visit the Colosseum",
          "description": "Explore the iconic Roman amphitheatre"
        },
        {
          "activity_id": "act002",
          "description": "Enjoy a traditional Roman pizza lunch"
        },
        {
          "activity_id": "act003",
          "name": "Stroll through the Trevi Fountain",
          "description": "Toss a coin and make a wish!"
        }
      ]
    },
    {
      "day": "Day 2",
      "activities": [
        {
          "activity_id": "act004",
          "name": "Explore the Vatican Museums",
          "description": "See incredible art and historical artifacts"
        },
        {
          "activity_id": "act005",
          "name": "St. Peter's Basilica",
          "description": "Visit the largest church in Christianity"
        }
      ]
    }
  ]
}
```

For the above response,

<table><thead><tr><th width="308">Section Field</th><th>Value from the example code</th></tr></thead><tbody><tr><td>Variable to iterate</td><td>will be a variable in which the list of sections are stored.</td></tr><tr><td>JSONPath for the section title</td><td><code>{{day}}</code></td></tr><tr><td>JSONPath for the section products</td><td><code>{{activities}}</code></td></tr><tr><td>JSONPath for the product ID</td><td><code>{{activity_id}}</code></td></tr></tbody></table>

This example demonstrates how to structure your JSON (stored in a variable) to the required format of "Dynamic Options with sections" using JSONPath. Ensure that the selected variable contains the data in an array format representing the product sections.

### **Footer**

A footer, found at the bottom of a message, typically includes the following information:

* The sender's name and contact details.
* Instructions for opting out of future messages.
* A disclaimer or copyright notice.
* Links to the sender's website or social media profiles.

<figure><img src="/files/ExQL2uc2k6PqYVN3wGNh" alt=""><figcaption></figcaption></figure>

### **Duplicate/Delete/Edit Send Product Card**

When hovering over the card, you'll see the option to **duplicate** the card, a **pencil** to edit the block, and a "**x**" to delete the card.

<figure><img src="/files/fdB8h0E3tfyZlnwh3yfo" alt=""><figcaption></figcaption></figure>

Here is how **Send Product card** looks on WhatsApp:

<figure><img src="/files/1Pli2jYrpYrQeXllZ0fC" alt=""><figcaption></figcaption></figure>


# Send Voice

Discover the AI Voice Beta feature on Gallabox for easy voice messaging. Record messages, add text for context, and select your preferred voice. Revolutionize your communication experience with us.

> **Who can use this Card?**
>
> * Gallabox Users having permission to either build and deploy bots or manage bots.
> * Available on Scale and Growth Plans.

## **AI Voice Beta Feature Overview:**

The AI Voice Beta feature offers users the ability to send voice messages effortlessly, revolutionizing communication within Gallabox. With this feature, users can leverage AI-powered voice recording capabilities to convey messages more effectively, fostering clearer and more engaging interactions.

<figure><img src="/files/7ytVu3BrsBFVpxQ6TgGs" alt=""><figcaption></figcaption></figure>

### **Gallabox Voice Beta Features:**

1. **Record Voice Messages:** Users can utilize the Record option to capture their voice messages directly within the Gallabox platform.
2. **AI Voice Selection:** Gallabox offers users the flexibility to select from a range of voices for their AI-generated messages.

Let's understand their usage by an example:

### AI VOICE

For generating AI voice, you have to type in the Question Text, select the desired voice from the drop-down, and click on Generate Voice Button.

The Question text will be changed into voice. You can listen to it, change playback speed before saving the card to be used in the bot.

<figure><img src="/files/zww2HYTUIZ12EQGOxrc8" alt=""><figcaption></figcaption></figure>

### Record Voice

If you want to send a message in your voice, use Record option. Just press the record Button to record. To stop recording, click on Stop Recording.

<figure><img src="/files/EwYurQ4HqXYqVqGnhcsI" alt=""><figcaption></figcaption></figure>


# Send Template

Enhance user engagement by incorporating CTA buttons in your bot flow through our Template Card. Share pre-approved message templates seamlessly with your customers.

{% hint style="info" %}
If you want CTA buttons in bot flow then you can only do it via Template.
{% endhint %}

> **Who can use this Card?**
>
> * Gallabox Users having permission to either build and deploy bots or manage bots.
> * Available on all Paid Plans.

## Overview

If you want to share an approved message template with the user, you can use this card.

<figure><img src="/files/YII2G9ibsXuphUfrzPzN" alt=""><figcaption></figcaption></figure>

### Order Confirmation Template

All you have to do is select the Approved Template you want to share with your customers from the dropdown.

<figure><img src="/files/fla0eRIKfH2VjPVd2izp" alt=""><figcaption><p>Sending a Order Confirmation Template in a chat-flow</p></figcaption></figure>

If your verified template has Body variables, provide the sample values for the Variables declared.

[Read for how to create message templates.](/basic-modules/whatsapp-template-guidelines)

### Media Template

All you have to do is select the **Approved Template** having any type of media you want to share with your customers from the dropdown.

<figure><img src="/files/bG1dd6Na1kc1EfMO8WnJ" alt=""><figcaption></figcaption></figure>

You have to upload the Media which you would like to share with your customers.

<figure><img src="/files/ylkWhZuwrZn1ZfWj4s4l" alt=""><figcaption></figcaption></figure>

### **Duplicate/Delete/Edit Send Template Card**

When hovering over the card, you'll see the option to **duplicate** the card, a **pencil** to edit the block, and a "**x**" to delete the card.

<figure><img src="/files/Q5FOF6TYuS5MA2hVx0tV" alt=""><figcaption></figcaption></figure>

Here is how Button Template looks on WhatsApp:

<figure><img src="/files/i8qAtnw17xoyBhmnXw52" alt=""><figcaption></figcaption></figure>


# Send Form

Enhance user engagement with customizable forms using the Send Form feature. Set header, body, footer texts, and more for a personalized experience.

> **Who can use this Card?**
>
> * Gallabox Users having permission to either build and deploy bots or manage bots.
> * Available on Scale and Growth Plans.

## **Understanding "Send Form"**

The Send Form feature allows users to send a form with customizable header, body, and footer texts through a messaging platform.

<figure><img src="/files/grskm1Gw9pcLeFz5zWJg" alt=""><figcaption></figcaption></figure>

## **Send Form Essentials:**

Before we start, here are some things you need to know:

### **Header Text**

This field allows you to set an optional header text for the form, providing context or a title. In the example: "Survey Form."

### **Body**

The body text is where you define the main content or prompt for the user. In the example: "What do you think?"

### **Footer**

Optionally, you can include a footer text. It can be used for additional information or a closing message. In the example: "Thank you for your feedback!"

### **Button Name**

This parameter involves specifying the name for the form submission button. In the example: "View."

### **WhatsApp Flow**

Here, you select or specify the WhatsApp flow associated with the form. It could be a predefined flow for handling user responses.

### **Flow Action**

The flow action defines what happens after the user interacts with the form. In the example: "Coming Soon" suggests that specific actions or behaviors are still in development or yet to be specified.

### **Screen Name**

Paste the Id from JSON format.

## **Implementation Example:**

Let's take an example configuration for a company that would like their customers to change the contact preferences and communication type.

For the **Header Text:** *"Manage Communication Preferences"*

<figure><img src="/files/PLCgkrRfF0AtjF5MV4E3" alt=""><figcaption></figcaption></figure>

For the **Body Text:** *"Select your communication preferences from the options below"*

<figure><img src="/files/SvNq9jLZlIxLrAJb5kBs" alt=""><figcaption></figcaption></figure>

For **Footer Text:** *"Thank you for managing your preferences with us!"*

<figure><img src="/files/WgOXy4CLbxPmFyKXZuNE" alt=""><figcaption></figcaption></figure>

For the **Button Name:** *"Submit Preferences"*

<figure><img src="/files/A8XRux6SUqqbZZJxq1ww" alt=""><figcaption></figcaption></figure>

Select the relevant WhatsApp Flow you have created in your Business Manager. If you haven't, created any, go to [Flows](/whatsapp-flows/create-whatsapp-forms).

<figure><img src="/files/GdLJRf9OwwoztdT5OO8W" alt=""><figcaption></figcaption></figure>

For the **Screen Name** you have to paste the Id of the first screen. You can take it from the JSON format. You will get the Id from your Business Manager.

In the below picture, the text enclosed in blue box is the Screen id you have to paste in the Screen Name of Ask Form.

<figure><img src="/files/v4D5rDNZ4MaoBMpj8qXL" alt=""><figcaption></figcaption></figure>

## Sample Flow - Send Form Card

### In Gallabox Bot Interface:

<figure><img src="/files/GdLJRf9OwwoztdT5OO8W" alt=""><figcaption></figcaption></figure>

### In WhatsApp:

<figure><img src="/files/DFs2PAIP7fqCK2Mpxavi" alt=""><figcaption></figcaption></figure>

{% hint style="info" %}
Note:

1. The above sample flow is for you to understand how "**Send Form**" Card works and it's usage. It is not a representation of what can be achieved with Gallabox.
2. All the responses will be collected in a section - [WhatsApp Flows](/whatsapp-flows/receiving-response-of-whatsapp-forms) under Settings.
3. You can use this Card if you don't require any input from the user.
   {% endhint %}

### Prefer watching over reading?

Watch the video below for a detailed explanation.

{% embed url="<https://youtu.be/BzBrdbm08sU?si=Df938Ilv-mz6mS3P>" %}


# Send Location

Discover how to easily share specific locations with others using the "Send Location" feature. Learn how to provide directions and essential details about a place.

> **Who can use this Card?**
>
> * Gallabox Users having permission to either build and deploy bots or manage bots.
> * Available on all Paid Plans.

## **Understanding "Send Location"**

The "**Send Location**" feature allows users to share a specific location with others. This feature is commonly used to provide recipients with directions about a particular place.

<figure><img src="/files/ooP1C7lWtBaEBdwtJvId" alt=""><figcaption></figcaption></figure>

## **Send Location Essentials:**

When utilizing the "**Send Location" feature"**, users are prompted to provide the following details:

### **Name**

This refers to the name of the location being shared. It could be a landmark, or your company's name.

### **Address**

Input the address of the location, including details such as street name, building number, city, and country.

### **Location**

Users have two options to specify the location:

* **Search Location:** Users can search for the location by typing its name or address in the search bar provided. They can also use View in Map to double check the location.
* **Latitude & Longitude:** Alternatively, users can input the latitude and longitude coordinates of the location directly.

{% hint style="info" %}
It's essential to remember that only static locations can be shared using this feature. Real-time locations, which constantly update as the user moves, cannot be shared via WhatsApp Business API.
{% endhint %}

## **Implementation Example:**

To send a location, users follow these steps:

1. Input the name of the location - Habitat center.
2. Provide the complete address of the location -
3. Select the preferred method to specify the location:
   * Use the search feature to find the location by name or address.
   * Alternatively, input the latitude and longitude coordinates of the location.
4. Confirm the location details and save the Card.

<figure><img src="/files/O2BGEuk7mxDPiUeCbPuO" alt=""><figcaption></figcaption></figure>


# Send Payments

Simplify payment processes and provide a payment experience to customers using the "Send Payments" feature on WhatsApp. Share payment links and receive payments directly through the app.

> **Who can use this Card?**
>
> * Gallabox Users having permission to either build and deploy bots or manage bots.
> * Available on Scale and Growth Plans.

### **Understanding "Send Payments"**

The "**Send Payments**" feature allows users to share WhatsApp Payment links with your customers. With this functionality, businesses can receive payments from customers directly through WhatsApp.

<figure><img src="/files/xQbpygq5eYREZDdn0TCK" alt=""><figcaption></figcaption></figure>

### Before you proceed

With this Card, make sure you have connected WhatsApp Payments. If not, visit

<table data-card-size="large" data-view="cards"><thead><tr><th></th><th data-hidden></th><th data-hidden></th></tr></thead><tbody><tr><td><a href="/pages/0V9Elxy7QQ0bKrTiXn84#update-payment-provider-in-meta"><strong>Link WhatsApp Payments</strong></a></td><td></td><td></td></tr></tbody></table>

### **Send WhatsApp Payments Essentials**

When utilizing the "**Send WhatsApp Payments"** Card, users are prompted to provide the following details:

#### Payment Provider

Choose from **UPI VPA ID** or **Razorpay** to receive the payment on WhatsApp.

#### **Order Details**

Provide information about the items included in the order (by adding manually or using a variable).

#### **Header Image**

Upload an optional header image for the payment request.

#### **Body**

Enter a brief description or message related to the payment request.

#### **Footer**

Include an optional footer text for the payment request.

#### **Advanced Settings**

Specify tax, shipping, and discount details for the payment.

#### Tax

**Tax Amount**: Enter the tax amount.

**Tax Description**: Provide a description of the tax.

#### Shipping

**Shipping Amount**: Enter the shipping amount.

**Shipping Description**: Provide a description of the shipping charges.

#### Discount

**Discount Amount**: Enter the discount amount.

**Discount Description**: Provide a description of the discount.

**Discount Program Name**: Enter the name of the discount program.

#### Advance Option

Input custom data in JSON format. Razorpay only supports up to 10 keys in a JSON.

### **Card Usage**

To send a payment request:

1. Select the desired payment provider.
2. Enter the order details, including items, country of origin, importer information, and address details.
3. Optionally, upload a header image and provide body and footer text.
4. Configure advanced options as needed, such as tax, shipping, and discount details.
5. Submit the payment request.

<figure><img src="/files/DCmtt1nlBdrHia7MBOVC" alt=""><figcaption></figcaption></figure>

With the Send Payments feature, businesses can streamline payment processes and offer a convenient payment experience to their customers directly through WhatsApp.


# Ask Questions

Boost customer engagement and double your leads by asking the right questions. Discover how to increase customer interaction on our website today!

*Ask questions from your customers to increase customer engagement to increase your lead by 2x!* Let's see what all we can ask from the customers.

{% hint style="info" %}
Use these cards when you want to wait for the user's response.
{% endhint %}

<table data-view="cards"><thead><tr><th align="center"></th><th data-hidden data-card-target data-type="content-ref"></th><th data-hidden data-card-cover data-type="files"></th></tr></thead><tbody><tr><td align="center"><strong>Ask Text</strong></td><td><a href="/pages/y4Tpxl4qZ4bC5jPCWa6j">/pages/y4Tpxl4qZ4bC5jPCWa6j</a></td><td><a href="/files/1cYjHsjVNAjOTbW91lMx">/files/1cYjHsjVNAjOTbW91lMx</a></td></tr><tr><td align="center"><strong>Ask Number</strong></td><td><a href="/pages/MbIcPp5BqUasTC7kVw5c">/pages/MbIcPp5BqUasTC7kVw5c</a></td><td><a href="/files/rFiXPOrq7ufOJyFrjP2A">/files/rFiXPOrq7ufOJyFrjP2A</a></td></tr><tr><td align="center"><strong>Ask Phone</strong></td><td><a href="/pages/ZWStnj3ZXRrl9pcD1Z8l">/pages/ZWStnj3ZXRrl9pcD1Z8l</a></td><td><a href="/files/IwXAtLcxSWwC5zeha6Df">/files/IwXAtLcxSWwC5zeha6Df</a></td></tr><tr><td align="center"><strong>Ask Email</strong></td><td><a href="/pages/ltZtH0wMTFi3hn517MVZ">/pages/ltZtH0wMTFi3hn517MVZ</a></td><td><a href="/files/wFRMpgcDDloVZUrNN6rd">/files/wFRMpgcDDloVZUrNN6rd</a></td></tr><tr><td align="center"><strong>Ask Date</strong></td><td><a href="/pages/T8891TymaMSCZ7ONBLPa">/pages/T8891TymaMSCZ7ONBLPa</a></td><td><a href="/files/F0Mzts7bhUM4zSpZjVn1">/files/F0Mzts7bhUM4zSpZjVn1</a></td></tr><tr><td align="center"><strong>Ask Location</strong></td><td><a href="/pages/NuilunwaIpmD1oLTmeCz">/pages/NuilunwaIpmD1oLTmeCz</a></td><td><a href="/files/RIMncjR8F3f2CVjqaMX7">/files/RIMncjR8F3f2CVjqaMX7</a></td></tr><tr><td align="center"><strong>Ask URL</strong></td><td><a href="/pages/6YPIMKAWssg81KdCvqUV">/pages/6YPIMKAWssg81KdCvqUV</a></td><td><a href="/files/P7nhyw20QdHFBzUPzExy">/files/P7nhyw20QdHFBzUPzExy</a></td></tr><tr><td align="center"><strong>Ask Files</strong></td><td><a href="/pages/iZeE1gWdgHeKgfoTAEA2">/pages/iZeE1gWdgHeKgfoTAEA2</a></td><td><a href="/files/kCMCuqUjB2rTmvCIC0qm">/files/kCMCuqUjB2rTmvCIC0qm</a></td></tr><tr><td align="center"><strong>Ask Button Option</strong></td><td><a href="/pages/WHWBdvEgSLUXlbWPZEBm">/pages/WHWBdvEgSLUXlbWPZEBm</a></td><td><a href="/files/ybayB9jE5uiy6Vb1OkJ7">/files/ybayB9jE5uiy6Vb1OkJ7</a></td></tr><tr><td align="center"><strong>Ask List Option</strong></td><td><a href="/pages/y7Vz8mouxGkixqSJ3CxG">/pages/y7Vz8mouxGkixqSJ3CxG</a></td><td><a href="/files/NNEa82b9I1Xlu9abACDs">/files/NNEa82b9I1Xlu9abACDs</a></td></tr><tr><td align="center"><strong>Ask Keywork Option</strong></td><td><a href="/pages/yUCDqEhSkww0hhtRpciX">/pages/yUCDqEhSkww0hhtRpciX</a></td><td><a href="/files/02x5CqhawsLhCLraQlqF">/files/02x5CqhawsLhCLraQlqF</a></td></tr><tr><td align="center"><strong>Ask Collection List</strong></td><td><a href="/pages/Pbxo0KhqcZG2irMLpugW">/pages/Pbxo0KhqcZG2irMLpugW</a></td><td><a href="/files/I9SaBHnuvRLi4tqd6W9h">/files/I9SaBHnuvRLi4tqd6W9h</a></td></tr></tbody></table>


# Ask Text

Discover the power of "Ask Text" Card in Gallabox. Engage users with open-ended questions and store their responses in a designated variable for use in your BotFlow.

> **Who can use this Card?**
>
> * Gallabox Users having permission to either build and deploy bots or manage bots.
> * Available on all Paid Plans.

## **Understanding "Ask Text"**

"**Ask Text**" Card in Gallabox lets bots ask users open-ended questions, making conversations more fun. Users can share their thoughts, opinions, or give info based on the questions. This user-generated text can be stored in a designated variable, allowing you to use that data in your BotFlow.

{% hint style="info" %}
You can ask the customer a question as a **Text** or as a **Voice**.
{% endhint %}

<figure><img src="/files/cgB8Iwbaxt5LGLzVcIFv" alt=""><figcaption></figcaption></figure>

## **Ask as Text Essentials**

Learn the basics of the "Ask as Text" option in Ask Text Card to make talking to users more interesting.

### **Question Text**

This is the question you want to ask users. Make it clear and short so users know what you're asking.

{% hint style="info" %}
The **Question text** can be made **Bold**, *Italic*, or ~~strikethrough~~ using the options provided. The text will add the asterisk(\*) for **Bold**, Underscore(\_) for **Italic text**, and Tilde(\~) for **Strikethrough** around the text.
{% endhint %}

## **Ask as Voice Essentials**

The Ask as a Voice feature in Gallabox's Ask Text Bot Card lets users talk to submit their answers, making it easy and fun to interact.

You can either choose **AI voice** or a **Record** option.

For generating AI voice, you have to type in the Question Text, select the desired voice from the drop-down, and click on Generate Voice Button.

The Question text will be changed into voice. You can listen to it, change playback speed before saving the card to be used in the bot.

<figure><img src="/files/0THRU0Kw9CnzP3scibMS" alt=""><figcaption></figcaption></figure>

If you want to send a message in your voice, use Record option. Just press the record Button to record. To stop recording, click on Stop Recording.

<figure><img src="/files/mbB655waUTVWbr8d6syp" alt=""><figcaption></figcaption></figure>

To know about Storing User Responses, go to [Bot Essentials](/bots/bot-essentials#creating-variables) and know about validation settings [here](/bots/bot-essentials#validation-settings-for-cards).

{% hint style="success" %}
PRO TIP: Use Variables in the **Question Text** and in the **Validation Error Message** to make it more personalized.
{% endhint %}

## **Implementation Example:**

Imagine you are asking your customers for their **PAN Card** to evaluate their Financial profile. The Ask Text question type with validation settings will make sure users give helpful responses within a specific character limit.

For the **Question Text** you can enter: *Enter your PAN Card details to evaluate your profile.*

You have the option to **store the user response** in the variable. You can create a variable - `user_details` for example to store the user response.

<figure><img src="/files/Z923yQelfHOzT4Idrpth" alt=""><figcaption></figcaption></figure>

Now for the **validation settings**, you could provide the **attempt** limit as 1, Validation Error Message is optional. Provide the **Action on Invalid Response**, and turn on the Additional Validation Settings.

<figure><img src="/files/RREFWatAwOmz6me6q7Wt" alt=""><figcaption></figcaption></figure>

In the additional validation settings, provide the **Minimum character, Maximum character, Regex.** The PAN Card number is of 10 digits meaning the minimum characters and the maximum characters are 10.

<figure><img src="/files/HzQHN8Xti1Y8DcM2TLJS" alt=""><figcaption></figcaption></figure>

The first five characters of a PAN Card are letters (**in uppercase by default**), followed by four numerals, and the last (tenth) character is a letter. To capture this you could use a regex - <mark style="background-color:blue;">**^\[A-Z]{5}\[0-9]{4}\[A-Z]{1}$**</mark> to make sure that the user enters a valid **PAN Number** which matches the following criteria's:

* The PAN Card number must be ten characters long.
* The first five characters must be uppercase letters.
* The next four characters must be numbers.
* The last character must be an uppercase letter.

<figure><img src="/files/D5MlR0EOBesShJSb9sQG" alt=""><figcaption></figcaption></figure>

## Sample Flow Using Ask Text Card

### In Gallabox Bot Interface:

<figure><img src="/files/iDFqN0eoNCH8kT9vL45y" alt=""><figcaption></figcaption></figure>

### In WhatsApp:

<figure><img src="/files/xcJkSDTouEi2JCHmXIh0" alt=""><figcaption></figcaption></figure>

{% hint style="warning" %}
The above sample flow is for you to understand how "**Ask Text**" Card works and it's usage. It is not a representation of what can be achieved with Gallabox.
{% endhint %}


# Ask Number

Discover the power of "Ask Number" in Gallabox Bots. This allows you to collect numeric input from users and store it in a designated variable.

> **Who can use this Card?**
>
> * Gallabox Users having permission to either build and deploy bots or manage bots.
> * Available on all Paid Plans.

## Understanding "Ask Number"

"Ask Number" is specifically designed to collect numeric input. Asking users for numeric input is a common and valuable tool of Gallabox Bots. This user input can be stored in a designated variable, allowing you to use that data in your BotFlow.

{% hint style="info" %}
You can ask the customer a question as a **Text** or as a **Voice**.
{% endhint %}

<figure><img src="/files/87ICgXcj5VDLSUgyZpv6" alt=""><figcaption></figcaption></figure>

## **Ask as Text Essentials:**

### **Question Text**

This is the question you want to ask users. Make it clear and short so users know what you're asking.

{% hint style="info" %}
The **Question text** can be made **Bold**, *Italic*, or ~~strikethrough~~ using the options provided. The text will add the asterisk(\*) for **Bold**, Underscore(\_) for **Italic text**, and Tilde(\~) for **Strikethrough** around the text.
{% endhint %}

### **Ask as Voice Essentials**

The Ask as a Voice feature in Gallabox's Ask Text Bot Card lets users talk to submit their answers, making it easy and fun to interact.

You can either choose **AI voice** or a **Record** option.

For generating AI voice, you have to type in the Question Text, select the desired voice from the drop-down, and click on Generate Voice Button.

The Question text will be changed into voice. You can listen to it, change playback speed before saving the card to be used in the bot.

![](/files/w4UOsbUgAXCC9cPP9C36)

If you want to send a message in your voice, use Record option. Just press the record Button to record. To stop recording, click on Stop Recording.

![](/files/CYfZ92dxZV7ohEmRi9ZB)

To know about Storing User Responses, go to [Bot Essentials](/bots/bot-essentials#creating-variables) and know about validation settings [here](https://docs.gallabox.com/~/changes/A8xmww5XU9i8x7QbfPLe/bots/bot-essentials#validation-settings-for-cards).

{% hint style="success" %}
PRO TIP: Use Variables in the **Question Text** and in the **Validation Error Message** to make it more personalized.
{% endhint %}

## **Implementation Example:**

Imagine you are asking your customers to rate your services out of 10. The Ask Number question type with validation settings will make sure users give helpful responses within a specific character limit.

For the **Question Text** you can enter: *On the range of 1 - 10, how would you rate our service? (1 being the worst).*

You have the option to **store the user response** in the variable. You can create a variable - `user_feedback` for example to store the user response.

<figure><img src="/files/QO3QdiHJva6hjvOctl8b" alt=""><figcaption></figcaption></figure>

Now for the **validation settings**, you could provide the **attempt** limit as 1, Validation Error Message is optional. Provide the **Action on Invalid Response**, and turn on the Additional Validation Settings.

<figure><img src="/files/rVOGZ61jm8YHx7hjq6qP" alt=""><figcaption></figcaption></figure>

In the additional validation settings, provide the **Minimum character, Maximum character, Regex.** The feedback we are looking is on a scale of 1-10, so the minimum character would be 1 and the maximum character would be 2. For regex, we could use - <mark style="background-color:blue;">**^\[1-9]\d?$**</mark> to make sure that the user enters a rating must between 1 and 9.

<figure><img src="/files/3YCUiTI3CtxGyfhlCIjx" alt=""><figcaption></figcaption></figure>

### Publish & Test the Card

To publish the flow, connect the card with the starting button and then click on Publish Button. To test the flow, click on Test Bot button to test on a WhatsApp Web Application or on your device.

<figure><img src="/files/GoM9vvO5YuA0YFTM7hJd" alt=""><figcaption></figcaption></figure>

### In WhatsApp:

This is how "Ask Number" card would be on the WhatsApp Platform.

<figure><img src="/files/UGF9t0zIiGEWYNAx6QfM" alt=""><figcaption></figcaption></figure>

{% hint style="success" %}
The above sample flow is for you to understand how "**Ask Number**" Card works and it's usage. It is not a representation of what can be achieved with Gallabox.
{% endhint %}


# Ask Phone

Discover the power of the "Ask Phone" card in Gallabox, enabling seamless collection of customer mobile numbers. Get insights on question text, response storage, validation settings, and more.

> **Who can use this Card?**
>
> * Gallabox Users having permission to either build and deploy bots or manage bots.
> * Available on all Paid Plans.

## Understanding "Ask Phone"

"**Ask Phone**" card in Gallabox lets the bots ask your customers their alternate mobile number.

{% hint style="info" %}
You can ask the customer a question as a **Text** or as a **Voice**.
{% endhint %}

<figure><img src="/files/qP17YGMimvDqswo1KJE9" alt=""><figcaption></figcaption></figure>

## **Ask as Text Essentials**

Before we start using Ask Phone Card, here are some things you need to know:

### **Question Text**

This is the question you want to ask your customers. Make it clear and short so users know what you're asking.

{% hint style="info" %}
The **Question text** can be made **Bold**, *Italic*, or ~~strikethrough~~ using the options provided. The text will add the asterisk(\*) for **Bold**, Underscore(\_) for **Italic text**, and Tilde(\~) for **Strikethrough** around the text.
{% endhint %}

## **Ask as Voice Essentials** <a href="#ask-as-voice-essentials" id="ask-as-voice-essentials"></a>

The Ask as a Voice feature in Gallabox's Ask Text Bot Card lets users talk to submit their answers, making it easy and fun to interact.

You can either choose **AI voice** or a **Record** option.

For generating AI voice, you have to type in the Question Text, select the desired voice from the drop-down, and click on Generate Voice Button.

The Question text will be changed into voice. You can listen to it, change playback speed before saving the card to be used in the bot.

<figure><img src="/files/D0k3w0hrmPk83J2oEVUN" alt=""><figcaption></figcaption></figure>

If you want to send a message in your voice, use Record option. Just press the record Button to record. To stop recording, click on Stop Recording.

<figure><img src="/files/7PbFcpRYBp6DwC9aqH8Z" alt=""><figcaption></figcaption></figure>

To know about Storing User Responses, go to [Bot Essentials#creating-variables](https://docs.gallabox.com/~/changes/A8xmww5XU9i8x7QbfPLe/bots/bot-essentials#creating-variables) and know about validation settings [here](https://docs.gallabox.com/~/changes/A8xmww5XU9i8x7QbfPLe/bots/bot-essentials#validation-settings-for-cards).

{% hint style="success" %}
PRO TIP: Use Variables in the **Question Text** and in the **Validation Error Message** to make it more personalized.
{% endhint %}

## **Implementation Example:**

Imagine you are asking your customers for their **Alternate contact number** to reach out in case their primary number is not available. The Ask Phone question type with validation settings will make sure users give helpful responses within a specific character limit.

For the **Question Text** you can enter: *"Kindly share your alternate contact number with us."*

You have the option to **store the user response** in the variable. You can create a variable - `user_alternate_contact` for example to store the user response.

<figure><img src="/files/Xhqjhd74hDy8J23SzKrj" alt=""><figcaption></figcaption></figure>

Now for the **validation settings**, you could provide the **attempt** limit as 1, Validation Error Message is optional. Provide the **Action on Invalid Response**, and turn on the Additional Validation Settings.

In the additional validation settings, provide the **Regex** - <mark style="background-color:blue;">**^(+\[0-9]{1,3}\[- ]\*)?\[0-9]{10}$**</mark> to make sure that the user enters a valid phone number which matches the following criteria:

* The contact number can start with a country code, which is a plus sign followed by one to three digits.
* The contact number must be 10 digits long.
* The contact number cannot contain any special characters.

<figure><img src="/files/UY9TY4ol0iKMjWzyf6np" alt=""><figcaption></figcaption></figure>

### Publish & Test the Card

To publish the flow, connect the card with the starting button and then click on Publish Button. To test the flow, click on Test Bot button to test on a WhatsApp Web Application or on your device.

<figure><img src="/files/dGVaLsYugxETAlg6uzQb" alt=""><figcaption></figcaption></figure>

### In WhatsApp

This is how "**Ask Phone**" card would be on the WhatsApp Platform.

<figure><img src="/files/GiXsnuWdJ4Nb6IbFyzkZ" alt=""><figcaption></figcaption></figure>

{% hint style="warning" %}
The above sample flow is for you to understand how "**Ask Phone**" Card works and it's usage. It is not a representation of what can be achieved with Gallabox.
{% endhint %}


# Ask Email

Optimize user engagement with Ask Email card: Tailor your questions, manage response storage, and fine-tune validation settings. Leverage variables for personalized communication.

> **Who can use this Card?**
>
> * Gallabox Users having permission to either build and deploy bots or manage bots.
> * Available on all Paid Plans.

## **Understanding "Ask** Email"

Ask email from your customer by using **Ask Email card.**

<figure><img src="/files/jGXXRJDEsz0lA0BJir6O" alt=""><figcaption></figcaption></figure>

### **Ask as Text Essentials**

Before you start using Ask Email card, here are some things you need to know:

### **Question Text**

This is the question you want to ask users. Make it clear and short so users know what you're asking.

{% hint style="info" %}
The **Question text** can be made **Bold**, *Italic*, or ~~strikethrough~~ using the options provided. The text will add the asterisk(\*) for **Bold**, Underscore(\_) for **Italic text**, and Tilde(\~) for **Strikethrough** around the text.
{% endhint %}

### **Ask as Voice Essentials** <a href="#ask-as-voice-essentials" id="ask-as-voice-essentials"></a>

The Ask as a Voice feature in Gallabox's Ask Text Bot Card lets users talk to submit their answers, making it easy and fun to interact.

You can either choose **AI voice** or a **Record** option.

For generating AI voice, you have to type in the Question Text, select the desired voice from the drop-down, and click on Generate Voice Button.

The Question text will be changed into voice. You can listen to it, change playback speed before saving the card to be used in the bot.

<figure><img src="/files/cTnNEiwEXr5T6FLocEPm" alt=""><figcaption></figcaption></figure>

If you want to send a message in your voice, use Record option. Just press the record Button to record. To stop recording, click on Stop Recording.

<figure><img src="/files/yZ8Q4ADvvObjHJdTbDij" alt=""><figcaption></figcaption></figure>

{% hint style="success" %}
PRO TIP: Use Variables in the **Question Text** and in the **Validation Error Message** to make it more personalized.
{% endhint %}

## **Implementation Example:**

You are asking your customers for their **Email id** to send notifications or product related updates. The Ask Email question type with validation settings will make sure users give helpful responses within a specific character limit.

For the **Question Text** you can enter: *"Kindly share your email with us to send you the help document shortly."*

You have the option to **store the user response** in the variable. You can create a variable - `user_email` for example to store the user response.

<figure><img src="/files/xMrTmVZoaQ11IDLV789k" alt=""><figcaption></figcaption></figure>

Now for the **validation settings**, you could provide the **attempt** limit as 1, Validation Error Message is optional. Provide the **Action on Invalid Response.**

<figure><img src="/files/l0qZ3QoI5fMpGbTstXav" alt=""><figcaption></figcaption></figure>

### Publish the flow

To publish the flow, connect the card with the starting button and then click on Publish Button.

<figure><img src="/files/3UXN9TORfK0aPWHFD6sA" alt=""><figcaption></figcaption></figure>

### In WhatsApp

This is how "**Ask Email**" card would be on the WhatsApp Platform.

<figure><img src="/files/LHgWIzpO2IBF99Qm13q2" alt=""><figcaption></figcaption></figure>

{% hint style="info" %}
The above sample flow is for you to understand how "**Ask Text**" Card works and it's usage. It is not a representation of what can be achieved with Gallabox.
{% endhint %}


# Ask Date

Learn the art of requesting dates from your clients with the Ask Date card. Set validation settings for the time slot you need for a productive discussion.

> **Who can use this Card?**
>
> * Gallabox Users having permission to either build and deploy bots or manage bots.
> * Available on all Paid Plans.

## Overview

Ask date from your customer by using **Ask Date card.**

{% hint style="info" %}
You can ask the customer a question as a **Text** or as a **Voice**.
{% endhint %}

<figure><img src="/files/DVLzKvprfOPp3UGBWK6k" alt=""><figcaption></figcaption></figure>

### **Ask as Text Essentials** <a href="#ask-as-text-essentials" id="ask-as-text-essentials"></a>

Learn the basics of the "Ask as Text" option in Ask Text Card to make talking to users more interesting.

#### **Question Text** <a href="#question-text" id="question-text"></a>

This is the question you want to ask users. Make it clear and short so users know what you're asking.

The **Question text** can be made **Bold**, *Italic*, or ~~strikethrough~~ using the options provided. The text will add the asterisk(\*) for **Bold**, Underscore(\_) for **Italic text**, and Tilde(\~) for **Strikethrough** around the text.

### **Ask as Voice Essentials** <a href="#ask-as-voice-essentials" id="ask-as-voice-essentials"></a>

The Ask as a Voice feature in Gallabox's Ask Text Bot Card lets users talk to submit their answers, making it easy and fun to interact.

You can either choose **AI voice** or a **Record** option.

For generating AI voice, you have to type in the Question Text, select the desired voice from the drop-down, and click on Generate Voice Button.

The Question text will be changed into voice. You can listen to it, change playback speed before saving the card to be used in the bot.

![](/files/AZ7FJ6P8r1k9TZ9LTuRm)

If you want to send a message in your voice, use Record option. Just press the record Button to record. To stop recording, click on Stop Recording.

![](/files/xh6OmgBTXnt5s7GmAEBf)

To know about Storing User Responses, go to [Bot Essentials#creating-variables](https://docs.gallabox.com/~/changes/A8xmww5XU9i8x7QbfPLe/bots/bot-essentials#creating-variables) and know about validation settings [here](https://docs.gallabox.com/~/changes/A8xmww5XU9i8x7QbfPLe/bots/bot-essentials#validation-settings-for-cards).

{% hint style="info" %}
PRO TIP: Use Variables in the **Question Text** and in the **Validation Error Message** to make it more personalized.
{% endhint %}

## Implementation Example

Kindly share the date you will be available for 20 mins to have a conversation.

The above text can be made Bold, Italic, or strikethrough using the options provided. The text will add the asterisk(\*) for **Bold**, Underscore(\_) for **Italic text**, and Tilde(\~) for **Strikethrough** as shown in the text below.

<figure><img src="/files/ozApvfCttPgedqlfFItd" alt=""><figcaption></figcaption></figure>

###

<br>

Once you have set all the fields required and click on **SAVE.**

<figure><img src="/files/bClr0WYSPxnnhmNwXFAn" alt=""><figcaption></figcaption></figure>

{% hint style="success" %}
PRO TIP: Use Variables in the **Question Text** and in the **Validation Error Message** to make it more personalized.
{% endhint %}


# Ask Location

Utilize the Ask Location card to prompt users for their location. Remember to ask for coordinates, not the address in text.

> **Who can use this Card?**
>
> * Gallabox Users having permission to either build and deploy bots or manage bots.
> * Available on Scale and Growth Plans.

## Overview

Ask Location from your customer by using **Ask Location card.**

<figure><img src="/files/tiFKNxbzJThp19LgD5lr" alt=""><figcaption></figcaption></figure>

{% hint style="info" %}
You can only ask the co-ordinates from the user not the address in text.
{% endhint %}

**For example:** Kindly share your location with us to send the service person.

The above text can be made Bold, Italic, or strikethrough using the options provided. The text will add the asterisk(\*) for **Bold**, Underscore(\_) for **Italic text**, and Tilde(\~) for **Strikethrough** as shown in the text below.

<figure><img src="/files/s9qk0AeiHL4evhFyRgjb" alt=""><figcaption></figcaption></figure>

### Other available fields:

1. **Attempt:** In this field, you have to add the number of times you would like to ask the same question to your customers when you get some other response.
2. **Validation Error Message:** This message is for the customer's when they respond randomly to the question you have asked.

<figure><img src="/files/4GY2XYuUVClPdEob5MrS" alt=""><figcaption></figcaption></figure>

3. **Action on Invalid Response:** This is for the Action you want to take when a customer gives an invalid response. You can either [**End the Flow** or **Skip the question** or **Proceed to Fallback**](/bots/gallabox-bot-faqs#define-the-options-for-action-on-invalid-response) to continue with the flow.

<figure><img src="/files/YDQxbqsMjMHPhYMoCEDL" alt=""><figcaption></figcaption></figure>

4. **Store response in the variable:** You can create or use the previously created variables to store the responses shared by your customers.\
   \&#xNAN;*If you are creating variables for the first time, all you have to do is type the Variables name in the box; it will ask to create the variable once you click on Create "Variable Name" as shown in the screenshot below.*

<figure><img src="/files/KFpbheEKwFVIlWIyJ29I" alt=""><figcaption></figcaption></figure>

Once you have set all the fields required and click on **SAVE.**

<figure><img src="/files/P7Mm7hX6zNRt07IhuUlq" alt=""><figcaption></figcaption></figure>

{% hint style="success" %}
PRO TIP: Use Variables in the **Question Text** and in the **Validation Error Message** to make it more personalized.
{% endhint %}

The ask card sent will have a button with a static text “**Send Location**”. When the end user clicks on “Send Location” will open maps in WhatsApp to share location.

<figure><img src="/files/idrTU2wduYL7ryjYUnja" alt=""><figcaption></figcaption></figure>


# Ask Address

Make it convenient for businesses in Singapore and India to collect customer addresses with the Ask Address feature. Craft a clear and reassuring Header Text to ensure customer safety.

{% hint style="info" %}
This feature is only available for businesses based in Singapore and their Singapore customers, and businesses based in India and their India customers.
{% endhint %}

### **Understanding "Ask Address"**

The Ask Address card is designed to make it easy for companies to get their customer's addresses for shipping, mailing, or location verification.

<figure><img src="/files/XmWuia9yVzTyvZEg2Ocd" alt=""><figcaption></figcaption></figure>

### **Ask as Text Essentials**

Learn the basics of the Ask Text Card to make the process of asking the customer's location easier.

#### Header Text

In the Header Text, you can craft a concise and welcoming message that immediately informs the customer of the purpose. This should be short, clear, and reassuring to ensure the customer feels safe in providing their address.

**Example:**

"Your Address will be safe with us"

<figure><img src="/files/Prbkyveo1pK09tlBPecp" alt=""><figcaption></figcaption></figure>

#### Question Text

This is the space which will inform users about your intention of asking their address.

**Example:**

"Kindly provide your address to help us deliver your selected products at your doorstep."

<figure><img src="/files/LWkalbGo639OiOSfYlxm" alt=""><figcaption></figcaption></figure>

#### Footer

The footer in a message provides important secondary information. In most of the WhatsApp Templates, it offers an option to unsubscribe from messages.

**Example:**

Text STOP to unsubscribe from messages.

<figure><img src="/files/udZL6jWfZwX7PQoDO4ZX" alt=""><figcaption></figcaption></figure>

#### Pre-filled Address

If you already have your customer's address, you can pre-fill the address using variables for them to double check and confirm that address.

<figure><img src="/files/yS2Ys5s9ataDa4HHf9Yx" alt=""><figcaption></figcaption></figure>

#### Store response in the variable

The user's address input can be stored in a variable named `address`.

<figure><img src="/files/m5dru3QsAPvoxdsRphLz" alt=""><figcaption></figcaption></figure>

#### Validation Errors

You throw errors in the address fields if you feel that the customer might have provided the details wrong and WhatsApp will prevent the customer from submitting the address until the issue(s) are/is resolved.

#### Validation Settings

**Attempt**: Specifies the number of attempts allowed for a user to provide valid input.

**Validation Error Message**: Optional field to enter a custom error message displayed when user input fails validation.

**Action on Invalid Response**: Defines the action to be taken when the user provides invalid input.

<figure><img src="/files/OvLK2tSRI7ylfaDDipMH" alt=""><figcaption></figcaption></figure>

### Best Practices

* Be transparent about why you're collecting the address and how it will be used.
* Respect customer privacy and ensure you comply with data protection regulations.
* Provide an option for customers to skip the address collection if it's not mandatory.
* Ensure the address input is as user-friendly as possible, supporting autofill and verification to minimize errors.


# Ask URL

Request the URL from your customers using the Ask URL card. Set up Regex validation to verify the input meets the specified URL criteria. Save the response in a variable for further use.

> **Who can use this Card?**
>
> * Gallabox Users having permission to either build and deploy bots or manage bots.
> * Available on all Paid Plans.

## Overview

Ask URL from your customer by using **Ask URL card.**

{% hint style="info" %}
You can ask the customer a question as a **Text** or as a **Voice**.
{% endhint %}

<figure><img src="/files/xh6OmgBTXnt5s7GmAEBf" alt=""><figcaption></figcaption></figure>

### **Ask as Text Essentials** <a href="#ask-as-text-essentials" id="ask-as-text-essentials"></a>

Learn the basics of the "Ask as Text" option in Ask Text Card to make talking to users more interesting.

#### **Question Text** <a href="#question-text" id="question-text"></a>

This is the question you want to ask users. Make it clear and short so users know what you're asking.

{% hint style="info" %}
The **Question text** can be made **Bold**, *Italic*, or ~~strikethrough~~ using the options provided. The text will add the asterisk(\*) for **Bold**, Underscore(\_) for **Italic text**, and Tilde(\~) for **Strikethrough** around the text.
{% endhint %}

### **Ask as Voice Essentials** <a href="#ask-as-voice-essentials" id="ask-as-voice-essentials"></a>

The Ask as a Voice feature in Gallabox's Ask Text Bot Card lets users talk to submit their answers, making it easy and fun to interact.

You can either choose **AI voice** or a **Record** option.

For generating AI voice, you have to type in the Question Text, select the desired voice from the drop-down, and click on Generate Voice Button.

The Question text will be changed into voice. You can listen to it, change playback speed before saving the card to be used in the bot.

![](/files/H7S4x1RxmXgKBbc9ky9I)

If you want to send a message in your voice, use Record option. Just press the record Button to record. To stop recording, click on Stop Recording.

![](/files/kHx3B6jH6vGnQNUpUhBW)

To know about Storing User Responses, go to [Bot Essentials#creating-variables](https://docs.gallabox.com/~/changes/A8xmww5XU9i8x7QbfPLe/bots/bot-essentials#creating-variables) and know about validation settings [here](https://docs.gallabox.com/~/changes/A8xmww5XU9i8x7QbfPLe/bots/bot-essentials#validation-settings-for-cards).

{% hint style="info" %}
PRO TIP: Use Variables in the **Question Text** and in the **Validation Error Message** to make it more personalized.
{% endhint %}

## Implementation Example

Please share the URL of the product that you would like to purchase.

The above text can be made Bold, Italic, or strikethrough using the options provided. The text will add the asterisk(\*) for **Bold**, Underscore(\_) for **Italic text**, and Tilde(\~) for **Strikethrough** as shown in the text below.

<figure><img src="/files/yPn8VxEms3WOm95oGL6O" alt=""><figcaption></figcaption></figure>

Once you have set all the fields required and click on **SAVE.**

<figure><img src="/files/GDf1SEzgFWRrOXWQHLRS" alt=""><figcaption></figcaption></figure>

{% hint style="success" %}
PRO TIP: Use Variables in the **Question Text** and in the **Validation Error Message** to make it more personalized.
{% endhint %}


# Ask File

Enhance user engagement with Ask File Card by requesting files from customers through text or voice. Learn how to utilize the "Ask as Text" and "Ask as Voice" features effectively.

> **Who can use this Card?**
>
> * Gallabox Users having permission to either build and deploy bots or manage bots.
> * Available on Scale and Growth Plans.

## Overview

Ask a File from your customer by using **Ask File card.**

{% hint style="info" %}
You can ask the customer a question as a **Text** or as a **Voice**.
{% endhint %}

<figure><img src="/files/TcmCqjCciZdILSboC8py" alt=""><figcaption></figcaption></figure>

### **Ask as Text Essentials** <a href="#ask-as-text-essentials" id="ask-as-text-essentials"></a>

Learn the basics of the "Ask as Text" option in Ask File Card to make talking to users more interesting.

#### **Question Text** <a href="#question-text" id="question-text"></a>

This is the question you want to ask users. Make it clear and short so users know what you're asking.

{% hint style="info" %}
The **Question text** can be made **Bold**, *Italic*, or ~~strikethrough~~ using the options provided. The text will add the asterisk(\*) for **Bold**, Underscore(\_) for **Italic text**, and Tilde(\~) for **Strikethrough** around the text.
{% endhint %}

### **Ask as Voice Essentials** <a href="#ask-as-voice-essentials" id="ask-as-voice-essentials"></a>

The Ask as a Voice feature in Gallabox's Ask Text Bot Card lets users talk to submit their answers, making it easy and fun to interact.

You can either choose **AI voice** or a **Record** option.

For generating AI voice, you have to type in the Question Text, select the desired voice from the drop-down, and click on Generate Voice Button.

The Question text will be changed into voice. You can listen to it, change playback speed before saving the card to be used in the bot.

![](/files/LaIgIdd1MlT6mZAD1bof)

If you want to send a message in your voice, use Record option. Just press the record Button to record. To stop recording, click on Stop Recording.

![](/files/kR6tGIoMsEY3pTzC6idd)

To know about Storing User Responses, go to [Bot Essentials#creating-variables](https://docs.gallabox.com/~/changes/A8xmww5XU9i8x7QbfPLe/bots/bot-essentials#creating-variables) and know about validation settings [here](https://docs.gallabox.com/~/changes/A8xmww5XU9i8x7QbfPLe/bots/bot-essentials#validation-settings-for-cards).

{% hint style="info" %}
PRO TIP: Use Variables in the **Question Text** and in the **Validation Error Message** to make it more personalized.
{% endhint %}

## Implementation Example

Please share your resume with us to evaluate your candidature.

The above text can be made Bold, Italic, or strikethrough using the options provided. The text will add the asterisk(\*) for **Bold**, Underscore(\_) for **Italic text**, and Tilde(\~) for **Strikethrough** as shown in the text below.

<figure><img src="/files/5MiOV63ZIA0pVCC7QPJI" alt=""><figcaption></figcaption></figure>

Once you have set all the fields required and click on **SAVE.**

<figure><img src="/files/IPs6tu7MxOq5ARwTco6F" alt=""><figcaption></figcaption></figure>

{% hint style="success" %}
PRO TIP: Use Variables in the **Question Text** and in the **Validation Error Message** to make it more personalized.
{% endhint %}


# Ask Button Option

Boost customer interaction with Ask Button Option Card. Provide quick options like Add to My Picks, Build an Outfit, and Buy. Add media for a more engaging experience. Shop fast-sellers now!

> **Who can use this Card?**
>
> * Gallabox Users having permission to either build and deploy bots or manage bots.
> * Available on all Paid Plans.

## Overview

Below image is the screenshot of a conversation with American Eagle's Bot. Observe the below picture for a moment and see the three options they have provided to the customer - **Add to My Picks**, **Build an Outfit**, and **Buy**. These three quick buttons help the customer to make quick decision if they want to go ahead with the business or not.

<figure><img src="/files/KZyTiLOF0suzdoRpHyDu" alt=""><figcaption><p>Source: <a href="https://www.chatbotguide.org/american-eagle-bot">Chatbot guide</a></p></figcaption></figure>

You can also create something like this for your business on WhatsApp using the **Ask Button Option**.

Let's see what goes into creating the **Button option** with media similar to the example above.

### Header Type

You can add an image or a video, or a text, or a document to make it more interactive.

<figure><img src="/files/4sXCP9UnM7RDTgvSMwym" alt=""><figcaption></figcaption></figure>

{% hint style="info" %}
Maximum size of:

Image is 5MB

Video is 16MB

Document is 16MB
{% endhint %}

### Question Text

This is the space where you ask your customer the question or write the description like - *Purple & Crème Patchwork cardigan at an unique price of INR 1299*. The possibilities are endless.

The above text can be made Bold, Italic, or strikethrough using the options provided. The text will add the asterisk(\*) for **Bold**, Underscore(\_) for **Italic text**, and Tilde(\~) for **Strikethrough** as shown in the text below.

<figure><img src="/files/dDp302Lex4h0661isvBx" alt=""><figcaption></figcaption></figure>

### Footer

This is the space for you to add any additional information related to the message like ***Hurry, size up on style & set #stylegoals*** or ***Hurry, Shop these fast-sellers Now.***

You can add the content as per your choice.

<figure><img src="/files/RMM3JMzz6nIzvhDMRdk3" alt=""><figcaption></figcaption></figure>

### Options Type

For the options, Gallabox gives you the liberty of adding Static and Dynamic Options.

Static Options means the option will be fixed while the Dynamic options are capable of changing. If you have the dynamic values stored somewhere in your database, it can be accessed using API Call.

**You can add a maximum of 3 buttons.**

Below is the example of how you can add the Static Options:

<figure><img src="/files/CCl39w5cQhvC9Z0VaNfn" alt=""><figcaption></figcaption></figure>

For the Dynamic Options in **Ask Button Option**, we have three fields - Variable to iterate, Path to ID, and Path to Title.

<figure><img src="/files/p4bd3hhbdOzYPQ0EDePo" alt=""><figcaption></figcaption></figure>

* Variable to iterate: You have to add the name of the array here.
* Path to ID: Add the path from your internal database in curly brackets.
* Path to Title: Add the title in curly brackets like this {{first\_name}}.

### **Attempt:**

In this field, you have to add the number of times you would like to ask the same question to your customers when you get some other response.

<figure><img src="/files/i5tPv8ZQ0dCbj6U4SuDM" alt=""><figcaption></figcaption></figure>

### **Validation Error Message**

This message is for the customer's when they respond randomly to the question you have asked.

<figure><img src="/files/CZMAC26GK4D8pKUHctX4" alt=""><figcaption></figcaption></figure>

### **Action on Invalid Response**

This is for the Action you want to take when a customer gives an invalid response. You can either [**End the Flow** or **Skip the question**](/bots/gallabox-bot-faqs#define-the-options-for-action-on-invalid-response) to continue with the flow.

<figure><img src="/files/YDQxbqsMjMHPhYMoCEDL" alt=""><figcaption></figcaption></figure>

### **Store response in the variable**

You can create or use the previously created variables to store the responses shared by your customers.\
\&#xNAN;*If you are creating variables for the first time, all you have to do is type the Variables name in the box; it will ask to create the variable once you click on Create "Variable Name" as shown in the screenshot below.*

<figure><img src="/files/E5ZXyUHzfY1KtieXI0a5" alt=""><figcaption></figcaption></figure>

Once you have set all the fields required and click on **SAVE.**

<figure><img src="/files/cSgVasFcWpwlNDM1PQ3z" alt=""><figcaption></figcaption></figure>

Based on the customer's response, you can continue with the **personalized** flow for each option like shown in the picture below.

<figure><img src="/files/pN9VYpqnBSic0Fliy8n5" alt=""><figcaption></figcaption></figure>


# Ask List Option

Discover a comprehensive list of up to 10 options for our website, simplifying your interaction with the customers in a consistent manner.

> **Who can use this Card?**
>
> * Gallabox Users having permission to either build and deploy bots or manage bots.
> * Available on all Paid Plans.

## Overview

This Card provides a list of up to 10 options, making it easier for users to choose and interact with your business in a straightforward and consistent manner.

## When to Use the Node:

Below are some scenarios you can use List Messages for industry wise:

<table><thead><tr><th width="150">Industry</th><th>Scenario - 1</th><th>Scenario - 2</th></tr></thead><tbody><tr><td>Education</td><td><p><strong>Course Information:</strong></p><ul><li>Browse Available Courses</li><li>Check Course Schedules</li><li>Explore Faculty Profiles</li><li>Request Syllabus Details</li></ul></td><td><p><strong>Admissions:</strong></p><ul><li>Admission Requirements</li><li>Undergraduate Programs</li><li>Graduate Program Options</li><li>Application Deadlines</li></ul></td></tr><tr><td>HealthCare</td><td><p><strong>Appointment Services:</strong></p><ul><li>Schedule a Appointment</li><li>Available Time Slots</li><li>Appointment Reminders</li><li>Reschedule Appointments</li></ul></td><td><p><strong>Health Information:</strong></p><ul><li>Health Services Offered</li><li>Medical Facility Locations</li><li>Health and Wellness Resources</li><li>Request Health Insurance Details</li></ul></td></tr><tr><td>Travel</td><td><p><strong>Flight Information:</strong></p><ul><li>Search for Flights</li><li>Check Flight Availability</li><li>Departure and Arrival Times</li><li>Explore Airline Options</li></ul></td><td><p><strong>Hotel Booking:</strong></p><ul><li>Find Available Hotels</li><li>Check Room Rates</li><li>Explore Amenities</li><li>Book a Room</li></ul></td></tr><tr><td>Real Estate</td><td><p><strong>Property Search:</strong></p><ul><li>Explore Available Properties</li><li>Check Property Details</li><li>View Images and Virtual Tours</li><li>Request a Property Viewing</li></ul></td><td><p><strong>Mortgage Services:</strong></p><ul><li>Learn About Mortgage Options</li><li>Check Interest Rates</li><li>Get Pre-Approval Details</li><li>Apply for a Mortgage</li></ul></td></tr><tr><td>E-Commerce</td><td><p><strong>Product Catalog:</strong></p><ul><li>Product Categories</li><li>View Featured Products</li><li>Product Details and Specifications</li><li>Add Items to the Cart</li></ul></td><td><p><strong>Order Management:</strong></p><ul><li>Track Order Status</li><li>View Order History</li><li>Request Returns or Exchanges</li><li>Explore Delivery Options</li></ul></td></tr></tbody></table>

## How to use it:

The Ask List Message Node has 6 fields - Header Type, Question Text, Footer, Button Name, Options Type, Attempt, Validation Error Message, Action on Invalid Response, and Variables.

<figure><img src="/files/TDkNoYvxW2HEw8ERWBSI" alt=""><figcaption></figcaption></figure>

### Header Type

You can add a text something like "Welcome to our Help Centre" or "Common questions about our products and services".

<figure><img src="/files/jT0EkDKooh68N22vb8lw" alt=""><figcaption></figcaption></figure>

### Question Text

This is the space where you ask your customer the question or write the description like - "This is a *self-service* Frequently Asked Questions database for **Services**. Choose from the list to help yourself." The possibilities are endless.

The above text can be made Bold, Italic, or strikethrough using the options provided. The text will add the asterisk(\*) for **Bold**, Underscore(\_) for **Italic text**, and Tilde(\~) for **Strikethrough** as shown in the text below.

<figure><img src="/files/L1D5SL9KItoe4n6Dep95" alt=""><figcaption></figcaption></figure>

### Footer

This is the space for you to add any additional information related to the message like the company's name or the tagline. Here in the example we have taken the made up company's name - **ANC Banking Company**.

You can add the content as per your choice.

<figure><img src="/files/oPnzttTDW7dGNhy29ReW" alt=""><figcaption></figcaption></figure>

### Options Type

For the options, you can add either Static or Dynamic Options.

<figure><img src="/files/LEJUmq6G6vmDOH2YXA43" alt=""><figcaption></figcaption></figure>

#### Static Options

Static Options means the option will be fixed while the Dynamic options are capable of changing. If you have the dynamic values stored somewhere in your database, it can be accessed using API Call.

**You can add a maximum of 10 buttons and you can create different sections.**

Below is the example of how you can add the Static Options:

<figure><img src="/files/XHK3wDMe89iz1lGFlsah" alt=""><figcaption></figcaption></figure>

#### Dynamic Options

For the Dynamic Options in **Ask List Option**, we have three fields - Variable to iterate, Path to ID, and Path to Title.

<figure><img src="/files/q1UiYSzYF41BgCCDrtxC" alt=""><figcaption></figcaption></figure>

* Variable to iterate: You have to add the name of the array here.
* Path to ID: Add the path from your internal database in curly brackets.
* Path to Title: Add the title in curly brackets like this {{first\_name}}.

{% hint style="info" %}
**Please note:**

1. If multiple options are added under same section, it can be sent without a section name.
2. If there are more than 1 section, then the section header is made mandatory to create the card.
   {% endhint %}

#### Dynamic Options with sections

This feature lets you send a curated selection of product items to your users in a grouped or sectioned format, dynamically generated from a JSON/API response stored in your variables.

For instance, below is an example of JSON response you get from your API:

```
{
  "clothing_types": [
    {
      "section_title": "Tops",
      "products": [
        {
          "product_id": "123",
          "product_name": "T-Shirt",
          "product_description": "A comfortable and casual shirt"
        },
        {
          "product_id": "456",
          "product_name": "Blouse",
          "product_description": "A stylish and elegant top"
        }
      ]
    },
    {
      "section_title": "Bottoms",
      "products": [
        {
          "product_id": "789",
          "product_name": "Jeans",
          "product_description": "Durable and versatile pants"
        },
        {
          "product_id": "012",
          "product_name": "Skirt",
          "product_description": "A fashionable and comfortable bottom"
        }
      ]
    }
  ]
}
```

For the above response:

<table><thead><tr><th width="485">Field Name</th><th>JSON response field</th></tr></thead><tbody><tr><td><strong>Variable where the sections are stored</strong></td><td>will be a variable in which the list of sections is stored</td></tr><tr><td><strong>JSONPath for the section title</strong><br><em>(This selects the "title" property for each object inside the "sections" array)</em></td><td><code>{{section_title}}</code></td></tr><tr><td><strong>JSONPath for the section options</strong><br><em>(This selects the "options" array for each object inside the "sections" array)</em></td><td><code>{{products}}</code></td></tr><tr><td><strong>JSONPath for the option ID</strong><br><em>(This selects the "id" property for each object inside the nested "options" array within each section)</em></td><td><code>{{product_id}}</code></td></tr><tr><td><strong>JSONPath for the option title</strong><br><em>(This selects the "title" property for each object inside the nested "options" array within each section)</em></td><td><code>{{product_name}}</code></td></tr><tr><td><strong>JSONPath for the option description</strong><br><em>(This selects the "description" property for each object inside the nested "options" array within each section)</em></td><td><code>{{product_description}}</code></td></tr></tbody></table>

This example shows how to structure your JSON variable to the required "Dynamic Options with sections" format using JSONPath. Make sure the variable has an array of product sections.

### **Validation Settings**

#### **Attempt:**

In this field, you have to add the number of times you would like to ask the same question to your customers when you get some other response.

<figure><img src="/files/zAdiNfEy7uRX3NTVmtBk" alt=""><figcaption></figcaption></figure>

#### **Validation Error Message**

This message is for the customer's when they respond randomly to the question you have asked.\
For Example: If the customer doesn't respond with the options, then you could send a message - Please choose from the above options or Choose from the options listed.

<figure><img src="/files/ozm2NuE0A1dh2boJlvSv" alt=""><figcaption></figcaption></figure>

#### **Action on Invalid Response**

This is for the Action you want to take when a customer gives an invalid response. You can either [End the Flow or Skip the question or Proceed to Fallback](/bots/gallabox-bot-faqs#define-the-options-for-action-on-invalid-response) to continue with the flow.

<figure><img src="/files/YDQxbqsMjMHPhYMoCEDL" alt=""><figcaption></figcaption></figure>

#### **Store response in the variable**

You can create or use the previously created variables to store the responses shared by your customers.\
\&#xNAN;*If you are creating variables for the first time, all you have to do is type the Variables name in the box; it will ask to create the variable once you click on Create "Variable Name" as shown in the screenshot below.*

<figure><img src="/files/bJH4uI0PRydf39EBUm5l" alt=""><figcaption></figcaption></figure>

Once you have set all the fields required and click on **SAVE**, the card will look like as shown in the screenshot below.

<figure><img src="/files/OYel4GhSC74RzTsUKwlz" alt=""><figcaption></figcaption></figure>

Below is the **sample flow** for your reference. You can create a thorough self-service FAQ bot.

<figure><img src="/files/BMjyBz8fM33NUQUIi0yn" alt=""><figcaption></figcaption></figure>

This is how **Ask List Option** Node works on WhatsApp for a Education Industry bot.

<figure><img src="/files/gYVTCi4GUi83yNMdVslM" alt=""><figcaption></figcaption></figure>


# Ask Keyword Option

Enhance user engagement with Ask Keyword Option Card. Craft personalized questions and dynamic options for a user-friendly experience.

> **Who can use this Card?**
>
> * Gallabox Users having permission to either build and deploy bots or manage bots.
> * Available on all Paid Plans.

## Overview

In WhatsApp, the options are displayed as a number list of choices, but now **you can use multiple keywords for each option, aside from the numbers.**

This way the valid answer to this question could be the corresponding number or one of the corresponding keywords.

In the Gallabox bot-builder, the **Keyword Options** looks just like a **List Option, b**ut when you start listing out the options, you'll be able to **associate maximum of 10 keywords to each Option** aside from the numbers (Which are provided by default as keywords).

<figure><img src="/files/CCzVQFU1RrNiIkr2CWU0" alt=""><figcaption></figcaption></figure>

The Ask Keyword Option Card has the field for Question Text, Options Type, Attempt, Validation Error Message, Action on Invalid Response, and Store response in the variable. Let's see what goes into creating the **Keyword option** by creating a self-service knowledge base bot.

### Question Text

This is the space where you ask your customer the question or write the description like - "Which feature of Gallabox you need help with?" The possibilities are endless.

The above text can be made Bold, Italic, or strikethrough using the options provided. The text will add the asterisk(\*) for **Bold**, Underscore(\_) for **Italic text**, and Tilde(\~) for **Strikethrough** as shown in the text below.

<figure><img src="/files/y6urpLs4XNrR1AzO6J9t" alt=""><figcaption></figcaption></figure>

### Options Type

For the options, Gallabox gives you the liberty of adding Static and Dynamic Options.

Static Options means the option will be fixed while the Dynamic options are capable of changing. If you have the dynamic values stored somewhere in your database, it can be accessed using [API Call](/bots/bot-connectors/connect-your-system-with-the-whatsapp-chat-bot-using-api).

**You can add a maximum of 20 Options.**

Below is the example of how you can add the Static Options. With the option text, you can add upto 10 keywords.

{% hint style="info" %}
Make sure to add the keywords that are relevant with your customers.
{% endhint %}

<figure><img src="/files/POgShKTh9Hb6oUc8CGXn" alt=""><figcaption></figcaption></figure>

For the Dynamic Options in **Ask List Option**, we have three fields - Variable to iterate, Path to ID, and Path to Title.

<figure><img src="/files/w2kFPuwgYvFZAVpnZbM9" alt=""><figcaption></figcaption></figure>

* Variable to iterate: You have to add the name of the array here.
* Path to ID: Add the path from your internal database in curly brackets.
* Path to Title: Add the title in curly brackets like this {{first\_name}}.

### **Attempt:**

In this field, you have to add the number of times you would like to ask the same question to your customers when you get some other response.

<figure><img src="/files/LWaaf9zAmA9pUxJKGe2N" alt=""><figcaption></figcaption></figure>

### **Validation Error Message**

This message is for the customer's when they respond randomly to the question you have asked.\
For Example: If the customer doesn't respond with the options, then you could send a message - Please choose from the above options or Choose from the options listed.

<figure><img src="/files/qyfwXl0MXud868QR70ky" alt=""><figcaption></figcaption></figure>

### **Action on Invalid Response**

This is for the Action you want to take when a customer gives an invalid response. You can either [**End the Flow** or **Skip the question** or **Proceed to Fallback**](/bots/gallabox-bot-faqs#define-the-options-for-action-on-invalid-response) to continue with the flow.

<figure><img src="/files/YDQxbqsMjMHPhYMoCEDL" alt=""><figcaption></figcaption></figure>

### **Store response in the variable**

You can create or use the previously created variables to store the responses shared by your customers.\
\&#xNAN;*If you are creating variables for the first time, all you have to do is type the Variables name in the box; it will ask to create the variable once you click on Create "Variable Name" as shown in the screenshot below.*

<figure><img src="/files/bJH4uI0PRydf39EBUm5l" alt=""><figcaption></figcaption></figure>

Once you have set all the fields required and click on **SAVE**, the card will look like as shown in the screenshot below.

<figure><img src="/files/s0AtkcsX387hCALeitPK" alt=""><figcaption></figcaption></figure>

A sample flow using the Ask Keyword Option, Send Text, Delay, Jump to, and Unassign Conversation is as below:

<figure><img src="/files/yg0JMiOnTKEXzn592r5W" alt=""><figcaption></figcaption></figure>


# Ask Collection List

Discover the steps to create a Collection option card on Gallabox with Header Text, Question Text, Catalog, Collection, and more. Optimize your catalog for better engagement!

> **Who can use this Card?**
>
> * Gallabox Users having permission to either build and deploy bots or manage bots.
> * Available on all Paid Plans.

### Overview

This card can be used only when you have created a catalog in Facebook, created the product sets and connected the catalog to Gallabox.

If you haven't created the product sets on Facebook, click on <https://www.facebook.com/business/help/620275848114281?id=725943027795860>

The Ask Collection Option Card has the field for Header Text, Question Text, Catalog, Collection, Validation Error Message, Action on Invalid Response, and Store response in the variable. Let's see what goes into creating the **Collection option.**

### Header Type

You can add a text something like "Welcome to our Catalog" or "Our Bestsellers" depending on the collection you want to share with people.

<figure><img src="/files/6uDGAm4SjMXCoHwNf9Sk" alt=""><figcaption></figcaption></figure>

### Question Text

This is the space where you ask your customer the question or write the description for the collection you are sharing with your customers.

The above text can be made Bold, Italic, or strikethrough using the options provided. The text will add the asterisk(\*) for **Bold**, Underscore(\_) for **Italic text**, and Tilde(\~) for **Strikethrough** as shown in the text below.

<figure><img src="/files/YgQ27yvUlslRlHOnkZah" alt=""><figcaption></figcaption></figure>

### Catalog

You have to choose the catalog that you would like to share with your customers. This is the same Catalog from which the collections has to be listed.

<figure><img src="/files/cP7h3LsjR5TCSPcJGoeV" alt=""><figcaption></figcaption></figure>

### Collections

You have to choose the collection from the list that you would like to share with your customers. If you are not seeing any collections that means you have not created any in your Commerce Manager. Go to <https://www.facebook.com/business/help/620275848114281?id=725943027795860> to understand how you can create.

{% hint style="info" %}
"All Products" is the default set created by Meta.
{% endhint %}

<figure><img src="/files/yM6B4rsHYWVT3hb3J0xC" alt=""><figcaption></figcaption></figure>

### **Validation Error Message**

This message is for the customer's when they respond randomly to the question you have asked.\
For Example: If the customer doesn't respond with the options, then you could send a message - Please choose from the above options or Choose from the options listed.

<figure><img src="/files/67DQ5qrX5mwovp0y2TSC" alt=""><figcaption></figcaption></figure>

### **Action on Invalid Response**

This is for the Action you want to take when a customer gives an invalid response. You can either [**End the Flow** or **Skip the question** or **Proceed to Fallback**](/bots/gallabox-bot-faqs#define-the-options-for-action-on-invalid-response) to continue with the flow.

<figure><img src="/files/YDQxbqsMjMHPhYMoCEDL" alt=""><figcaption></figcaption></figure>

### **Store response in the variable**

You can create or use the previously created variables to store the responses shared by your customers.\
\&#xNAN;*If you are creating variables for the first time, all you have to do is type the Variables name in the box; it will ask to create the variable once you click on Create "Variable Name" as shown in the screenshot below.*

<figure><img src="/files/bJH4uI0PRydf39EBUm5l" alt=""><figcaption></figcaption></figure>

Once you have set all the fields required and click on **SAVE**, the card will look like as shown in the screenshot below.

<figure><img src="/files/sbw4tcCYRUt7wxu5nJrn" alt=""><figcaption></figcaption></figure>

{% hint style="info" %}
This card will work in collaboration with the [Send Collection](/bots/send-card/send-collection)Card.
{% endhint %}

The Send collection card has to be edited as below:

<figure><img src="/files/UyLu1vbFNwcSq7Hr0VSq" alt=""><figcaption></figcaption></figure>

{% hint style="warning" %}
Make sure to check the box for - Dynamic collection from previous response
{% endhint %}

Under the Collection for the Send Collection card, you have to choose the custom variables as shown in the picture

<figure><img src="/files/Jhw4JY5MHhCNGZ21wwru" alt=""><figcaption></figcaption></figure>

* user\_response.id: In this variables, the payload of the button that the user responded with will be stored.
* user\_response.title: In this variable, the title of the product that user responded with will be stored.
* user\_response.description: In this variable, the description of the product that user responded with will be stored.

We have chosen the **user\_response.title** variable.

Once you have edited the Send Collection card, the flow will look like

<figure><img src="/files/NTxE2jNGgHPx2rrfSHYz" alt=""><figcaption></figcaption></figure>


# Ask Form

Enhance user engagement with interactive forms using the Ask Form feature. Customize headers, questions, and footers effortlessly while storing responses in variables.

> **Who can use this Card?**
>
> * Gallabox Users having permission to either build and deploy bots or manage bots.
> * Available on Scale and Growth Plans.

## **Understanding "Ask Form"**

The Ask Form feature enables to send the interactive forms, allowing users to input information seamlessly. This feature includes customization options for the header, questions, footer, and the ability to store responses in variables.

<figure><img src="/files/mMtar6o2GgfgooeaYhFZ" alt=""><figcaption></figcaption></figure>

## **Ask Form Essentials:**

Before using Ask Form in your chatbot, here are some things you need to know:

### **Header Text**

This field allows you to set an optional header text for the form, providing context or a title. For example: "Survey Form" or "Booking Form".

### **Question Text**

The question text is where you define the main query or prompt for the user. For example: "What is your feedback?"

### **Footer**

Optionally, you can include a footer text. It can be used for additional information or a closing message. In the example: "Thank you for your response!"

### **Button Name**

This involves specifying the name for the form submission button. For example: "Submit."

### **WhatsApp Flow**

Here, you select the WhatsApp flow you want to associate with the form. It is a predefined flow for handling user responses.

To create WhatsApp Flow, [click here](/whatsapp-flows/create-whatsapp-forms).

### **Flow Action**

The flow action defines what happens after the user interacts with the form. In the example: "Navigate" suggests moving to another screen or action within the WhatsApp flow.

### **Screen Name**

Paste the Screen Id from the JSON.

### **Response Storage Variable**

This optional setting allows you to store user responses in a variable for later use or processing.

Variable should follow specific rules, such as starting with an alphabet and only allowing underscores as special characters. In the example: "user feedback."

### **Validation Settings**

These rules are important to make sure users provide the right info.

Let's explore the key components of the validation settings for the "**Ask Form**" question type:

1. **Attempt:**

Define the number of attempts a user has to provide a valid response. This feature helps manage user expectations and encourages accurate inputs.

2. **Validation Error Message:**

An optional setting where you can enter a specific error message to guide users in case of invalid input.

3. **Action on Invalid Response:**

Here is how to make sure the conversation stays smooth even if there's a mistake in the answer. Here's how you can handle it:

* **Drop from the bot**: If there's an error, the Bot session timeout action will happen and the message for Session timeout will be shared with the user.
* **Skip the Question**: Your customer will move forward in the BotFlow without answering a particular question.
* **Proceed to Fallback**: If an invalid response is encountered, the question will be skipped and will move to the next card connected to the fallback connector🔶.

## **Implementation Example**

Let's design a "Ask Form" Card for a Restaurant.

For the **Header Text** you can enter: "*Welcome to Hotel Charminar Palmshore*".

<figure><img src="/files/GD0FrkKoy50yNGXREUYb" alt=""><figcaption></figcaption></figure>

For the **Question Text** you can enter: "*Kindly Select from Today's Menu".*

<figure><img src="/files/tyQLn4emxfmNlyH5qikM" alt=""><figcaption></figcaption></figure>

For the **Footer** you can enter any text or leave it blank.

<figure><img src="/files/aTVWbJtAZwCpa9shlP3x" alt=""><figcaption></figcaption></figure>

For the **button name**, you can either enter "View Menu" or "Our Menu"

<figure><img src="/files/kJVYAXdOqW9C6cmVHPTC" alt=""><figcaption></figcaption></figure>

Select the relevant WhatsApp Flow you have created in your Business Manager. If you haven't, created any, go to [Flows](/whatsapp-flows/create-whatsapp-forms).

<figure><img src="/files/8eTreDkTp8TKFq4jsS7s" alt=""><figcaption></figcaption></figure>

For the **Screen Name** you have to paste the Id of the first screen. You can take it from the JSON format. You will get the Id from your Business Manager.

In the below picture, the text enclosed in blue box is the Screen id you have to paste in the Screen Name of Ask Form.

<figure><img src="/files/v4D5rDNZ4MaoBMpj8qXL" alt=""><figcaption></figcaption></figure>

You have the option to **store the user response** in the variable. You can create a variable - `user_details` for example to store the user response.

<figure><img src="/files/LjdFO6gHWo2dK3V3EDBR" alt=""><figcaption></figcaption></figure>

Now for the **validation settings**, you could provide the **attempt** limit as 1, Validation Error Message is optional. Kindly provide the **Action on Invalid Response** as [*Proceed to fallback*](/bots/bot-essentials#validation-settings-for-cards)*.*

<figure><img src="/files/bxBlX7Em5vnDvUc8tUDb" alt=""><figcaption></figcaption></figure>

## Sample Flow Using "Ask Form" Card

### In Gallabox Bot Interface

<figure><img src="/files/5EPXeQbjJ3P20satpv73" alt=""><figcaption></figcaption></figure>

### In WhatsApp

<figure><img src="/files/76mwkS6MEd5IUyKBvtac" alt=""><figcaption></figcaption></figure>

{% hint style="info" %}
Note:

1. The above sample flow is for you to understand how "**Ask Form**" Card works and it's usage. It is not a representation of what can be achieved with Gallabox.
2. All the responses will be collected in a section - [WhatsApp Flows](/whatsapp-flows/receiving-response-of-whatsapp-forms) under Settings.
3. You can use this Card if you require input from the user.
   {% endhint %}


# Ask Payments

Learn how to efficiently use "Ask Payments" feature to receive payments directly via WhatsApp. Explore detailed instructions and customizable options now!

> **Who can use this Card?**
>
> * Gallabox Users having permission to either build and deploy bots or manage bots.
> * Available on Scale and Growth Plans.

### **Understanding "Ask Payments"** <a href="#understanding-send-payments" id="understanding-send-payments"></a>

The "**Ask Payments**" feature allows users to share WhatsApp Payment links with your customers. With this functionality, businesses can receive payments from customers directly through WhatsApp.

<figure><img src="/files/J4gc8DztDUr4O9MiL3a2" alt=""><figcaption></figcaption></figure>

#### Before you proceed <a href="#before-you-proceed" id="before-you-proceed"></a>

With this Card, make sure you have connected WhatsApp Payments. If not, visit

<table data-card-size="large" data-column-title-hidden data-view="cards" data-full-width="false"><thead><tr><th></th><th data-hidden></th><th data-hidden></th></tr></thead><tbody><tr><td><a href="https://docs.gallabox.com/payments/establish-connection#update-payment-provider-in-meta"><strong>Link WhatsApp Payments</strong></a></td><td></td><td></td></tr></tbody></table>

### **Ask WhatsApp Payments Essentials** <a href="#send-whatsapp-payments-essentials" id="send-whatsapp-payments-essentials"></a>

When utilizing the "**Ask WhatsApp Payments"** Card, users are prompted to provide the following details:

<table><thead><tr><th width="186">Order Details</th><th>Description</th></tr></thead><tbody><tr><td>Payment Provider</td><td>Choose from <strong>UPI VPA ID</strong> or <strong>Razorpay</strong> to receive the payment on WhatsApp.</td></tr><tr><td>Order Details</td><td>Provide information about the items included in the order (by adding manually or using a variable).</td></tr><tr><td>Header Image</td><td>Upload an optional header image for the payment request.</td></tr><tr><td>Body</td><td>Enter a brief description or message related to the payment request.</td></tr><tr><td>Footer</td><td>Include an optional footer text for the payment request.</td></tr></tbody></table>

#### **Advanced Settings**

Specify tax, shipping, and discount details for the payment.

<table><thead><tr><th width="235">Advanced Settings</th><th>Description</th></tr></thead><tbody><tr><td>Tax Amount</td><td>Enter the tax amount.</td></tr><tr><td>Tax Description</td><td>Provide a description of the tax.</td></tr><tr><td>Shipping Amount</td><td>Enter the shipping amount.</td></tr><tr><td>Shipping Description</td><td>Provide a description of the shipping charges.</td></tr><tr><td>Discount Amount</td><td>Enter the discount amount.</td></tr><tr><td>Discount Description</td><td>Provide a description of the discount.</td></tr><tr><td>Discount Program Name</td><td>Enter the name of the discount program.</td></tr></tbody></table>

#### Proceed to fallback

If enabled, when any response other than payment occurs, the card associated with the fallback node will be executed.

### Ask WhatsApp Payment Card Usage

To ask for a payment:

1. Select the desired payment provider.
2. Enter the order details, including items, country of origin, importer information, and address details (**if you are manually adding products**). Enter the variable for Product Details & Reference Id, copy JSON format, edit the format as per your product details.
3. Optionally, upload a header image and provide body and footer text.
4. Configure advanced options as needed, such as tax, shipping, and discount details.
5. Enable Proceed to Fallback to curb any response other than payment.
6. Submit the payment request.

<figure><img src="/files/ZntqHdPw3Kx9qMHq2Y9J" alt=""><figcaption></figcaption></figure>


# Bot Utilities

Boost your productivity with our Utilities Cards, offering a range of cool features. Dive in and experience the difference!

***Utilities has some cool features to make your flow easier and more efficient.***

*Let's dive into these features!!*

<table data-view="cards"><thead><tr><th></th><th></th><th></th><th data-hidden data-card-target data-type="content-ref"></th><th data-hidden data-card-cover data-type="files"></th></tr></thead><tbody><tr><td>Send Button Option</td><td></td><td></td><td><a href="/pages/pNUq2Q2xCtdw4sD2Cw3a">/pages/pNUq2Q2xCtdw4sD2Cw3a</a></td><td><a href="/files/ybayB9jE5uiy6Vb1OkJ7">/files/ybayB9jE5uiy6Vb1OkJ7</a></td></tr><tr><td>Send List Option</td><td></td><td></td><td><a href="/pages/o1kSbp7ac05FWaE9YwkV">/pages/o1kSbp7ac05FWaE9YwkV</a></td><td><a href="/files/tcCcTmQlUg3DleJZ2s1i">/files/tcCcTmQlUg3DleJZ2s1i</a></td></tr><tr><td>Delay</td><td></td><td></td><td><a href="/pages/HbLiuAje1UY1mT1GIVvJ">/pages/HbLiuAje1UY1mT1GIVvJ</a></td><td><a href="/files/ZZ7LBXc7HBaFlKY41xz0">/files/ZZ7LBXc7HBaFlKY41xz0</a></td></tr><tr><td>Condition</td><td></td><td></td><td><a href="/pages/ltAohOqywdbuV5kNlPHE">/pages/ltAohOqywdbuV5kNlPHE</a></td><td><a href="/files/iIpoUdrIYOx03KIl28Av">/files/iIpoUdrIYOx03KIl28Av</a></td></tr><tr><td>Set Variable</td><td></td><td></td><td><a href="/pages/yjSwLJbW55z6vr4qazw9">/pages/yjSwLJbW55z6vr4qazw9</a></td><td><a href="/files/oVHCgQ33loCfVIEXkHYD">/files/oVHCgQ33loCfVIEXkHYD</a></td></tr><tr><td>Jump to</td><td></td><td></td><td><a href="/pages/SRBadLOXEyCYue9gCKf2">/pages/SRBadLOXEyCYue9gCKf2</a></td><td><a href="/files/IXFzeGIJgWbYOuVuLigW">/files/IXFzeGIJgWbYOuVuLigW</a></td></tr><tr><td>Switch</td><td></td><td></td><td><a href="/pages/xnlE3hRlE7hvP3WTeNRU">/pages/xnlE3hRlE7hvP3WTeNRU</a></td><td><a href="/files/M8GflwOzAUFvF8C0hvox">/files/M8GflwOzAUFvF8C0hvox</a></td></tr></tbody></table>


# Send Button Option

Create engaging Send Button Option Cards for your customers. Add images, videos, or documents to make it interactive. Ask questions in bold, italic, or strikethrough text.

> **Who can use this Card?**
>
> * Gallabox Users having permission to either build and deploy bots or manage bots.
> * Available on all paid plans.

### Overview

Use this if you want your customers to easily reply with certain words without having to type them out, you can use the Send Button option.

Let's see what goes into creating the Button option with media.

### Header Type

You can add an image or a video, or a text, or a document to make it more interactive.

<figure><img src="/files/UyUu3qdso7VUFZzkEWCW" alt=""><figcaption></figcaption></figure>

{% hint style="info" %}
Maximum size for:

Image is 5MB

Video is 16MB

Document is 16MB
{% endhint %}

### Question Text

This is the space where you ask your customer the question for example- These are the available times at the store. or Oversized T-shirts start at Rs.449. Which spectrum of prints you would take a dive in? The possibilities are endless.

The above text can be made Bold, Italic, or strikethrough using the options provided. The text will add the asterisk(\*) for **Bold**, Underscore(\_) for **Italic text**, and Tilde(\~) for **Strikethrough** as shown in the text below.

<figure><img src="/files/nUxnUJq8WvuKfc7SkyWF" alt=""><figcaption></figcaption></figure>

### Footer

This is the space for you to add any additional information related to the message like ***Hurry, size up on style & set #stylegoals*** or ***Hurry, Shop these fast-sellers Now.***

You can add the content as per your choice.

<figure><img src="/files/RMM3JMzz6nIzvhDMRdk3" alt=""><figcaption></figcaption></figure>

### Button Type

You can choose from Two Button Types - **Reply** or **CTA** (Call to Action) depending on the message you would like to share with your customers. Let's see in detail the two types.

<figure><img src="/files/3kPn7fZAt78JFEtllct0" alt=""><figcaption></figcaption></figure>

#### Reply Button

For the reply, Gallabox has the option of adding either **Static** or **Dynamic Options**.

*Static Options* means the option will be fixed while the *Dynamic options* are capable of changing. If you have the dynamic values stored somewhere in your database, it can be accessed using [API Call](/bots/bot-connectors/connect-your-system-with-the-whatsapp-chat-bot-using-api).

{% hint style="info" %}
**You can add a maximum of 3 buttons.**
{% endhint %}

Below is the example of how you can add the Static Options:

<figure><img src="/files/bFiSyXKNYQAZENYYVaIn" alt=""><figcaption></figcaption></figure>

For the Dynamic Options in **Ask Button Option**, we have three fields - *Variable to iterate, Path to ID, and Path to Title*.

<figure><img src="/files/p4bd3hhbdOzYPQ0EDePo" alt=""><figcaption></figcaption></figure>

* *Variable to iterate*: You have to add the name of the array here.
* *Path to ID*: Add the path from your internal database in curly brackets.
* *Path to Title*: Add the title in curly brackets like this {{first\_name}}.

#### CTA (Call To Action) URL

{% hint style="info" %}
This feature is only supported in cloud API.
{% endhint %}

You can include a interactive button to enhance user engagement and interactivity.

You have two fields - Button text and Button URL. For Button you can add Visit Us for example and for the Button URL, you can add the website you would like to redirect your customers.

<figure><img src="/files/t1sceFv9ubtfS5qud8pH" alt=""><figcaption></figcaption></figure>

Once you have set all the fields required for ***Reply Button type*** and click on **SAVE**, the card will look like below.

<figure><img src="/files/MsNNJhRri9wNXZVM8dMM" alt=""><figcaption></figcaption></figure>

For ***CTA URL type***, the card will look like below.

<figure><img src="/files/pJYqNK1FFSXpn6aiZd5G" alt=""><figcaption></figcaption></figure>

To the customer, the Reply Button Option would look something like the screenshot below:

<figure><img src="/files/176B150fU2VzwUHy36oh" alt=""><figcaption></figcaption></figure>

{% hint style="success" %}
Reply Buttons are best for getting response from a limited set of options, particularly valuable for use cases where a generic response is adequate.
{% endhint %}


# Send List Option

Enhance customer engagement and streamline data collection with Gallabox's Send List Option feature. Simplify the process of gathering responses with predefined options. Explore now!

> **Who can use this Card?**
>
> * Gallabox Users having permission to either build and deploy bots or manage bots.
> * Available on all paid plans.

### Overview

To make it easier for your customers to respond with specific words, you can use the Send List option. This feature allows customers to choose from a list of predefined options instead of typing their responses manually. It's a convenient way to engage with customers and gather the information you need.

Let’s understand how we can use **Send List Optio**n node in Gallabox.

### **Header Text**

You can paste the text here for upto 60 characters. For Instance, you can add your Business Name. In the below screenshot, we have mentioned the name of the restaurant - PeachMint.

<figure><img src="/files/BbVH121dQrMSlquCNH4v" alt=""><figcaption></figcaption></figure>

### Question Text

This is the space where you ask your customer the question or any sentence you would like to mention. For example - ***"For Main Course, you can order the combo meals"***

The above text can be made Bold, Italic, or strikethrough using the options provided. The text will add the asterisk(\*) for **Bold**, Underscore(\_) for **Italic text**, and Tilde(\~) for **Strikethrough** as shown in the text below. You can add variables too.

<figure><img src="/files/qk8WszkQHsz1ZqWlIQGi" alt=""><figcaption></figcaption></figure>

### **Footer**

This is the space for you to add any additional information related to the message like ***Prices are Inclusive of GST.***

You can add the content as per your choice.

<figure><img src="/files/rCr5pjRExPuIIu0JunlJ" alt=""><figcaption></figcaption></figure>

### Options Type

For the options, Gallabox gives you the liberty of adding Static and Dynamic Options.

<figure><img src="/files/W2R035Ha0OfjjzWUW8IM" alt=""><figcaption></figcaption></figure>

#### Static Options

Static Options means the option will be fixed while the Dynamic options are capable of changing. If you have the dynamic values stored somewhere in your database, it can be accessed using API Call.

**You can add a maximum of 10 buttons and you can create different sections.**

Below is the example of how you can add the Static Options:

<figure><img src="/files/DDtT3R2fmhkWpba5xLRa" alt=""><figcaption></figcaption></figure>

#### Dynamic Options

For the Dynamic Options in **Send List Option**, we have three fields - Variable to iterate, Path to ID, and Path to Title.

<figure><img src="/files/FJshgjmMvPk9TeNHS8nT" alt=""><figcaption></figcaption></figure>

* Variable to iterate: You have to add the name of the array here.
* Path to ID: Add the path from your internal database in curly brackets.
* Path to Title: Add the title in curly brackets like this {{first\_name}}.

{% hint style="info" %}
Please note:

1. If multiple options are added under same section, it can be sent without a section name.
2. If there are more than 1 section, then the section header is made mandatory to create the card.
   {% endhint %}

#### Dynamic Options with sections

This feature allows you to send a curated selection of product items to your users in a grouped or sectioned format grouped or sectioned format, dynamically dynamically generated from a JSON/API response stored in your variable.

For instance, below is an example of JSON response you get from your API:

```
{
  "menu": [
    {
      "category": "Appetizers",
      "items": [
        {
          "category_id": "app001",
          "name": "Calamari",
          "description": "Lightly fried squid with a zesty dipping sauce"
        },
        {
          "id": "app002",
          "name": "Bruschetta",
          "description": "Toasted bread topped with fresh tomatoes, garlic, and basil"
        }
      ]
    },
    {
      "category": "Main Courses",
      "items": [
        {
          "id": "main001",
          "name": "Lasagna",
          "description": "Layers of pasta, meat sauce, and ricotta cheese"
        },
        {
          "id": "main002",
          "name": "Chicken Piccata",
          "description": "Thinly sliced chicken with lemon-caper sauce"
        }
      ]
    },
    {
      "category": "Desserts",
      "items": [
        {
          "id": "dessert001",
          "name": "Tiramisu",
          "description": "Ladyfingers dipped in coffee, layered with mascarpone cream"
        },
        {
          "id": "dessert002",
          "name": "Panna Cotta",
          "description": "Italian cream pudding with a fruit compote"
        }
      ]
    }
  ]
}
```

For the above response,

<table><thead><tr><th width="347">Dynamic Options with sections Fields</th><th></th></tr></thead><tbody><tr><td>Variable where the sections are stored</td><td>will be the one in which the API response is stored.</td></tr><tr><td>JSONPath for the section title</td><td>{{category}}</td></tr><tr><td>JSONPath for the section options</td><td>{{items}}</td></tr><tr><td>JSONPath for the option ID</td><td>{{id}}</td></tr><tr><td>JSONPath for the option title</td><td>{{name}}</td></tr><tr><td>JSONPath for the option description</td><td>{{description}}</td></tr></tbody></table>

#### Once you have set all the fields required and click on **SAVE**, the card will look like as shown in the screenshot below.

<figure><img src="/files/rRgY5YqTn0uLK6nUGq5r" alt=""><figcaption></figcaption></figure>

{% hint style="success" %}
List Buttons are best if you want to update the customer but not get any input from the customer.
{% endhint %}


# Delay

Optimize your chat-flow with Gallabox's Delay Card feature, enabling you to add delays of minutes or hours for a smoother interaction. Ensure your session TTL is longer than the delay time.

> **Who can use this Card?**
>
> * Gallabox Users having permission to either build and deploy bots or manage bots.
> * Available on Scale and Pro Plans.

There might be a situation when you would like to wait more than seconds for the user's response and then send the next message.

This is where the **Delay Card** in Gallabox comes into picture. You can add a delay of some **seconds**, **minutes** or **hours.**

<figure><img src="/files/ZJKeXXFBULLdG1LVG2q0" alt=""><figcaption><p>Delay Card</p></figcaption></figure>

For Instance, if you have asked the user for any document, it is recommend to use the **Delay card** after the **Send card** to keep the conversation flowing. Refer to the below screenshot for more clarity.

<figure><img src="/files/0luR75WZUt1acEh5rN9L" alt=""><figcaption><p>Delay Card in a Chat-flow</p></figcaption></figure>

In the above screenshot, the flow is extended accordingly for [**On Completion**](#user-content-fn-1)[^1] and for [**On Interrupt**](#user-content-fn-2)[^2] conditions.

Like the example discussed above, you could use the Delay Card as per the chat-flow you are building.

{% hint style="info" %}
When using Delay Card, please make sure the session TTL is always greater than the time in the Delay Card.

*For Example, If the session TTL is kept 3 minutes, and the time in Delay is set as 15 minutes, then the chat-flow will follow the session TTL, meaning the chat will drop after 3 minutes.*
{% endhint %}

[^1]: Success Condition: When you don't receive any message from the user's end during the time set in Delay Card.

[^2]: Failure Condition: When you receive the message from the user before the Delay time is over.


# Condition

earn how to use condition logic to split your chat-flow based on specific conditions. Set up the condition block with variables, operators, and values. Use AND or OR logic to add multiple conditions.

> **Who can use this Card?**
>
> * Gallabox Users having permission to either build and deploy bots or manage bots.
> * Available on all paid plans.

### Overview

Condition logic allows you to split the chat-flow based on the conditions you want.

Each condition logic has two outputs - On Success and On Interrupt.

### Setting the Condition Block

<figure><img src="/files/i6Xm8ixNsSp8GcX8ZBAD" alt=""><figcaption><p>Adding the Condition Card</p></figcaption></figure>

The condition card consists of **Comparator** (Variable), **Operator** (condition), the **Value**, and the A**ND & OR Logic** (To add more than one condition)

In the Comparator, you have to fill the variable that is saving the user's response.

<figure><img src="/files/GSKufn3UYzPqsr3IXyIe" alt=""><figcaption></figcaption></figure>

In the Operator, you have to fill the condition that will be checked.

<figure><img src="/files/6Ruq8ecJUzztC3VX8DKu" alt=""><figcaption><p>Selecting the condition</p></figcaption></figure>

After Setting the condition, you will have to add the value that you want to check against the comparator (variable).

<figure><img src="/files/dn0C5jI9LoyxlqGg4DK9" alt=""><figcaption><p>Adding the value</p></figcaption></figure>

### Using AND or OR Logic

These are used in case you want to add two or more conditions.

<figure><img src="/files/uLjSvjjUSE2Q4zzzjdiP" alt=""><figcaption><p>Using the OR Logic</p></figcaption></figure>

Follow the GIF below:

<figure><img src="/files/RS1G4o1TUjM02TtzdGm9" alt=""><figcaption></figcaption></figure>

The Condition card has On Success and On Fail Conditions which you can use to move forward with the chat-flow.

<figure><img src="/files/x5Jd3gxoXsZHJqTl8f1X" alt=""><figcaption></figcaption></figure>


# Set Variable

Explore the concept of variables and how to set them up with our Set Variable block. Choose from 6 different formats and easily assign values to your variables.

> **Who can use this Card?**
>
> * Gallabox Users having permission to either build and deploy bots or manage bots.
> * Available on all paid plans.

### Overview

Imagine **Variable** as a box, which can be named and you can store "things". In this scenario, "*things*" are values (numbers, texts, dates, etc...).

**Set Variable** is a powerful block that allows you to create, select format, and set a value to a variable.

To use the card, select it from utilities.

<figure><img src="/files/VBdFz8D6p2ws42U6I4qy" alt=""><figcaption><p>Set variable Card in Utilities</p></figcaption></figure>

{% hint style="info" %}
Learn more about the concept of a [variable](https://www.tynker.com/blog/how-to-teach-variables-to-kids/) from this article.
{% endhint %}

### Setting a Variable

You can select a variable that already exists or create a new one.

<figure><img src="/files/7MM2QOtRUdWasQLk5NTQ" alt=""><figcaption><p>Select a Variable</p></figcaption></figure>

{% hint style="info" %}
Variable name should start with alphabet; Cannot have special characters except underscore (\_).
{% endhint %}

Just type the name, select the format, and click on "create".

<figure><img src="/files/VZ6szsVIkw3NoMQe8XYt" alt=""><figcaption><p>Selecting the Format</p></figcaption></figure>

When it comes to selecting the format of the variable, you have 6 formats to choose from.

* Text
* Number
* Boolean
* Date
* Object
* Array

### Typing the Value

You can type the value you want to give to the variable. You can also make it depend on other variable values.

In the below screenshot, we have named the variable as **phone\_book** and made the value dependent on other variable as **recipient.phone**.

<figure><img src="/files/Bdn0kkvdzbASfTT8SOvD" alt=""><figcaption></figcaption></figure>


# Jump to

Simplify your chat-flow by utilizing the Jump to feature. Easily connect blocks within the same flow or between different flows. Follow the steps provided to make the most out of Jump to!

> **Who can use this Card?**
>
> * Gallabox Users having permission to either build and deploy bots or manage bots.
> * Available on Scale and Pro Plans.

### Overview

In some scenarios, we need to simplify our chat-flow either by connecting blocks in the same chat-flow or in different flow. The **Jump to** feature can be really useful to achieve this result.

Below are two things to remember when using the **Jump to**:

{% hint style="info" %}
**If you are transitioning within the same flow**, your destination card can be any type, provided there is an ask card in between.

***When jumping to a different flow*** - ensure the destination card is of the "ask" type.
{% endhint %}

## **Jump to** Block Usage:

### **Jumping to a block in the same flow**

1. In the chat flow, open the card to which you want to jump to and copy the reference id.

<figure><img src="/files/Awjb3Aljvy8Rctw65ymK" alt=""><figcaption><p>Copying the reference id of the destination block</p></figcaption></figure>

2. Go to "**Utilities**" and then click on "**Jump to".** Choose the option - No for Jump to another flow.

<div align="center" data-full-width="false"><figure><img src="/files/c3klldmDrMT64hkLTaVR" alt=""><figcaption><p><strong>Jumping to a block in the same flow</strong></p></figcaption></figure></div>

3. Paste the Reference id that you copied and click on Save.

### **Jumping to another flow(chat-flow).**

1. In the Bots, open the flow to which you want to jump to and copy the reference id.

<figure><img src="/files/VJpp1QBJRJ43Uv8oq6GM" alt="" width="563"><figcaption><p>Copying the reference id of the destination block</p></figcaption></figure>

2. Go to "**Utilities**" and then click on "**Jump to".** Choose the option - yes for Jump to another flow. A drop-down menu named "**Flow**" will appear and will contain a list of flows within this bot. Select the specific flow you want to jump to from the list.

<figure><img src="/files/2EuasrdDrXlGZXzEFc73" alt="" width="563"><figcaption></figcaption></figure>

3. Then, paste the previously copied the reference id in the "**Block Reference**" field.

<figure><img src="/files/0IeqhWMxg3WwZjyEWbGF" alt="" width="563"><figcaption></figcaption></figure>

4. Click on Save.

That are the possibilities with **Jump to**. Play around and jump to different flows or different block in the same chat-flow.


# Switch

Discover how to optimize user interactions with Gallabox's Switch Card through a Product Inquiry Chat-bot. Guide customers to their desired products efficiently and effectively.

> **Who can use this Card?**
>
> * Gallabox Users having permission to either build and deploy bots or manage bots.
> * Available on Scale and Pro Plans.

Let’s understand how we can use Switch Card in Gallabox with the help of an example use case: **Product Inquiry Chat-bot**.

The chat-bot's goal is to assist customers in finding the right products based on their preferences.

The conversation begins with the chat-bot greeting the user and asking for their product preferences. The chat-bot prompts the user with a question like "*What type of product are you looking for?*"

We want to evaluate the product type and determine the appropriate action after capturing the user’s response. In the next series of steps (including screenshots) we will guide you on how to do this.

1. **Switch Type:**

Enter the Switch type as either “**Find Best match**” or “**Equals**” depending on the condition that you want.

{% hint style="info" %}
***Find Best Match** is used when you want to find the closest match in the user response to the content we have in your database.*

***Equals** can be used when you want to match the condition with the user’s response.*
{% endhint %}

Continuing with the above example, we will take Switch type ad “**Find Best Match**”.

<figure><img src="/files/Zxi5hhrNLaeOCWjEprYh" alt=""><figcaption><p>Selecting Switch Type</p></figcaption></figure>

2. **Input:**

The Input acts as the data on which the condition will be applied. You can add any variable that you have declared with the greeting message or can add intent, recipient details, contact fields

In continuation with the example, we are taking the input as a custom variable - *test\_product* declared in the greeting message.

<figure><img src="/files/IiHLpXjZhpKXKYSIPqSu" alt=""><figcaption><p>Selecting the preferred Input</p></figcaption></figure>

3. **Rating Threshold:**

It depicts how similar is the response you received from the user in fraction from 0 to 1 (both inclusive). The higher fraction shows high similarity. We’ll take the rating threshold to 0.2.

<figure><img src="/files/APh3p5cnmahHvft8lwlQ" alt=""><figcaption><p>Adding the Rating Threshold</p></figcaption></figure>

4. **Match:**

Here you have to add the condition to which the response will be evaluated. Continuing the example, we are adding three product categories: electronics, clothing, and home décor. You can add as many categories as you want.

<figure><img src="/files/nPR2M6EqaU75TQUNU67C" alt=""><figcaption><p>Adding the conditions (Match)</p></figcaption></figure>

#### This is how the chat-flow will look like after:

<figure><img src="/files/9cvA3wBjsXNhEvIJhN5K" alt=""><figcaption><p>Switch Card in the chat-flow</p></figcaption></figure>

You can create different journey’s for the keywords you chose. There will be one default keyword that will get triggered when the switch card is not able to capture the user response according to the condition provided.

In the above example, if the user responded with groceries, the default journey will get triggered for that particular user.


# AI node - GPT Dialog

Utilize GPT Dialog Node to develop conversational bots. Gather user information through realistic conversations. Control AI interactions using natural language prompts.

> **Who can use this Card?**
>
> * Gallabox Users having permission to either build and deploy bots or manage bots.
> * Available on Pro Plan.

### Overview

The **GPT Dialog Node** in Gallabox allows you to create conversational bots that can understand and respond to natural language input. With this card, you can build bots that collect information from users using human-like conversations.

<figure><img src="/files/4cEQitY66DkmAkTPqIpd" alt=""><figcaption></figcaption></figure>

It contains the below sections:

1. **Prompt**: The prompt is where you provide instructions to your AI. This is like telling your AI what to do in the conversation. You can use simple, natural language instructions to guide the AI in its interactions.
2. **User Message**: This is the message provided by the user that will trigger the GPT Dialog card. If this card is the first card in your conversation flow, you can use `{{intent.text}}`to capture the user's initial message. However, in later parts of the bot-flow, you can store the previous card's response in a variable and use it here. This helps the AI understand the context of the conversation.
3. **Max Tokens**: Max Tokens determine the maximum number of [tokens](https://help.openai.com/en/articles/4936856-what-are-tokens-and-how-to-count-them) that the GPT-model can use in its response.
4. **Temperature**: The temperature setting controls the randomness of the AI responses. A higher value, like 0.8, makes the responses more unpredictable and creative. A lower value, such as 0.2, makes the responses more focused and closely related to the prompt.
5. **Function:** The GPT model will return its output in a structured format via function calls. A function includes the name and parameters.
   * **Name**: The function name describes the function's purpose. It tells the AI what this function is meant to achieve.
   * **Description**: The description provides a brief explanation to the AI about what the function does.
   * **Store the parameters in the Variable (optional)**: You can choose to store the data collected (**parameters**) from users in a variable. This allows you to use the customer responses effectively in the conversation flow, helping your bot remember and utilize the information.
   * **Parameters**
     * Parameters are the specific data points you want to collect from the users using AI.
     * **Name**: The name of the parameter is like a title for the data you want to collect. For instance, if you need to gather the customer's business name, you can name it "*business\_name*"
     * **Description (optional)**: The description gives the AI node more context about what this parameter represents. It's an optional explanation of the data you're collecting.
     * **Type**: The data type specifies what kind of information you want to collect. It can be a string (text), number, or Boolean (true/false).

### Example

Let's say you are using the AI node to collect the lead information.

**Prompt**:

{% code overflow="wrap" %}

```
Assume you are a sales associate at ABC company. You collect information about leads to qualify them. You will ask them the following data.

- Business name
- Industry
- Company size
- email ID 
```

{% endcode %}

**User Message**:

{% code overflow="wrap" %}

```markup
{{intent.text}}
```

{% endcode %}

**Max Tokens**:

{% code overflow="wrap" %}

```
1000
```

{% endcode %}

**Temperature**:

```
0
```

**Function:**

{% code title="Name:" %}

```
Lead information
```

{% endcode %}

{% code title="Description: " %}

```
Information of the customer collected
```

{% endcode %}

{% code title="Store Parameters in Variable: " overflow="wrap" %}

```
Lead_info
```

{% endcode %}

* **Parameter 1**

{% code title="Name:" overflow="wrap" %}

```
business_name
```

{% endcode %}

{% code title="Description:" overflow="wrap" %}

```
name of the customer business
```

{% endcode %}

{% code title="Type:" %}

```
String
```

{% endcode %}

* **Parameter 2**

{% code title="Name:" overflow="wrap" %}

```
industry
```

{% endcode %}

{% code title="Description:" overflow="wrap" %}

```
name of the industry
```

{% endcode %}

{% code title="Type:" %}

```
String
```

{% endcode %}

* **Parameter 3**

{% code title="Name:" overflow="wrap" %}

```
company_size
```

{% endcode %}

{% code title="Description:" overflow="wrap" %}

```
number of employee's in the company
```

{% endcode %}

{% code title="Type:" %}

```
number
```

{% endcode %}

* **Parameter 4**

{% code title="Name:" overflow="wrap" %}

```
email_id
```

{% endcode %}

{% code title="Description:" overflow="wrap" %}

```
email address of the customer
```

{% endcode %}

{% code title="Type:" %}

```
String
```

{% endcode %}

### Using the Collected Data

Once the user provides the necessary details to qualify as a lead, the information is stored in the "**Lead\_info**" variable for further processing.

If you want to use, for example, the industry information collected from the customer elsewhere in the conversation flow, you can do so using a format like

"`{{variables.Lead_info.industry}}`."

<figure><img src="/files/WJDNMASnc5P5jPVLHrf1" alt=""><figcaption></figcaption></figure>


# AI node - GPT Knowledge Base

Discover how to customize and utilize the GPT model for specific tasks within Gallabox with the GPT Knowledge Base feature. Tailor interactions, store information, and fine-tune conversations.

> **Who can use this Card?**
>
> * Gallabox Users having permission to either build and deploy bots or manage bots.
> * Available on Pro Plan.

### Overview

The **GPT Knowledge Base** feature lets you customize and use the GPT model for tasks in Gallabox. You can set input variables, choose variables to save history, and adjust settings to fine-tune conversations. This helps in customizing interactions and storing useful information for later.

<figure><img src="/files/LZRqsViqWtNEN6ztzUZ9" alt=""><figcaption></figcaption></figure>

The Node contains the below sections:

1. **Input Variable:** Users can choose or create variables to serve as input for interacting with the GPT model.
2. **Select or Create Variable to Store History:** This allows users to manage the history of interactions by selecting or creating variables. Variable names should adhere to specific guidelines.
3. **Knowledge Base:** Users can select the knowledge base to instruct the GPT model on specific information or context.
4. **Prompt:** Users describe their goal or the context in which they want the GPT-model to provide information. The prompt serves as input to the model.
5. **Max Tokens:** Max Tokens determine the maximum number of [tokens](https://help.openai.com/en/articles/4936856-what-are-tokens-and-how-to-count-them) that the GPT-model can use in its response.
6. **Temperature:** The temperature setting controls the randomness of the AI responses. A higher value, like 0.8, makes the responses more unpredictable and creative. A lower value, such as 0.2, makes the responses more focused and closely related to the prompt.
7. **Function:** Users define a function by entering a name and description. This function encapsulates the purpose or task the GPT-model is intended to perform.

* **Store the Parameters in the Variable (Optional):** Optionally, users can create or select variables to store the parameters used in the GPT Knowledge Base configuration.
* **Parameter 1:** Users define a specific parameter by providing a name, description (optional), and type (e.g., String).

### Example

To start with the GPT Knowledge Base Node, you have to create a Knowledge Base in your Gallabox Account.

{% hint style="success" %}
The knowledge Base can be either a File Type (Pdf, csv, excel) or Catalog that you connected with your WhatsApp Number on Gallabox.
{% endhint %}

#### Add Knowledge Base

1. Use the Shortcut "Ctrl" + "K" to open the Search in Gallabox. Type **Knowledge Base** and click on it.

<figure><img src="/files/QZDsMuikugUMlcEDiLOU" alt=""><figcaption></figcaption></figure>

2. Click on "**+Create Knowledge Base**" and Name the Knowledge Base.

<figure><img src="/files/QUpHKtHhRaj352EMsYfi" alt=""><figcaption></figcaption></figure>

3. You have to choose the Type whether you would like to upload a file or use already connected catalogue with your WhatsApp Number.

* If you choose the Type as **File**, you can upload the pdf or csv or an excel file as the Knowledge Base.

<figure><img src="/files/D9z7cp5k8UWfmsehlYif" alt=""><figcaption></figcaption></figure>

* If you choose the Type as **Catalog**, you have to choose the WhatsApp Channel (*if more than one is connected with Gallabox*) and the catalog connected with the Channel. If you have more than one catalog connected with a WhatsApp Channel, you can add those by clicking on "**+Add**".

<figure><img src="/files/P0UDWa4Qw27nSZ44ctij" alt=""><figcaption></figcaption></figure>

4. Click on create and your Knowledge Base will be created.

<figure><img src="/files/uF8IPgUvBjodhAm5LCIL" alt=""><figcaption></figcaption></figure>

{% hint style="danger" %}
You can only add 3 Knowledge Base.
{% endhint %}

After adding the Knowledge Base you can use **GPT Knowledge Base** Node in your Bot flow.

**Input Variable:** Select or create a variable named "userQuery."

**Select or Create Variable to Store History:** Create a variable named "interactionHistory."

**Knowledge Base:** Select the company's Help Docs as the knowledge base.

**Prompt:** Describe your goal: "Assist users in understanding the troubleshooting steps for network connectivity issues."

**Max Tokens:** Set to 300.

**Temperature:** Set to 0.5 for a balanced response.

**Function:**

* Name: "Network\_Troubleshooting"
* Description: "Generate helpful responses for network connectivity issues provided in the pdf file."

**Store the Parameters in the Variable (Optional):** Create or select a variable named "functionParameters."

**Parameter 1:**

* Name: "Device\_Type"
* Description: "Specify the type of device experiencing issues (optional)."
* Type: "String"


# Working hours

Enhance your bot's functionality with our Working Hours block. Configure your bot to operate based on your business hours and switch to a different flow outside those hours.

> **Who can use this Card?**
>
> * Gallabox Users having permission to either build and deploy bots or manage bots.
> * Available on Scale and Pro Plans.

### Overview

Want to personalize the bot experience based on your business hours? We've got you covered!

Our new **Working Hours** block brings this functionality.

<figure><img src="/files/1yTyvWR4ugL6MvbUMx1f" alt=""><figcaption></figcaption></figure>

### Working Hours Node Usage

This card configures the bot to operate based on your specified working hours. During these hours, it will be "**open**" and execute connected cards. Outside these hours, it will switch to the "**closed**" flow.

{% hint style="info" %}
If working hours are not set, the bot will assume you're available 24/7. To configure or manage your working hours, [Click here](https://app.gallabox.dev/channels/whatsapp/642412eaf07544be554d1c2f/configuration).
{% endhint %}

<figure><img src="/files/acMgxBX2XQFFLZ9Fm1Mr" alt=""><figcaption></figcaption></figure>


# Hint

Simplify complex setups with the Hint Node in your bot templates. Add clear descriptions to make complex node simpler to understand.

> **Who can use this Card?**
>
> * Gallabox Users having permission to either build and deploy bots or manage bots.
> * Available on all paid plans.

### Overview

The Hint Node in the Bot Builder adds helpful hints in your bot templates to guide users through complex setups. This feature simplifies the user experience by providing assistance right when and where it’s needed.

<figure><img src="/files/R56zb6OjdFvtG2SxSzNS" alt=""><figcaption></figcaption></figure>

### Hint Node Usage

Adding clear descriptions to each hint is very helpful. It makes complex settings simpler to understand, ensuring users can follow easily. This is especially useful for guiding users through multiple steps or explaining technical details that might not be immediately clear.

Using Hint Node wisely improves user interaction with your bot, leading to better configurations and a smoother user experience.

<figure><img src="/files/A4t9tHMw5qHseKqF91kQ" alt=""><figcaption></figcaption></figure>

{% hint style="info" %}
Make sure to connect your hint node with the previous node.
{% endhint %}

### Using Beautify Flow

When using beautify flow option, all unconnected hint nodes will be stacked near the start button in the bot canvas.

<figure><img src="/files/JLDUHssZZZhk2k5dn0ho" alt=""><figcaption></figcaption></figure>


# Wait for order

> **Who can use this Card?**
>
> * Gallabox Users having permission to either build and deploy bots or manage bots.
> * Available on Scale and Pro Plans.

### Overview

The Wait for Order card helps to simplify the ordering process in your bot flows. It allows you to gather information before placing an order and save it in variables, leading to more personalized and efficient interactions with customers. This card also makes sure that the information collected remains available even after the order is completed.

<figure><img src="/files/gxzgr1MII1l0IY2cb3NT" alt=""><figcaption></figcaption></figure>

### **Key features**

1. The node will wait for a customer's order message.
2. If no order is received within the specified drop-off time, the flow will drop - off as per the bot flow configuration.
3. The node will automatically populate the `session.cart.items` and `session.cart.amount` variables, providing information about the items and total cost in the cart.\
   The variable `session.cart.items` will be an object which include all the items you have put in the cart and `session.cart.amount` will show the cart amount.

### **Configuration options**

1. Customize the message prompting the customer to place their order.
2. Add **Validation settings -** Specify the number of attempts to validate the order before proceeding, customize the message sent to the customer if their order is invalid, and choose the action to take if the order is invalid: Drop from the bot, Skip the question, Proceed to Fallback.
3. Save and use this Card in your bot flow.

<figure><img src="/files/LafhXbCDYBCQ2Vv50WvI" alt=""><figcaption></figcaption></figure>


# Bot Actions

Boost Efficiency with Gallabox Actions: Assign conversation, Update fields automatically and many more actions

**Actions** empower you to take control of your communication and get more done in less time.

<table data-view="cards"><thead><tr><th align="center"></th><th data-hidden data-card-cover data-type="files"></th><th data-hidden data-card-target data-type="content-ref"></th></tr></thead><tbody><tr><td align="center"><strong>Assign Conversation</strong></td><td><a href="/files/cgMc8EiAHN769INwDcp2">/files/cgMc8EiAHN769INwDcp2</a></td><td><a href="/pages/uGCcLHywQX9fqNJCr4Yw">/pages/uGCcLHywQX9fqNJCr4Yw</a></td></tr><tr><td align="center"><strong>Unassign Conversation</strong></td><td><a href="/files/JHVJ1I4u7XbKVkLsZeZe">/files/JHVJ1I4u7XbKVkLsZeZe</a></td><td><a href="/pages/OgiNi62OrQjaTjsVfTMX">/pages/OgiNi62OrQjaTjsVfTMX</a></td></tr><tr><td align="center"><strong>Resolve Conversation</strong></td><td><a href="/files/T4sBf0BCz2hiH1JCWIT3">/files/T4sBf0BCz2hiH1JCWIT3</a></td><td><a href="/pages/vM8Gbl4iTKZHeWmXJVQd">/pages/vM8Gbl4iTKZHeWmXJVQd</a></td></tr><tr><td align="center"><strong>Update Conversation Fields</strong></td><td><a href="/files/8tVfsS8mZ8X1U6LD5NXh">/files/8tVfsS8mZ8X1U6LD5NXh</a></td><td><a href="/pages/gY609TiSjk2xKfdtJP0N">/pages/gY609TiSjk2xKfdtJP0N</a></td></tr><tr><td align="center"><strong>Update Contact Fields</strong></td><td><a href="/files/AiKNUwRVcgPgoAaDECzK">/files/AiKNUwRVcgPgoAaDECzK</a></td><td><a href="/pages/R99HCSXUT9JORLuIE1Wo">/pages/R99HCSXUT9JORLuIE1Wo</a></td></tr><tr><td align="center"><strong>Update Company Fields</strong></td><td><a href="/files/ce27Jkgu83FKvjAidTsw">/files/ce27Jkgu83FKvjAidTsw</a></td><td><a href="/pages/HhxZLlmdtfmqnRatHSLW">/pages/HhxZLlmdtfmqnRatHSLW</a></td></tr></tbody></table>


# Assign Conversation

Enhance customer interactions with a personalized touch using our conversation assignment card. Assign to users, teams, bots, or contact owners in your Gallabox Account.

> **Who can use this Card?**
>
> * Gallabox Users having permission to either build and deploy bots or manage bots.
> * Available on all paid plans.

### Overview

This card allows your agents to take over the conversation and provide a personal touch.

<figure><img src="/files/r3esiukqa2ZNKxY2djkP" alt=""><figcaption><p>Assigning the conversation</p></figcaption></figure>

You can Assign the Conversation to any of the User or Team or Bot or their contact owner listed in the CRM software.

### Assign to a user

If you select **Assignee Type as user**, then Assignee will be one of the users that you have invited on your Gallabox Account.

<figure><img src="/files/mcDNqU3xbkN1fHP5Kak5" alt=""><figcaption></figcaption></figure>

### Assign to any Team

If you select **Assignee Type as Team**, then Assignee will be all the Teams that you created on your Gallabox Account.

<figure><img src="/files/STGbIPirC1B5EhITxJCQ" alt=""><figcaption></figcaption></figure>

### Assign to any Bot

If you select **Assignee Type as Bot**, then Assignee will be the Bots you created on your Gallabox Account.

<figure><img src="/files/8YYg0na7Dxt6qANRKtKa" alt=""><figcaption></figcaption></figure>

### Assign to any contact owner

If you select **Assignee Type as contact\_owner**, then Assignee will be contact owner of the lead (on the CRM).

<figure><img src="/files/YsQKSreei7S0y9YJ5MuM" alt=""><figcaption></figcaption></figure>

Once the Assign Conversation card is triggered, the visitor can wait for an interaction with your agents.

### Store Response in the variable

The Store Variable feature improves how we keep track of who is handling each conversation. It does this by letting us save information about the person assigned to a conversation right in the Assignment section. This makes it easier to see who is in charge of a conversation and helps with creating reports.

<figure><img src="/files/Uu2f9lT9zwuNLRAstDrv" alt=""><figcaption></figcaption></figure>


# Unassign Conversations

Ensure seamless customer service by utilizing this card. Connect the final card to retain crucial data and enhance efficiency.

> **Who can use this Card?**
>
> * Gallabox Users having permission to either build and deploy bots or manage bots.
> * Available on all paid plans.

This card is used to unassign the conversation created when a customer goes through the chat-flow.

<figure><img src="/files/6U0SmypRtj5aaVkzSUib" alt=""><figcaption><p>Unassign Conversation</p></figcaption></figure>

{% hint style="info" %}
The best practice is to connect the last card of the chat-flow to **this** card to avoid losing important data.
{% endhint %}


# Resolve Conversations

Enhance customer service efficiency by using this card to conclude conversations after gathering necessary information. Link it to the final chat-flow card for seamless data retention.

> **Who can use this Card?**
>
> * Gallabox Users having permission to either build and deploy bots or manage bots.
> * Available on all paid plans.

This card can be used to Resolve the Conversation after collecting the required information from a customer.

<figure><img src="/files/qlJtNBWwBjfz1L5fkwwO" alt=""><figcaption><p>Resolving a conversation</p></figcaption></figure>

{% hint style="info" %}
The best practice is to connect the last card of the chat-flow to **this** card to avoid losing important data.
{% endhint %}


# Update Conversation Fields

Simplify conversation management with our website's card feature. Update or delete conversation tags with ease by selecting values, operations, and saving changes for a smooth chat-flow experience.

> **Who can use this Card?**
>
> * Gallabox Users having permission to either build and deploy bots or manage bots.
> * Available on all paid plans.

This card can be used to Update for the conversation or remove the tags from the conversation.

<figure><img src="/files/51KKGSuuoXkuGFtXT3xv" alt=""><figcaption><p>Field Name in Conversation tags</p></figcaption></figure>

If you want to update the **Conversation Tag**, then you have to provide the value for the tag. You can either create the value for the tag or you can add the variables.

{% hint style="info" %}
Under the variables, you can have Intent, Recipient Details, Contact Fields, or any custom fields as the value.
{% endhint %}

<figure><img src="/files/zWxv8fp8sIamLDPF8YKT" alt=""><figcaption><p>Adding the value</p></figcaption></figure>

Once you are done selecting the value, you have to select the operation. You want to Append, replace, or add if empty.

-> Use **Append** if you want to add to the previous value.

-> Use **Replace** if you want to replace the previous value and add a new one.

-> Use **Add if Empty** if the field in a conversation has no value and you want to add.

As a last step, click on Save to update the conversation fields when a customer goes through the chat-flow.

You can find the conversation tags in the conversation window.

<figure><img src="/files/Xtbz5to4yu6P3LGT8cqO" alt=""><figcaption><p>Conversation tags</p></figcaption></figure>


# Update Contact Fields

Streamline customer communication with Gallabox's contact field update feature. Opt to replace, add if empty, or append details seamlessly. Click to find out more!

> **Who can use this Card?**
>
> * Gallabox Users having permission to either build and deploy bots or manage bots.
> * Available on all paid plans.

This card can be used to Update the Contact fields that you ask from your customers like their name, contact number, email, their availability, or any instruction they have given.

<figure><img src="/files/wqdkkog06NVa0aPr4YwM" alt=""><figcaption><p>Update the Contact Fields</p></figcaption></figure>

After choosing the field that you would like to update and the value for the field, you have to select the operation in some cases:

-> Choose **Replace**, if you want to update the previous contact details with new details.

-> Choose **Add if Empty**, to add the contact details to a particular contact.

-> Choose **Append**, if you want to add more to the details.

<figure><img src="/files/WP0HXZQSNqm0sLmuIEij" alt=""><figcaption></figcaption></figure>

You can see the updated contact fields in the **Contact** section of Gallabox.

<figure><img src="/files/9zvv5iyMbGciIdBx0EhJ" alt=""><figcaption><p>Contacts in Gallabox</p></figcaption></figure>

To change the Marketing Opt-ins, follow the below GIF:

<figure><img src="/files/cbaWrACpcGOkh0O3aFdV" alt=""><figcaption></figcaption></figure>

{% hint style="info" %}
To know more about how to create and update the Fields in Gallabox [click here](/basic-modules/contact-fields#create-a-contact-field).
{% endhint %}


# Update Company Fields

Easily update your customers' Company Name on our website. Add, replace, or remove Company Tags, Name, and more with just a few clicks. Click here to learn how to manage Fields in Gallabox.

> **Who can use this Card?**
>
> * Gallabox Users having permission to either build and deploy bots or manage bots.
> * Available on all paid plans.

This card can be used to Update Company Name of your customers.

You can **update** the *Company Tags*, *name*, *website*, and switch the company name. Likewise, you can **remove** the *Company Tags*, and *Name*.

<figure><img src="/files/Pm66uROUCrpsCknThout" alt=""><figcaption><p>Update the Company Fields</p></figcaption></figure>

Once you select the Field you want to update, you will have to add the value and the operation.

<figure><img src="/files/7FgvGMDUQkooecTtEAq6" alt=""><figcaption><p>Company Fields</p></figcaption></figure>

After choosing the field that you would like to update and the value for the field, you have to select the operation:

-> Choose **Replace**, if you want to replace the previous value of Company details with new ones.

-> Choose **Add if Empty**, to add the company details.

{% hint style="info" %}
To know more about how to create and update the Fields in Gallabox [click here](/basic-modules/contact-fields#create-a-company-field).
{% endhint %}


# Push to Sequence

Automate engagement with Push to Sequence: Categorize and organize contacts into sequences effortlessly. Streamline contact management for efficient follow-up actions.

> **Who can use this Card?**
>
> * Gallabox Users having permission to either build and deploy bots or manage bots.
> * Available on Scale and Pro Plans.

### Overview <a href="#stay-tuned-we-are-coming-up-with-the-feature" id="stay-tuned-we-are-coming-up-with-the-feature"></a>

Push to Sequence initiates a sequence of actions based on user responses or behaviors, ensuring personalized engagement.

<figure><img src="/files/vGxperep0TwXtEK4X8PL" alt=""><figcaption></figcaption></figure>

### Usage

To use this action, select the Channel (WhatsApp Number connected with Gallabox) and the published sequence name from the dropdown. Confirm the action to execute the push operation.

<figure><img src="/files/Y23GOIKru4VEDjaG9JWB" alt=""><figcaption></figcaption></figure>

{% hint style="info" %}
You can either use this card as the first card in the bot flow or the last card in the bot flow.
{% endhint %}

### **Benefits:**

1. **Automation:** Automates the process of categorizing and organizing contacts into sequences, saving time and effort.
2. **Efficiency:** Streamlines contact management tasks, ensuring contacts are properly sorted for follow-up actions.


# Add Note & Mention

Improve communication by directly addressing relevant users in discussions with our Mention feature. Tag or notify specific individuals within a conversation to ensure prompt involvement of users.

> **Who can use this Card?**
>
> * Gallabox Users having permission to either build and deploy bots or manage bots.
> * Available on Scale and Pro Plans.

### Overview

The Mention feature in our messaging platform allows users to tag or notify specific individuals within a conversation. This feature enhances communication by directly addressing and involving relevant users in discussions.

<figure><img src="/files/foRqrc2ql3Sdbc2wbgUe" alt=""><figcaption></figcaption></figure>

{% hint style="info" %}
**Note:**

When using this Node/Card, keep in mind the following:

1. The maximum length of a Note is 4096 characters.
2. Mentions are optional and should be used judiciously to avoid unnecessary notifications for users.
   {% endhint %}

### Usage

To use this, write the note in the space provided. You can choose the Gallabox users from the dropdown to mention them.

<figure><img src="/files/AJGQNj0oF9qjfSwUDZWz" alt=""><figcaption></figcaption></figure>

In the above example, the note will be mentioned on the chat and the concerned person will be mentioned in the chat. This will ensure, the relevant team members are promptly informed and involved in the discussion.

This is how it will be visible in the conversation:

<figure><img src="/files/kAI3msTuiaIj9htBH9IK" alt=""><figcaption></figcaption></figure>


# Conversion Events

### Overview

This card introduces dedicated **Lead** and **Purchase** event nodes inside Gallabox’s CTWA-based bot builder. Until now, tracking key actions like lead generation or completed purchases required workarounds using tags — now, it’s as simple as dragging and dropping an event node into your flow.

With this nodes, you can trigger lead or purchase events directly from a bot conversation, customize key properties like currency and order value, simplifying how you track and analyze conversions — all without leaving the bot builder. Whether you're capturing a new inquiry or logging a completed transaction, these events make automation easier and smarter.

Perfect for sales and marketing teams looking to drive better outcomes with less manual effort.

### STAY TUNED!!!


# Bot Connectors

Connect Your Business Everywhere: Gallabox integrates with popular apps like HubSpot, Shopify & more!

You can connect through the below list of Connectors:

**API, Google Sheets, Razorpay, ZOHO CRM IN, Shopify, HubSpot, ZOHO Bigin In, Lead Squared, WooCommerce**

<table data-view="cards"><thead><tr><th align="center"></th><th data-hidden data-card-target data-type="content-ref"></th><th data-hidden data-card-cover data-type="files"></th></tr></thead><tbody><tr><td align="center"><strong>Google Sheet</strong></td><td><a href="/pages/Q1Est6AHn79A1k84jHih">/pages/Q1Est6AHn79A1k84jHih</a></td><td><a href="/files/BIas5QKcAP5peCTT3kKs">/files/BIas5QKcAP5peCTT3kKs</a></td></tr><tr><td align="center"><strong>API Call</strong></td><td><a href="/pages/skZcxwbbBkvKM2cAIz1J">/pages/skZcxwbbBkvKM2cAIz1J</a></td><td><a href="/files/mcxZlsN51DAF8m8QEKvd">/files/mcxZlsN51DAF8m8QEKvd</a></td></tr><tr><td align="center"><strong>Razorpay</strong></td><td><a href="/pages/HG9r562CYz8DHtX0IZfd">/pages/HG9r562CYz8DHtX0IZfd</a></td><td><a href="/files/Ognjra5mBkeKHJP7XL9D">/files/Ognjra5mBkeKHJP7XL9D</a></td></tr><tr><td align="center"><strong>Zoho CRM</strong></td><td><a href="/pages/IDQLKY8D7V5FuPZKtTHM">/pages/IDQLKY8D7V5FuPZKtTHM</a></td><td><a href="/files/JvDLMOnose7XNqMtTveT">/files/JvDLMOnose7XNqMtTveT</a></td></tr><tr><td align="center"><strong>Shopify</strong></td><td><a href="/pages/uVQS2Db23p1XDmrtTtkg">/pages/uVQS2Db23p1XDmrtTtkg</a></td><td><a href="/files/uTWNLvMpIZq7RwDoNwUF">/files/uTWNLvMpIZq7RwDoNwUF</a></td></tr><tr><td align="center"><strong>HubSpot</strong></td><td><a href="/pages/6dsXOAN3h55YVSdhmQhs">/pages/6dsXOAN3h55YVSdhmQhs</a></td><td><a href="/files/DU6hvQyIuItB6wAAtiVw">/files/DU6hvQyIuItB6wAAtiVw</a></td></tr><tr><td align="center"><strong>Zoho Bigin</strong></td><td><a href="/pages/0DniSsjnHtjZt6hPqp90">/pages/0DniSsjnHtjZt6hPqp90</a></td><td><a href="/files/aMf0to3vbmcyVbqXSQq0">/files/aMf0to3vbmcyVbqXSQq0</a></td></tr><tr><td align="center"><strong>LeadSquared</strong></td><td><a href="/pages/xk56EnyhGbtXAbhyt4iQ">/pages/xk56EnyhGbtXAbhyt4iQ</a></td><td><a href="/files/oSmmiDBF8zH038emRTx1">/files/oSmmiDBF8zH038emRTx1</a></td></tr><tr><td align="center"><strong>WooCommerce</strong></td><td><a href="/pages/kOG44MaHbiykDeGUqBAe">/pages/kOG44MaHbiykDeGUqBAe</a></td><td><a href="/files/5Vedj815DjQOklhhB6lk">/files/5Vedj815DjQOklhhB6lk</a></td></tr><tr><td align="center"><strong>Open AI</strong></td><td><a href="/pages/skZcxwbbBkvKM2cAIz1J">/pages/skZcxwbbBkvKM2cAIz1J</a></td><td><a href="/files/WGQxqGW2LFNwIkYSnyp5">/files/WGQxqGW2LFNwIkYSnyp5</a></td></tr><tr><td align="center"><strong>Zoom</strong></td><td><a href="/pages/A94Gn41iaipkAmflQzM4">/pages/A94Gn41iaipkAmflQzM4</a></td><td><a href="/files/ruLNShMC3M8LeNkVjmXd">/files/ruLNShMC3M8LeNkVjmXd</a></td></tr><tr><td align="center"><strong>Sangam CRM</strong></td><td><a href="/pages/JVQlRqIjvIx6jv2HWXhY">/pages/JVQlRqIjvIx6jv2HWXhY</a></td><td><a href="/files/6MHygZLPrUZzEBTlf1RU">/files/6MHygZLPrUZzEBTlf1RU</a></td></tr></tbody></table>


# Connect your system with the WhatsApp chat bot using API

Learn how to integrate external APIs with ease using the API Call feature. Configure HTTP methods, URLs, headers, authentication, and more with detailed instructions.

> **Who can use this Card?**
>
> * Gallabox Users having permission to either build and deploy bots or manage bots.
> * Available on Scale and Pro Plans.

## **Overview**

The API Call feature facilitates the integration of external APIs into the system by allowing users to make HTTP requests to specified URLs.

<figure><img src="/files/Lc53noI1Ave3yFo2hvdi" alt=""><figcaption></figcaption></figure>

## **What is API?**

API stands for Application Programming Interface. It is a set of rules and protocols that allows different software applications to communicate with each other. API acts as a bridge between different software programs, enabling them to exchange data and functionalities easily.

## API methods in Gallabox

API methods are requests dictating actions like retrieving, submitting, updating, or removing data between applications. Below are the API methods you can use in Gallabox bot:

<table data-view="cards" data-full-width="false"><thead><tr><th></th><th></th><th data-hidden></th></tr></thead><tbody><tr><td><strong><code>GET</code></strong></td><td>Use this method to retrieve information or data from a specified resource.</td><td></td></tr><tr><td><strong><code>POST</code></strong></td><td>Use this method to submit data to a specified resource.</td><td></td></tr><tr><td><strong><code>PATCH</code></strong></td><td>Use this method to partially update a specified resource.</td><td></td></tr><tr><td><strong><code>PUT</code></strong></td><td>Use this method to update a specified resource with new data.</td><td></td></tr><tr><td><strong><code>DELETE</code></strong></td><td>Use this method to delete a specified resource.</td><td></td></tr></tbody></table>

## **Key Components of API Call Connector**

The API Call Connector in Gallabox has several components that allow for efficient interaction with external APIs. Below are the key components and their descriptions:

<table><thead><tr><th width="208">Field Name</th><th>Description</th></tr></thead><tbody><tr><td><strong>HTTP Method</strong></td><td>Choose the HTTP method to be used for the API call, such as <code>GET</code>, <code>POST</code>, <code>PUT</code>, <code>PATCH</code> or <code>DELETE</code>.</td></tr><tr><td><strong>URL</strong></td><td>The endpoint URL to which the API call will be made.</td></tr><tr><td><strong>Headers</strong></td><td>Additional information included in the request headers, such as content type, authorization, or custom headers.</td></tr><tr><td><strong>Authentication</strong></td><td>Select the application from Hubspot, Zoho CRM, Zoho Bigin, Razorpay, and Zoom.</td></tr><tr><td><strong>Select Connection</strong></td><td>Allows users to choose from pre-configured connections or set up new connections to external systems.</td></tr><tr><td><strong>Query Parameters</strong></td><td>Optional parameters included in the API call URL to customize the request.</td></tr><tr><td><strong>Body Content Type</strong></td><td>Specifies the format of the request body content, such as JSON, XML, or form-URL encoded.</td></tr><tr><td><strong>Body</strong></td><td>The payload or data to be sent in the request body, if applicable.</td></tr><tr><td><strong>Test Values</strong></td><td>Allows users to input test values for the API call to simulate and validate the request.</td></tr><tr><td><strong>Response from API</strong></td><td>Displays the response received from the API after making the request, including status code, headers, and body content.</td></tr><tr><td><strong>Store Response in Variables</strong></td><td>Provides the option to store specific values from the API response or the entire API response in variables to use in subsequent cards.</td></tr></tbody></table>

<figure><img src="/files/GH67zlI7QO5xA25FsMwc" alt=""><figcaption></figcaption></figure>

## **Usage**

1. **Configure API Call:** Input the necessary details such as HTTP method, URL, headers, authentication, and other parameters.
2. **Test API Call:** Use test values to simulate the API call and verify the response received from the API.
3. **Store Response Data:** Select specific data elements from the API response or the entire API Response to store in variables for use in subsequent cards like [Send Products](/bots/send-card/send-products).

<figure><img src="/files/vXBL15V3OEypGEcLvmYn" alt=""><figcaption></figcaption></figure>

The API Call feature offers users a powerful tool for integrating external APIs seamlessly into the system. By following the guidelines provided, users can configure and execute API calls effectively, retrieve relevant data, and leverage it for various system functionalities.


# Connect WhatsApp and Google Sheets to Collect Responses

Learn how to effortlessly manage customer data with our Google Sheet connector. Integrate your chat-flow with Google Sheets for a smooth process.

> **Who can use this Card?**
>
> * Gallabox Users having permission to either build and deploy bots or manage bots.
> * Available on all Paid Plans.

## Overview

Unlock the potential of our Google Sheet connector to effortlessly store and manage customer data from your chat-flow. This guide will walk you through the seamless process, ensuring a smooth integration between your conversational interface and Google Sheets.

{% hint style="info" %}
Make sure you have the spreadsheet ready with the sheet and columns defined.
{% endhint %}

### Google Sheet Operations

Here's a summary of the operations you can perform with the Google Sheet connector.

<table><thead><tr><th width="218">Operation</th><th>Description</th></tr></thead><tbody><tr><td><strong>Add New Row</strong></td><td>Add a Row to the Google Sheet.</td></tr><tr><td><strong>Update Row</strong></td><td>Update Rows in a Sheet using a Reference Column.</td></tr><tr><td><strong>Fetch the Row Value</strong></td><td>Fetch Row in a Sheet using a reference column.</td></tr><tr><td><strong>Fetch the first 10 matched Row Value</strong></td><td>Fetch Rows in a Sheet using a reference column.</td></tr></tbody></table>

## Connect your Google sheet

1. Click on **Connections** from the left pane and select **Google Sheet** from the list as shown in the Gif below.

<figure><img src="/files/NvOIkLUUBE1uKziMHxCx" alt=""><figcaption></figcaption></figure>

2. Click on any action out of four listed - **Add new Row**, **Update Row**, **Fetch Row Value**, and **Fetch the first 10 Matched Row Values**.

For clarity, we will choose the action - **Add New Row**.

<figure><img src="/files/Mtp13JNSKTJGWnMFtBAZ" alt=""><figcaption></figcaption></figure>

3. Now Connect your Google account by clicking on **Connect Now** to create a New Connection and click on Save.

<figure><img src="/files/aN9zZEjBBePbTuspoIap" alt=""><figcaption></figcaption></figure>

4. Sign in to Google will be prompted and you have to sign in using the email address the google sheet has owner access with.

<figure><img src="/files/ZgdJhHtRRluYxxrPwL1z" alt=""><figcaption></figcaption></figure>

{% hint style="info" %}
The google sheet connector is recommended to be connected at the start of the flow to gather all the details.
{% endhint %}

## Using the Google Sheets Connector

### **Add New Row**

1. After you create a connection and Go to **Select Existing Connection** tab and you will see the connection that you created on top and the connections previously created after that. Click on the connection you created, and it will take you to edit the Action you choose previously - **Add New Row**.

<figure><img src="/files/GNh3HQna82wCX5RSIwDj" alt=""><figcaption></figcaption></figure>

2. To choose the **spreadsheet,** click on upload button to select form your google drive.

<figure><img src="/files/0STT0WFiCRkFn8xfUqQ7" alt=""><figcaption></figcaption></figure>

3. To add the row values, you have to select the Column name (from the sheet you choose in the previous step) from the dropdown and for the value, you have to select the variable that you have defined to store the value from the user.\
   For example: The sheet we selected has 3 columns - Name, Phone, and Email. We are pushing the data for all the three columns.

<figure><img src="/files/L3w4Cy8loHGmL1D2qGIQ" alt=""><figcaption></figcaption></figure>

4. After bot gets triggered and the customer responds to it, that data will be captured in Google Sheet as shown below:

<figure><img src="/files/egV27BmdrIfNM1S2QQ3R" alt=""><figcaption></figcaption></figure>

### **Update Row**

This action is used when you want to update the data already in a particular row.

1. Go to **Google sheet Connector** click on Action - Update Row. Select the connection - Test you created before to edit the Action as shown in the below GIF.

<figure><img src="/files/jH3Jl9zK4KJed0DEsXli" alt=""><figcaption></figcaption></figure>

2. To choose the **spreadsheet,** click on upload button to select form your google drive.

<figure><img src="/files/fOsegd0R603s7KRoDUJE" alt=""><figcaption></figcaption></figure>

3. For the *Row Values*, you have to select the Column name (from the sheet you choose in the previous step) from the dropdown that you want to update and in the value choose the variable that had the previous value.\
   \
   For the *Update Row Values*, you have to select the same Column name(from the sheet you choose in the previous step) from the dropdown that you want to update and in the value choose the new variable that stores the new information you want to update.

For example: We will select the column - Name.

<figure><img src="/files/Petd2aXFd8g6C6Da81oa" alt=""><figcaption></figcaption></figure>

4. After bot gets triggered and the customer responds to it, that data will be updated in Google Sheet as shown below:

<figure><img src="/files/D70FmBwo6KnKjIJErVs2" alt=""><figcaption></figcaption></figure>

### Fetch the Row Value

1. Go to **Google sheet Connector** click on Action - **Fetch the Row Value**. Select the connection - Test you created before to edit the Action as shown in the below GIF.

<figure><img src="/files/XblfioU3670dYpYVWbat" alt=""><figcaption></figcaption></figure>

2. To choose the **spreadsheet,** click on upload button to select form your google drive.

<figure><img src="/files/FvA50dou8dGuljizQYpu" alt=""><figcaption></figcaption></figure>

3. To choose the reference row values, you have to select the Column name (from the sheet you choose in the previous step) from the dropdown and for the value, you have to select the variable that you have defined to store the value from the user.\
   \
   For Get the Row Values, you have to select the Column name and the variable you would like to fetch.

<figure><img src="/files/sJgsgJ0hmT2OVeiGYPuX" alt=""><figcaption></figcaption></figure>

### Fetch the first 10 matched Row Value

1. Go to **Google sheet Connector** click on Action - **Fetch the first 10 matched Row Value**. Select the connection - Test you created before to edit the Action as shown in the below GIF.

<figure><img src="/files/jYljTcIxVMjRLBSP12NI" alt=""><figcaption></figcaption></figure>

2. To choose the **spreadsheet,** click on upload button to select form your google drive.

<figure><img src="/files/b8cmtLpPp6WjLwqeBG23" alt=""><figcaption></figcaption></figure>

3. To choose the reference row values, you have to select the Column name (from the sheet you choose in the previous step) from the dropdown and for the value, you have to select the variable that you have defined to store the value from the user. For Get the Row Values, you have to select the Column name and the variable you would like to fetch. Click on Save.

For example: The first 10 matching rows will be fetched from the selected sheet, which contains names and their corresponding task titles.

<figure><img src="/files/ZJO5EQqSKqq6gJWxV2UT" alt=""><figcaption></figcaption></figure>

{% hint style="info" %}
You will have two **conditions** after every Action to carry forward your chat-flow - one is **On success** and other is **On Fail** Condition.
{% endhint %}

With the Google Sheet connector seamlessly integrated into your chat-flow, managing and updating customer data becomes a breeze. Whether you're adding new rows, updating existing data, or fetching specific values, follow our step-by-step instructions to optimize your workflow and enhance data-driven decision-making.

<br>


---

[Next Page](/llms-full.txt/1)

