> For the complete documentation index, see [llms.txt](https://docs.gallabox.com/llms.txt). Markdown versions of documentation pages are available by appending `.md` to page URLs; this page is available as [Markdown](https://docs.gallabox.com/contacts/marketing-opt-in/marketing-opt-in-on-contact-creation.md).
# Marketing opt-in on contact creation
Contacts can be created in various ways, which include:
1. [Single contact creation in the contact module.](#single-contact-creation-in-the-contact-module)
2. [Single contact creation in the conversations module.](#single-contact-creation-in-the-conversations-module)
3. [Contact creation upon receiving an incoming message.](#contact-creation-on-an-incoming-message)
4. [Bulk contact import.](#creating-contacts-through-an-excel-sheet-in-the-broadcast-module)
5. [Creating contacts through an excel sheet in the broadcast module.](#creating-contacts-through-an-excel-sheet-in-the-broadcast-module)
6. [Contact creation through integration and webhook.](#contact-creation-through-integration-and-webhook)
7. [Contact creation via API.](#contact-creation-via-api)
Let's delve into the specifics of how marketing opt-in is managed during contact creation in each of these scenarios.
### Single contact creation in the contact module
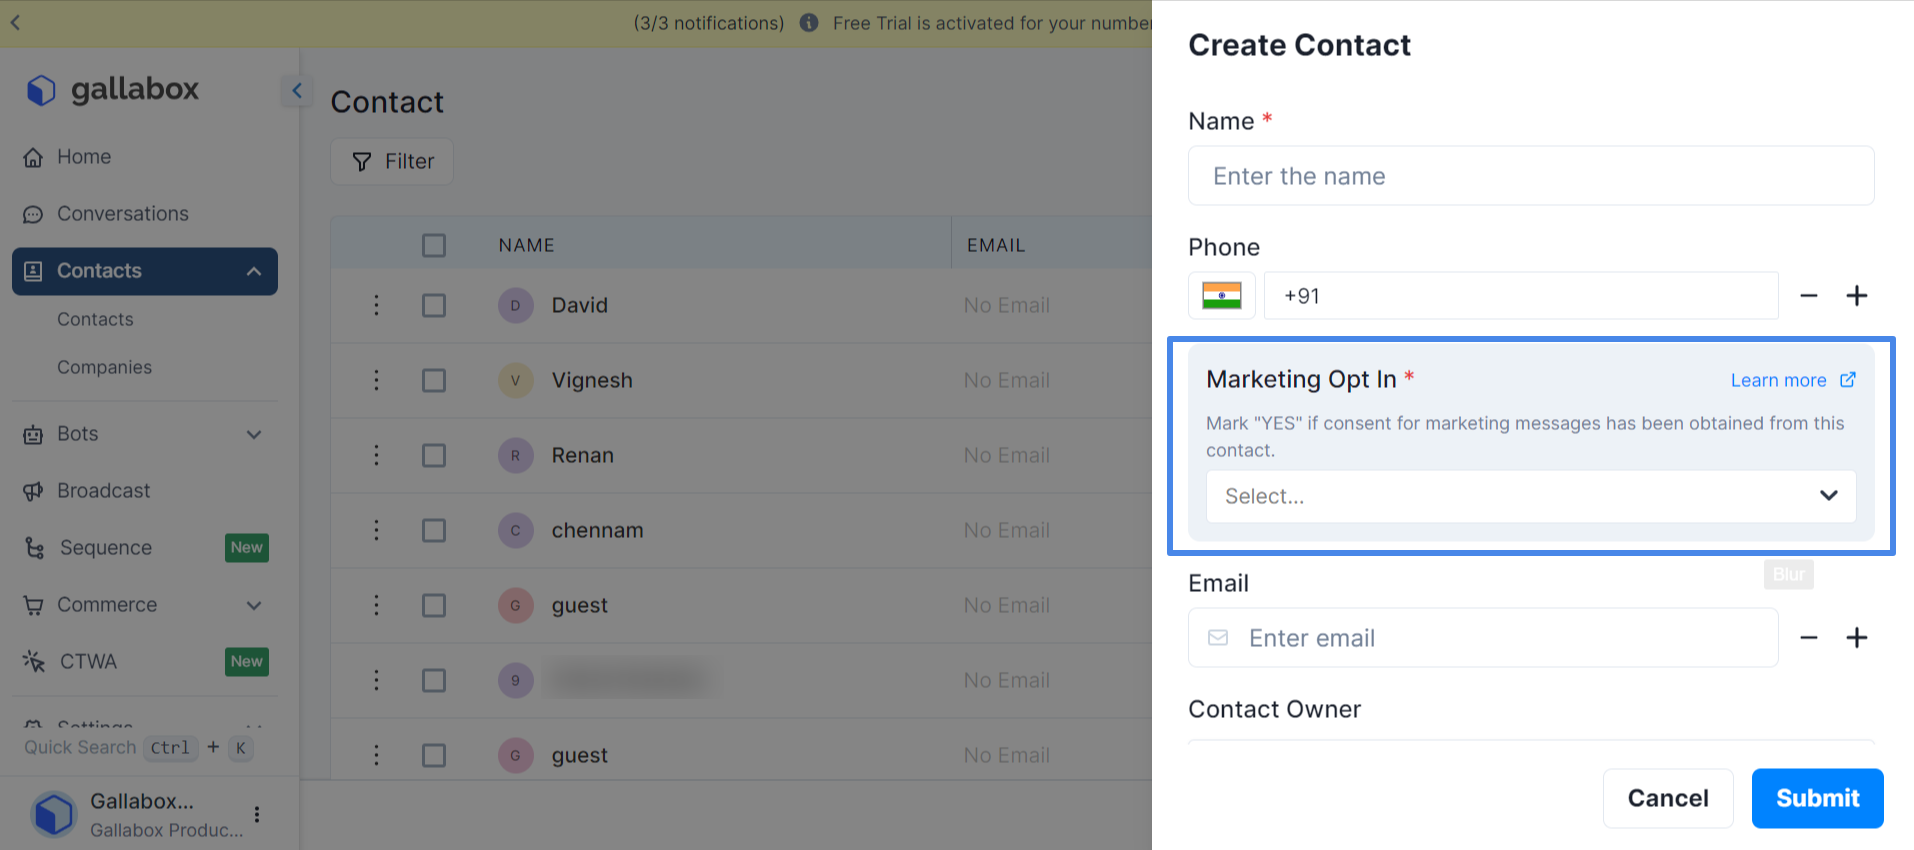
* When a new contact is created via the contacts module, there is a field for marketing opt-in.
* You can provide the consent your customer has given you in this field.
* If the field is set to **YES**, you will be able to send marketing templates to them.
* If the field is set to **NO**, Gallabox will automatically detect it and skip sending marketing messages to this particular customer.
* Gallabox will also provide a warning when you try to send a marketing message to them.
### Single contact creation in the conversations module
* When a new contact is created via the compose box, the marketing opt-in is set to **YES by default.**
* The marketing opt-in option is displayed on the right side of the screen.
* If you haven't received marketing opt-in from that specific customer, you can easily change it to **NO by editing it** with a single click.
### Contact creation upon receiving an incoming message
* When a new incoming message is received, Gallabox automatically creates a contact.
* During this contact creation, the marketing opt-in is automatically set to **YES**.
### **Bulk contact import**
* Bulk import can be done in two ways: Simple import and Advanced import.
**Simple Import:**
* During simple import, you can bulk import four details: Name, email, phone number, and tags.
* When uploading an excel file, you can set the marketing opt-in via a dropdown.
* If you select "**YES**" in the dropdown while importing 1000 contacts, all the contacts' opt-in will be set as "**YES**".
* Similarly, if you set the value as "**NO**", all the contacts' opt-in will be set as "**NO**".
{% hint style="info" %}
In simple import, the dropdown value is only considered for new contacts, and existing contacts' opt-in is not overwritten.
{% endhint %}
**Advanced Import**
* During advanced import, you can individually provide the marketing opt-in consent for each contact by using "**TRUE**" for "**YES**" and "**FALSE**" for "**NO**".
* During the file upload, you can also set the marketing opt-in via a dropdown.
* ***Scenario:** You are importing 1000 contacts, and around 10 of these contacts have said "No" to marketing messages. How can you do this?*
* *In the sheet, fill the value of Marketing opt-in for those 10 contacts as "FALSE" and leave the rest blank.*
* *Now in the drop-down, select value as YES and proceed*
* *Except for those 10 contacts, all other contacts will be created with marketing opt-in set as "YES".*
{% hint style="info" %}
In advanced import, the dropdown value is only considered for new contacts, and existing contacts' opt-in is not overridden. However, the value provided in the sheet will be considered for both new and existing contacts, and overwrite will occur.
{% endhint %}
### Creating contacts through an excel sheet in the broadcast module
* When uploading an excel sheet, you can bulk import two details: Name and phone number.
* During the excel file upload, there is a dropdown to set the marketing opt-in.
* If you choose "YES" in the dropdown, all 1000 contacts' opt-in will be set as "YES".
* Similarly, if you choose "NO", all the contacts' opt-in will be set as "NO".
{% hint style="info" %}
The dropdown value is only considered for new contacts, and existing contacts' opt-in is not overwritten.
{% endhint %}
### Contact creation through integration and webhook
* When a message is sent to a new contact via integration or webhook, Gallabox automatically creates a contact.
* During the contact creation process, the marketing opt-in is automatically set to **YES**.
### Contact creation via API
* When a contact is created via API, you have the option to provide the marketing opt-in values as **YES** or **NO**.
* If you do not pass a value, Gallabox sets the marketing opt-in as **YES** by default.