Send WhatsApp Message
- From the top navigation bar, hover on Automation and select workflow. To start creating the Workflow, click on Create Workflow and click on either From Scratch or From template. We will select From Scratch to guide you through.
Workflow in HubSpot
- You have to choose the trigger and how you want to start the workflow. For your understanding, we will choose the trigger - Contact-based and with a Blank Workflow. You can explore and choose the trigger and the way you want to start the workflow. Click on Next.
Choosing the trigger
- Click on Set up the trigger to decide how the contact will enter the workflow we are creating. When you click on the button - Set up Triggers, a left pop-up will come for the Enrollment triggers. To know in depth about how to set up trigger, click here.
Trigger in the Workflow
- Click on + to choose the action available. Under the listed Actions, scroll to the bottom to WhatsApp Business Messaging and select from the list**.** We will select Gallabox Send WhatsApp Messager (Advanced) as an example.
You have the option to select either
- Gallabox Send Whatsapp Message(Advanced): Add dynamic content such as images, videos, and documents.
- Gallabox Send Whatsapp Message(Footer Variables): Add footer variables to messages, which can be particularly useful for compliance or marketing purposes, such as adding an unsubscribe link or company contact information.
- Gallabox Send Whatsapp Message(Simple): Send text messages quickly and easily without setting variables. It’s ideal for quick updates or messages to customers.
-
After you select, you will have to paste certain values in order to successfully create the action item. For every template, you will have to add the following details:
I. Gallabox Account id
II. Gallabox API key & secret
III. WhatsApp number
IV. Name (Contact Name)
V. Email (Contact Email)
VI. Select WhatsApp template
VII. Variable, button, and payload values, if required
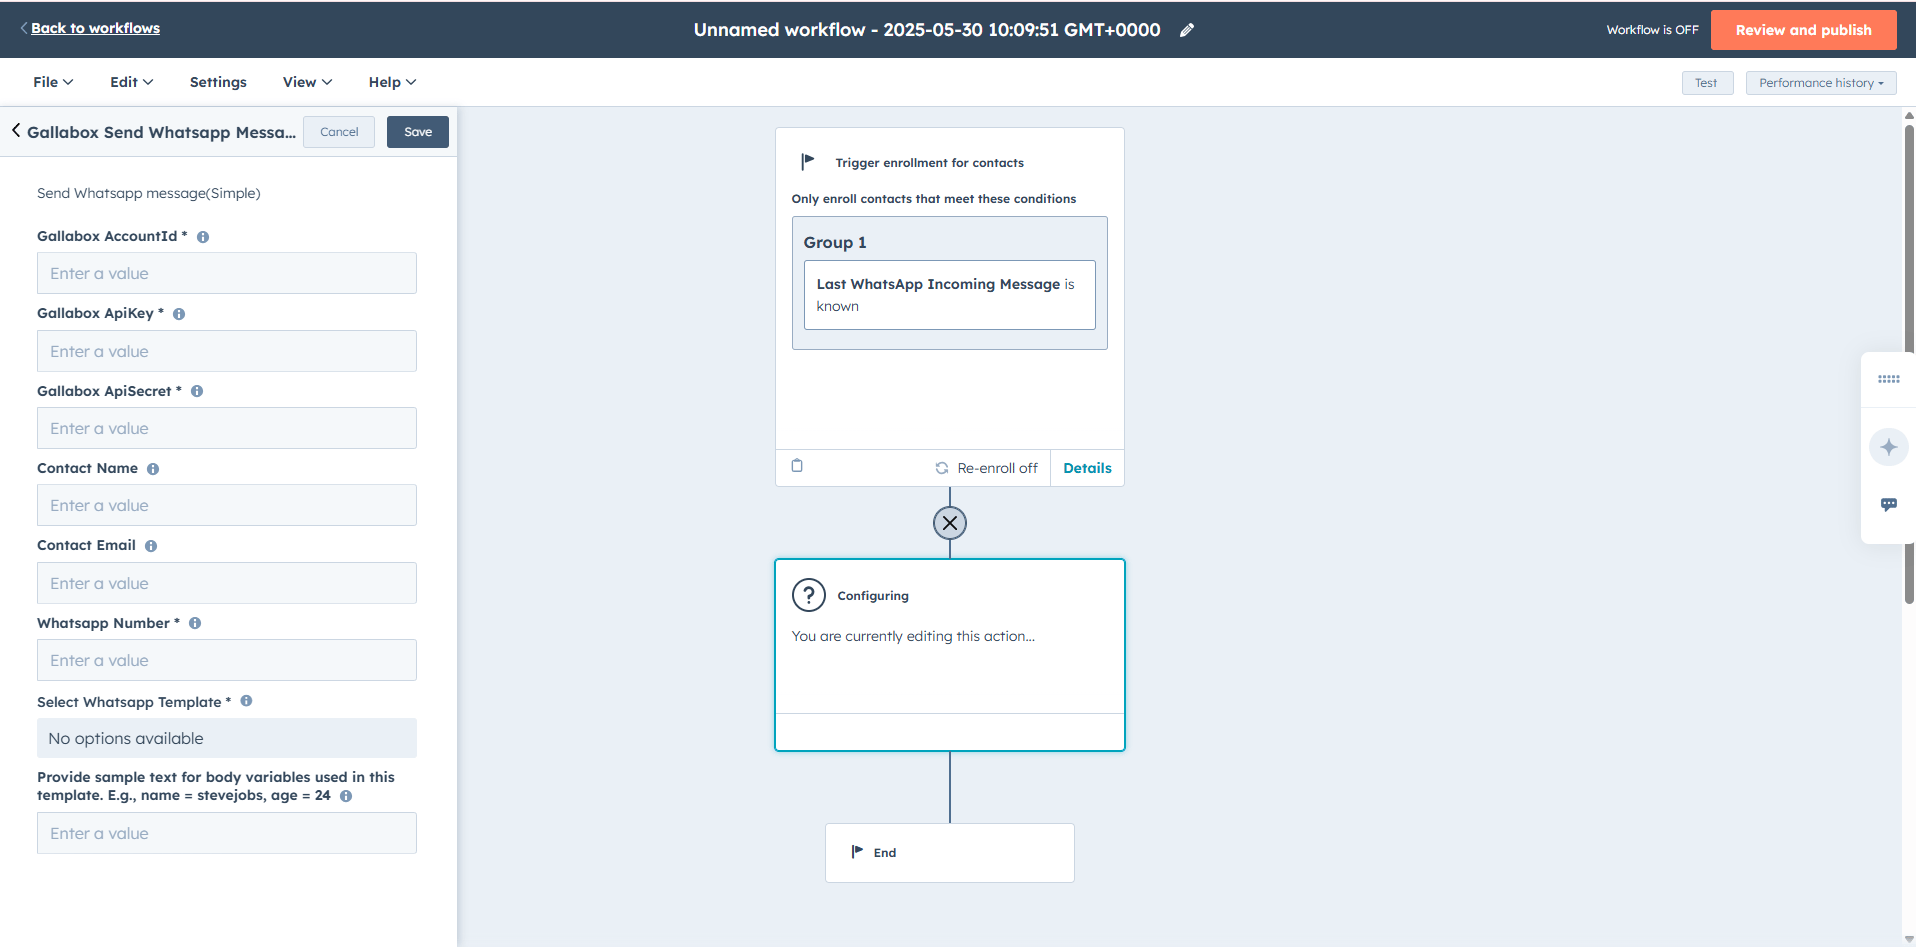
- Click on your Gallabox Profile and select Account Details. Copy the ID that is being displayed at the top. Paste the Account Id under Gallabox Account Id in HubSpot.
- Click on Settings to Select the API keys and copy paste the API Key and API Secret.
Detailed read if you haven’t created any API Keys.
- Input the name, email, and the number you want to send the message to. For WhatsApp Number, Click on Contact Token. For type choose Contact from the list and for Token select WhatsApp Phone Number.
- All the verified templates in the Gallabox Account will be listed here. Select the desired WhatsApp template from the list. For example we have taken the WhatsApp Template -
static_url_with_tracking.
- If the template you are using supports some variables, buttons, and payload, You can provide those details here like shown in the picture below.
The best practise is to view the selected template in another browser to verify the variables.
- If your template has any button variables, mention them as shown in the picture below. We have added the value for CTA button.
To provide a sample text for the variable:
- In the body:
name = john,age= 24- For button URL:
1 = www.gallabox.com- Payloads for buttons =
<button name> = payload. For example, if buttons are named as Need Assistance and User Id, thenNeed Assistance = payload 1andUser Id = payload 2
- If your template has any media header, paste the link in the field as shown.
- Once you have pasted all the information, click on Save button as shown in the picture to save the Action.
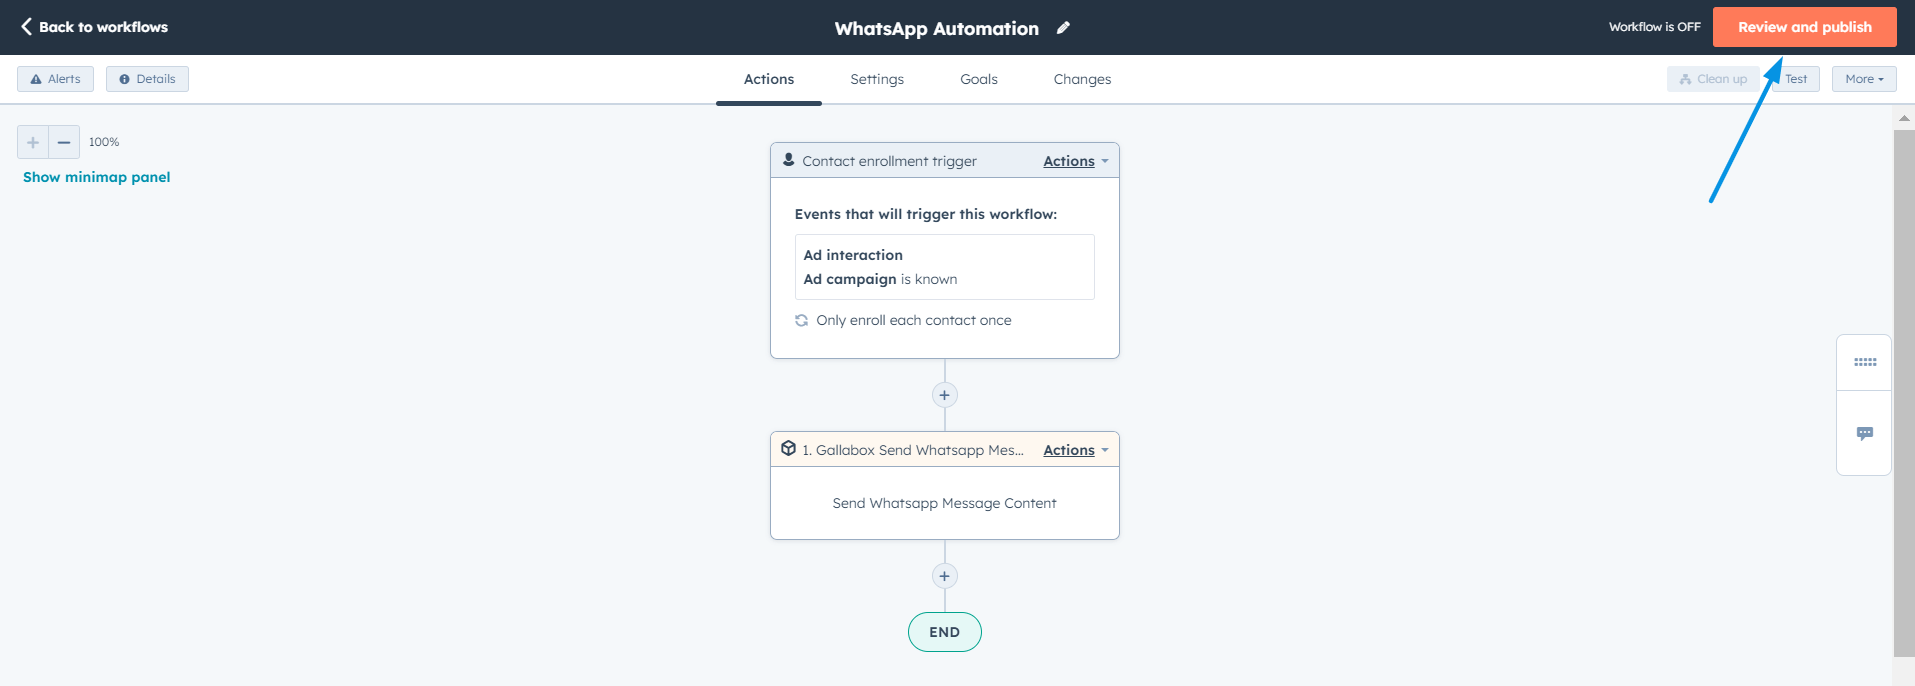
- Once you save the action, procced to click on Review and Publish button as shown in the picture below.